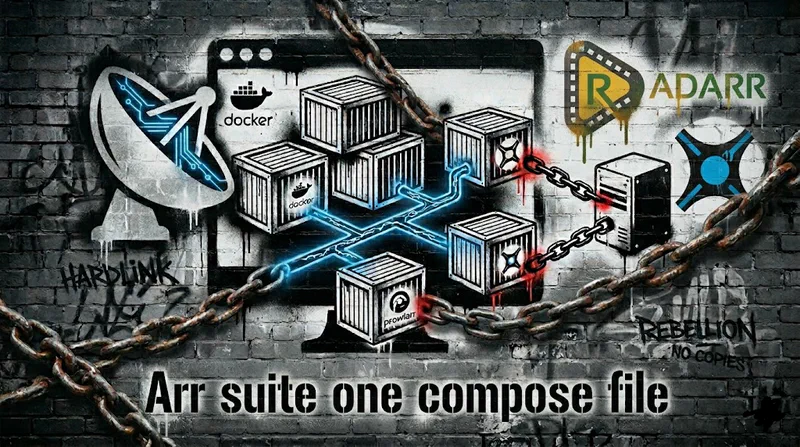
I initially built my *arr apps in separate LXC containers, and the result was a mess. The volume paths were hard to manage and never quite lined up right, and Radarr and Sonarr kept failing to import movies and shows because of permission issues. Every “Import failed, path does not exist” error sent me back to the settings page. So I tore the whole thing down and rebuilt it as one Docker Compose file, with a shared bridge network. That was the day automation finally worked. This post is the arr stack docker compose guide I wish I’d had.
If you’ve been searching for a walkthrough that covers the whole suite at once instead of four separate install posts, this is it. We’ll stand up Prowlarr, Radarr, Sonarr, Bazarr, and SABnzbd in a single Compose file on a Debian 13 VM in Proxmox, and we’ll set up Prowlarr as the central indexer hub so you only have to configure your indexers once.
This is a Usenet guide, not a torrent guide. I don’t seed, so there’s no ratio to protect and no need to keep a second copy of every file hanging around. My downloads go to a dedicated NVMe drive where SABnzbd does its repair and unpack work, and the finished media is then written over to my mergerfs NAS pool. The download drive and the media pool are deliberately two different filesystems, and as you’ll see, that’s completely fine for a Usenet setup. If you run torrents and care about seeding from the same files you import, this is not the best guide for you.
I run this setup on Proxmox 9.3.2 inside a Debian 13 VM with Docker 29.6.0, using the LinuxServer.io images for Prowlarr 2.4.0, Radarr 6.2.1, Sonarr 4.0.17, and Bazarr 1.5.6, SABnzbd 5.0.4 image. Every command and path below is copied from this working stack.
Why One Compose File Beats Four Install Guides
Here’s the biggest lesson from my initial setup: the *arr apps are a system, not a collection of independent programs. Radarr needs to reach SABnzbd. Prowlarr needs to push indexers into both Radarr and Sonarr. Bazarr needs to see the same media folders Radarr and Sonarr write to. When you install each one separately, you make a fresh networking and permissions decision every time, and those decisions drift out of sync.
A single Docker Compose file fixes this at the root. One file defines:
- One shared user-defined bridge network, so every app can reach every other app by container name.
- One
PUID/PGIDpair, so every container reads and writes files as the same user. - One lifecycle:
docker compose up -dto start the whole arr suite,docker compose downto stop it, anddocker compose pullto update.
Compose centralizes networking, volumes, UIDs, and updates in a single source of truth.
Decision First: VM, Bare Metal, or LXC
Before any commands, make the architecture choice, because it changes everything downstream. This guide is written around Proxmox, but nothing here is Proxmox-specific. The stack runs equally well on a dedicated bare-metal server. What you want, either way, is a normal Linux environment for Docker.
Use a VM or bare metal (recommended)
Create a Debian or Ubuntu VM, install Docker inside it, and run the whole stack there. A bare-metal Debian or Ubuntu box with Docker installed directly works exactly the same way, so if you have a spare machine and don’t need Proxmox, point it at that instead. Either path is what I run and what I recommend for almost everyone. Both give Docker a clean, normal Linux environment, so PUID/PGID behave exactly the way every LinuxServer.io guide assumes. No cgroup edits, no device passthrough wrestling, no surprise nobody:nogroup ownership.
Choose this if you want the least UID/GID and networking pain. On Proxmox the cost is a little more RAM overhead than an LXC; bare metal has none of that overhead at all.
Use a privileged LXC (advanced, not recommended)
An LXC uses fewer resources, but to run Docker inside one on Proxmox it usually needs to be privileged, and you have to edit /etc/pve/lxc/<id>.conf to allow the devices and mounts Docker expects. Here’s the trap that bites almost everyone: an unprivileged LXC with host NFS/SMB storage often shows your media as owned by nobody, which makes imports fail, and you need to understand how to map users and groups in the LXC config. I have guides on this, but it’s outside the scope of this post.
Choose this only if you’re resource-constrained and comfortable debugging Proxmox LXC permissions quirks. A full VM, or a bare-metal box with Docker, is simpler and more reliable for the *arr suite, which is why I don’t recommend the LXC route for this stack. And because I’m weird, I only run unprivileged LXCs and never privileged ones. If something needs that level of permission, it gets a VM, not an LXC.
The rest of this guide assumes the VM (or bare-metal) path. I’ll flag the LXC-specific steps where they differ.
Step 1: Plan the Storage Layout
This is the step that, done wrong, causes import failures down the line. So let me be clear about what this setup is doing, because it’s the opposite of the torrent-focused guides you’ve probably read.
My download drive and my media library are two separate filesystems on purpose. Downloads land on a fast NVMe drive, where SABnzbd does the heavy, IO-intensive work of par2 repair and rar extraction. The finished files are then imported onto a mergerfs pool mounted at /media/Storage, which is where the actual library lives. When Radarr or Sonarr import a file, it gets copied from the NVMe onto the pool.
That copy is not a bug, and it’s not something to engineer away. For Usenet there’s nothing to seed, so there’s no reason to keep the downloaded file linked to the library file. The bytes have to physically move from the NVMe onto the pool to end up in the library no matter what, so a one-time copy on import is exactly the behavior you want. You get NVMe speed where it actually matters, during repair and unpack, and your bulk storage stays on the pool. The only cost is a brief moment of the file existing in two places during the copy, which the app cleans up afterward.
This is also why you will not see a single /data mount or any hardlink settings in this guide. Those exist to keep a seeding torrent and its imported copy as one set of bytes on one filesystem. With Usenet you don’t need that, so the layout is simpler.
On the VM, create the download tree on the NVMe drive. Set DOWNLOADS_PATH to wherever your NVMe is mounted:
sudo mkdir -p /downloads/{incomplete,complete/{movies,tv}}
Create the media library on the mergerfs pool:
sudo mkdir -p /media/Storage/{Movies,Shows,Hallmark}
I keep a separate Hallmark library because Radarr handles it as its own root folder, which keeps those movies out of my main collection. You can drop that folder if you don’t need a second movie root.
Finally, create a tree for container configuration. Keep it off $HOME to avoid permission and backup headaches:
sudo mkdir -p /docker/{prowlarr,sonarr,radarr,bazarr,sabnzbd}
Set ownership and capture PUID/PGID
Pick a user that will own the media. I use a dedicated user myuser who is a member of the media group. Find its numeric IDs:
id myuser
That prints something like uid=1000(myuser) gid=1001(media). Those two numbers become your PUID and PGID in the .env file, and they don’t have to match each other. Mine are 1000 and 1001. Now hand the download and config folders to that user:
sudo chown -R myuser:media /downloads /docker
sudo chmod -R 770 /downloads /docker
Don’t let that chmod string scare you. It gives the owner and the media group full read and write, and traverse on directories, while locking everyone else out completely. That lines up with the UMASK=0007 in your .env, which tells the containers to create new files the same way: owner and group only, nothing for anyone else.
The mergerfs pool is the one place to slow down. Because the pool sits on top of your NAS disks, its ownership is governed at the storage layer, not by a simple chown on the mount. The thing that actually matters is that the PUID/PGID your containers run as can write to /media/Storage. Confirm that before you go further, because a pool the apps can’t write to is the most common cause of silent import failures in this kind of split setup.
PUID/PGID the containers run as. Write the UID and GID down now, you’ll paste them into the .env file in a minute.Checkpoint: log in as myuser and run touch /downloads/complete/movies/test and touch /media/Storage/Movies/test. No permission error on either means you’re good. Delete the test files afterward.

Step 2: Prepare the VM and Install Docker
Update the OS and install Docker using the official convenience script:
sudo apt update && sudo apt upgrade -y
curl -fsSL https://get.docker.com | sudo sh
sudo usermod -aG docker myuser
Log out and back in as myuser so Docker runs without sudo. Verify:
docker run hello-world
For the LXC path instead: create a privileged Debian/Ubuntu container, bind-mount your storage into it, then install Docker the same way. Be aware of the nobody:nogroup trap mentioned earlier, which is the main reason I steer people toward a VM for this.
Checkpoint: docker info runs cleanly and hello-world prints its success message.
Step 3: Write the Docker Compose File
This is the heart of the arr stack docker compose setup. First, a quick note on two design choices in my file.
I keep every tunable value in a .env file rather than hardcoding it in the Compose file. Ports, paths, and the user IDs all live in one place, which makes the Compose file readable and easy to reuse. I also run every service on an external network called media_network, which means the network is created once, outside of Compose, and the stack attaches to it. That keeps the network stable even when I tear the stack down and bring it back up.
Create a project directory and the .env file:
sudo mkdir -p /docker && cd /docker
cat > .env <<EOF
# User and Group ID (Prevents permission issues)
# Main user ID
PUID=1000
# Main group ID:
PGID=1001
# File permission mask
UMASK=0007

# Timezone (Ensures correct scheduling and logs)
TZ=America/Denver

# Define Ports (Ports for each container are defined here)
RADARR_PORT=7878
SONARR_PORT=8989
SABNZBD_PORT=8080
PROWLARR_PORT=9696
BAZARR_PORT=6767

# Data Directories (Keeps storage paths centralized)
CONFIG_PATH=/docker
DOWNLOADS_PATH=/downloads
MEDIA_PATH=/media/Storage
HALLMARK_PATH=/media/Storage/Hallmark
EOF
Replace the PUID and PGID with the values you captured from id myuser, set TZ to your timezone, and point the paths at your real download drive and media pool.
Now create the external network, since the Compose file expects it to already exist:
docker network create media_network
Then create docker-compose.yml:
services:
  #################################
  # PROWLARR
  #################################
  prowlarr:
    image: lscr.io/linuxserver/prowlarr:latest
    container_name: prowlarr
    env_file: .env
    ports:
      - ${PROWLARR_PORT}:9696
    volumes:
      - ${CONFIG_PATH}/prowlarr:/config
    healthcheck:
      test: wget --no-verbose --tries=1 --spider http://localhost:9696/ping || exit 1
      start_period: 30s
      timeout: 3s
      interval: 30s
      retries: 3
    networks:
      - media_network
    restart: unless-stopped

  #################################
  # SONARR
  #################################
  sonarr:
    image: lscr.io/linuxserver/sonarr:latest
    container_name: sonarr
    env_file: .env
    ports:
      - ${SONARR_PORT}:8989
    volumes:
      - ${CONFIG_PATH}/sonarr:/config
      - ${MEDIA_PATH}/Shows:/tv
      - ${DOWNLOADS_PATH}:/downloads
    healthcheck:
      test: wget --no-verbose --tries=1 --spider http://localhost:8989/ping || exit 1
      start_period: 30s
      timeout: 3s
      interval: 30s
      retries: 3
    networks:
      - media_network
    restart: unless-stopped

  #################################
  # RADARR
  #################################
  radarr:
    image: lscr.io/linuxserver/radarr:latest
    container_name: radarr
    env_file: .env
    ports:
      - ${RADARR_PORT}:7878
    volumes:
      - ${CONFIG_PATH}/radarr:/config
      - ${MEDIA_PATH}/Movies:/movies
      - ${HALLMARK_PATH}:/hallmark
      - ${DOWNLOADS_PATH}:/downloads
    healthcheck:
      test: wget --no-verbose --tries=1 --spider http://localhost:7878/ping || exit 1
      start_period: 30s
      timeout: 3s
      interval: 30s
      retries: 3
    networks:
      - media_network
    restart: unless-stopped

  #################################
  # BAZARR
  #################################
  bazarr:
    image: lscr.io/linuxserver/bazarr:latest
    container_name: bazarr
    env_file: .env
    ports:
      - ${BAZARR_PORT}:6767
    volumes:
      - ${CONFIG_PATH}/bazarr:/config
      - ${MEDIA_PATH}/Movies:/movies
      - ${MEDIA_PATH}/Shows:/tv
    healthcheck:
      test: wget --no-verbose --tries=1 --spider http://localhost:6767/ || exit 1
      start_period: 30s
      timeout: 3s
      interval: 30s
      retries: 3
    networks:
      - media_network
    restart: unless-stopped

  #################################
  # SABNZBD
  #################################
  sabnzbd:
    image: lscr.io/linuxserver/sabnzbd:latest
    container_name: sabnzbd
    env_file: .env
    ports:
      - ${SABNZBD_PORT}:8080
    volumes:
      - ${CONFIG_PATH}/sabnzbd:/config
      - ${DOWNLOADS_PATH}:/downloads
    healthcheck:
      test: wget --no-verbose --tries=1 --spider http://localhost:8080/ || exit 1
      start_period: 30s
      timeout: 3s
      interval: 30s
      retries: 3
    networks:
      - media_network
    restart: unless-stopped

#################################
# NETWORK
#################################
networks:
  media_network:
    name: media_network
    external: true
A few things worth pointing out in that file.
Every service joins media_network, the user-defined bridge, so they resolve each other by container name like http://radarr:7878. Each service also gets a healthcheck, so docker ps tells you at a glance whether an app is genuinely up and answering, not merely running.
Notice that Prowlarr mounts only its /config folder. It manages indexers and never touches your media or downloads, so there’s no reason to give it those mounts. Sonarr and Radarr each mount their library folder plus the shared /downloads path, and Radarr gets the extra /hallmark root on top of /movies. Bazarr mounts the two media folders it writes subtitles into and nothing else.
The key detail that keeps imports working is that SABnzbd, Sonarr, and Radarr all see the completed download at the exact same container path, /downloads. Because that path is identical across all three, Sonarr and Radarr can find what SABnzbd finished without any remote path mapping. The media folders differ between containers (/tv, /movies, /hallmark), but those are import destinations, so that’s fine.
Validate before launch:
docker compose config
If that prints your merged config without errors, you’re ready.
Step 4: Bring Up the Stack
From /docker:
docker compose up -d
Check health:
docker ps
All containers should read Up, and after a minute the healthchecks should report healthy. Now reach the web UIs at your VM’s IP:
- Prowlarr:
http://<vm-ip>:9696 - Radarr:
http://<vm-ip>:7878 - Sonarr:
http://<vm-ip>:8989 - Bazarr:
http://<vm-ip>:6767 - SABnzbd:
http://<vm-ip>:8080
Step 5: Configure SABnzbd
SABnzbd is the download client, so it needs your Usenet provider and a folder layout that matches the paths the containers expect.
- Open SABnzbd at
http://<vm-ip>:8080and run the startup wizard. Add your Usenet provider’s server details (host, port, SSL, username, password, and connection count) under Config, Servers. - Under Config, Folders, set the temporary download folder to
/downloads/incompleteand the completed download folder to/downloads/complete. Both of these resolve to your NVMe drive inside the container. - Under Config, Categories, create two categories so Sonarr and Radarr can route their grabs:
tvwith folder/downloads/complete/tvmovieswith folder/downloads/complete/movies
Pointing the incomplete and complete folders at the NVMe is what keeps repair and unpack fast. The completed files sit there only until Radarr or Sonarr import them onto the pool.
Test: send a test NZB to the movies category and confirm the finished files land in /downloads/complete/movies on the host. Because SABnzbd sees /downloads at the identical path the *arr apps see, no remote path mapping is needed later.
Step 6: Wire Prowlarr as the Central Indexer Hub
Here’s the payoff of the shared network. Prowlarr is the Servarr indexer manager, and its job is to hold all your Usenet indexers in one place and sync them into Radarr and Sonarr automatically. If you want the deeper, single-app walkthrough for this piece, see How to Install Prowlarr in Docker. You add an indexer once in Prowlarr, and it appears in both apps.
- In Prowlarr, go to Settings, Indexers, and add your Usenet indexers. These are API-based, so each one needs its API key and host. Test each one.
- Go to Settings, Apps, and add Radarr:
- Prowlarr Server:
http://prowlarr:9696 - Radarr Server:
http://radarr:7878 - API key: from Radarr, Settings, General
- Prowlarr Server:
- Repeat for Sonarr with
http://sonarr:8989. - Save. Prowlarr’s Sync App integration pushes every indexer into Radarr and Sonarr.
Notice the container names in those URLs. That only works because every app shares media_network.
One nice thing about a Usenet-only setup: you can skip the whole FlareSolverr thing that torrent guides walk you through. FlareSolverr exists to solve Cloudflare anti-bot challenges on public torrent trackers. Usenet indexers talk over a clean API, so there’s nothing to solve and one less container to run.
Test: open Radarr, Settings, Indexers, and confirm the Prowlarr indexers appear there without you adding them manually. Run an interactive search for a known movie and verify results come back.
Step 7: Configure Radarr and Sonarr
Now connect Radarr and Sonarr to SABnzbd and set the root folders. If you only need to stand up one of these on its own, the per-app guides go deeper: install Radarr on its own or install Sonarr on its own.
Root folders
Set Root Folders to the media paths the containers see:
- Radarr:
/movies, and add/hallmarkas a second root folder if you keep that library - Sonarr:
/tv
Download client
In Radarr, go to Settings, Download Clients, add SABnzbd:
- Host:
sabnzbd(the container name, not an IP) - Port:
8080 - API key: from SABnzbd, Config, General
- Category:
movies
Repeat in Sonarr with category tv. Because both apps and SABnzbd see /downloads at the same path, leave remote path mappings empty. That’s what eliminates the “path does not exist” import failures.
When Radarr or Sonarr import a finished download, it copies the file from /downloads on the NVMe to its root folder on the pool, then tidies up the download. That copy is expected and correct for Usenet, as covered back in Step 1.
Test: grab a single movie or episode, let it download and import, and confirm a finished file appears under /media/Storage/Movies (or Shows) on the host. A clean import with the file landing on the pool means the whole chain is wired correctly.
Step 8: Configure Bazarr for Subtitles
Bazarr connects to both Radarr and Sonarr, watches their libraries, and fetches subtitles automatically.
- Open Bazarr, go to Settings, Sonarr:
- Address:
sonarr, Port8989, API key from Sonarr
- Address:
- Settings, Radarr:
- Address:
radarr, Port7878, API key from Radarr
- Address:
- Because Bazarr mounts the same
/moviesand/tvfolders, its library paths line up with what Radarr and Sonarr report. No path mapping needed. - Under Settings, Languages, set your subtitle languages. Then under Settings, Providers, add a provider. OpenSubtitles.com is the usual starting point: create a free account on their site, then enter those credentials in the Bazarr provider config. If you want a second source, Podnapisi is a solid no-account-needed backup.
- Trigger a scan. Bazarr should list every title Radarr and Sonarr know about and start pulling subtitles.
Checkpoint: open a movie folder under /media/Storage/Movies and confirm .srt files show up after Bazarr runs.
Troubleshooting the Common Failures
These are the failures I hit, in roughly the order they bit me. The FAQ at the end gives quick one-line answers. This section is the diagnostic walkthrough for when something is actually broken.
“Import failed, path does not exist”
This almost always means the path the download client reports does not match what Radarr or Sonarr can see. With this layout it should not happen, because SABnzbd and both *arr apps all mount the downloads drive at the identical /downloads path. If it does happen, check that you didn’t accidentally rename a volume target in Compose (for example mounting ${DOWNLOADS_PATH}:/data in SABnzbd but leaving the *arr apps on /downloads). Keep the download path identical across all three and delete any remote path mappings.
Radarr or Sonarr can’t write to the pool
If imports fail with permission errors on the media side, the apps can’t write to /media/Storage. Confirm the PUID/PGID in your .env match a user that has write access to the mergerfs pool. This is the split-mount gotcha: downloads on the NVMe might be perfectly writable while the pool is not, because the pool’s permissions are governed at the NAS layer. Fix write access to the pool and imports start landing.
Files show as nobody:nogroup (LXC users)
This is the classic unprivileged-LXC trap. The container cannot map your host user, so it sees media as nobody, and imports fail. Either convert the LXC to privileged, or configure UID/GID mapping and ACLs, which is fiddly and error-prone. This is the single best reason to use a VM.
Containers cannot reach each other
If Prowlarr cannot talk to Radarr by name, confirm both services list media_network under networks in Compose, that you created the external network with docker network create media_network before bringing the stack up, and that you used container names, not localhost or 127.0.0.1, in the app URLs. From inside one container you can test with docker exec -it prowlarr ping radarr.
Permissions sanity check
When in doubt, validate the chain. Run id myuser on the host, confirm it matches the PUID/PGID in .env, and test a write as that user to both the download drive and the pool:
sudo -u myuser touch /downloads/complete/movies/perm-test && echo "downloads OK"
sudo -u myuser touch /media/Storage/Movies/perm-test && echo "pool OK"
Maintenance: Updates and Backups
Updating the stack is two commands from /docker:
docker compose pull
docker compose up -d
For backups, the important data is small. Back up /docker/*, which holds every app’s config and database. The media under /media/Storage is large, so handle that at the storage layer with NAS or pool-level snapshots rather than copying it.
To grow the stack later, add more services to the same Compose file and media_network: Lidarr for music, Readarr for books, or Jellyfin pointed at the same /media/Storage media folders.
Frequently Asked Questions
➤ Why are my downloads and media on different filesystems? Isn't that wrong?
➤ Should I run the *arr suite in a Proxmox VM, on bare metal, or in an LXC?
➤ How do I connect Prowlarr to Radarr and Sonarr?
http://radarr:7878, http://sonarr:8989) plus the API key from that app’s Settings, General page. Prowlarr’s Sync App feature then pushes all indexers into both automatically, so you configure indexers only once.➤ Do I still need Jackett with Prowlarr?
➤ Why does my import fail with a path error?
/downloads, so the paths line up and remote path mapping stays empty. If you renamed that mount target in one container, fix it back to /downloads everywhere.Wrapping Up
The shortcut I learned the hard way: treat the *arr apps as one system from the start. A single Docker Compose file, one shared media_network bridge, a fast NVMe download drive, and a mergerfs media pool, with matching PUID/PGID across every container, turns a fragile pile of containers into automation that genuinely works. SABnzbd does the heavy lifting on fast storage, Prowlarr feeds both apps your Usenet indexers, and Bazarr fills in subtitles without a second thought. That’s the whole arr stack docker compose payoff.
From here, bring up the stack, run a test grab end to end, then layer on a media server like Jellyfin against the same /media/Storage. If you came in from one of our per-app install guides for Radarr, Sonarr, or Prowlarr, this is the stack they were always meant to plug into.