Exposing your homelab to the internet is risky. Port forwarding your home router, poking holes in firewalls, juggling dynamic IPs, dealing with CGNAT. It gets messy fast.
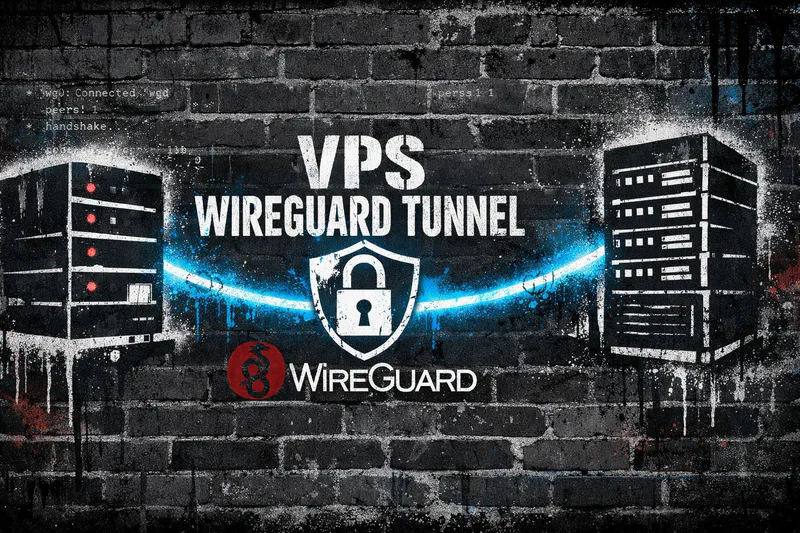
A cleaner approach: install WireGuard on a cheap VPS, create a secure tunnel back to your homelab, and let the VPS act as your public gateway. From there, layer in a Caddy reverse proxy for HTTPS, lock down the VPS with iptables.
I’ve done this a few times now. Getting WireGuard running was the easy part. The part that drove me insane was an MTU mismatch silently killing large packet transfers. The fix was two lines. Finding it was the hard part.
This guide walks through the VPS setup, including the parts that usually break.
Install WireGuard on your VPS. Lock it down with iptables. Test the tunnel with a temporary Linux client. Use Caddy on the VPS to reverse proxy traffic through the tunnel to your homelab services. Tune MTU if large transfers stall or don't work at all. Permanent homelab client setup on OPNsense/pfSense is in Part 3.
Architecture Overview: VPS Gateway + Homelab Client
Here’s what we’re building:
- VPS (public IP)
- WireGuard server
- Caddy reverse proxy (handles TLS and proxies to homelab through the tunnel)
- iptables host firewall
- Homelab (behind NAT or CGNAT)
- WireGuard client (OPNsense/pfSense setup in Part 3)
- Local services (Jellyfin, Immich, dashboards, etc.)
- Optional internal reverse proxy (Nginx, Traefik, Caddy)
Traffic flow:
Internet -> VPS -> External Reverse Proxy -> WireGuard tunnel -> Homelab service
Your home network stays private. No router port forwarding required.
Prepare the VPS (Debian 13)
This guide assumes:
- Debian 13 is installed on your VPS. Ubuntu 24.04 or 22.04 works too with the same commands.
- First login is with root
- No other users have been created
Update the System and Install Required Packages
apt update && apt upgrade -y && apt install sudo iptables -y
Create a New User
adduser <username>
Add the user to the sudo group
usermod -aG sudo <username>
Verify they are in the sudo group:
id <username>
Should return this:
uid=1001(username) gid=1001(username) groups=1001(username),27(sudo),100(users)
You can see that group ID 27 (sudo) was added.
Install WireGuard
apt install wireguard -y && chmod 770 /etc/wireguard/ && chown root:<username> /etc/wireguard/
Switch from root to the normal user with sudo rights
su <username>
Generate WireGuard Keys
On the VPS:
cd /etc/wireguard && sudo wg genkey | sudo tee server_private.key | wg pubkey > server_public.key
server_private.keystays secret. Never paste it into chat, docs, or ticket systems. Not even “just for a second.” Keys leak. They always leak.server_public.keywill be shared with the homelab.
Lock down the private key immediately:
sudo chmod 600 server_private.key
Configure the VPS WireGuard Server
Create the config file:
sudo nano /etc/wireguard/wg0.conf
Example:
[Interface]
Address = 10.10.10.1/24
PrivateKey = <server_private_key>
ListenPort = 51820
That’s it. No PostUp, no PostDown, no iptables spaghetti crammed into a WireGuard config. The firewall is managed separately, which is where it belongs.
10.0.0.0/24, pick something else like 10.13.13.0/24. Overlapping subnets cause traffic to stay local instead of hitting the tunnel, and the resulting behavior looks like the tunnel is broken when it’s actually a routing conflict.Secure the VPS with iptables
Your VPS is on the public internet. Lock it down before you do anything else.
These rules control what traffic the VPS accepts for itself (the INPUT chain). Since Caddy proxies traffic rather than forwarding it, these INPUT rules are all you need for the base setup.
sudo iptables -A INPUT -m conntrack --ctstate ESTABLISHED,RELATED -j ACCEPT
sudo iptables -A INPUT -i lo -j ACCEPT
sudo iptables -A INPUT -p icmp -j ACCEPT
sudo iptables -A INPUT -p tcp --dport 22 -j ACCEPT
sudo iptables -A INPUT -p tcp --dport 80 -j ACCEPT
sudo iptables -A INPUT -p tcp --dport 443 -j ACCEPT
sudo iptables -A INPUT -p udp --dport 51820 -j ACCEPT
sudo iptables -P INPUT DROP
What each of these do:
- Accept return traffic for existing connections
- Accept loopback (local services talking to each other)
- Accept ICMP (ping, path MTU discovery)
- Accept SSH
- Accept HTTP
- Accept HTTPS
- Accept WireGuard
- Drop everything else
Rule order matters here. The conntrack rule goes first because it handles the bulk of traffic in a single check. Everything after that is for new inbound connections only. The policy DROP at the end catches anything you didn’t explicitly allow.
Persist across reboots:
sudo apt install iptables-persistent -y
sudo netfilter-persistent save
Verify your rules are in place:
sudo iptables -L INPUT -n -v --line-numbers
Your rules should look like this:
Chain INPUT (policy DROP 3 packets, 171 bytes)
num   pkts bytes target     prot opt in     out     source               destination
1        7   492 ACCEPT     all  --  *      *       0.0.0.0/0            0.0.0.0/0            ctstate RELATED,ESTABLISHED
2        0     0 ACCEPT     all  --  lo     *       0.0.0.0/0            0.0.0.0/0
3        0     0 ACCEPT     icmp --  *      *       0.0.0.0/0            0.0.0.0/0
4        0     0 ACCEPT     tcp  --  *      *       0.0.0.0/0            0.0.0.0/0            tcp dpt:22
5        0     0 ACCEPT     tcp  --  *      *       0.0.0.0/0            0.0.0.0/0            tcp dpt:80
6        0     0 ACCEPT     tcp  --  *      *       0.0.0.0/0            0.0.0.0/0            tcp dpt:443
7        0     0 ACCEPT     udp  --  *      *       0.0.0.0/0            0.0.0.0/0            udp dpt:51820
You should see your rules numbered in order. If you lock yourself out of SSH, most VPS providers have a web console or rescue mode. Test SSH access in a second terminal before you close your current session.
A Note on Firewall Coexistence
These iptables rules assume a clean firewall. If you’re on a fresh VPS from RackNerd, Hetzner, Linode, Vultr, or DigitalOcean with no custom firewall configured, you’re good.
If you’ve customized your firewall or aren’t sure, check what’s running:
sudo ufw status
sudo nft list ruleset
If UFW is active: Disable it or manage your rules through UFW instead. Running both UFW and raw iptables rules leads to confusion. Pick one.
If nftables is running: On many VPS images, iptables is actually a compatibility layer over nftables. Your commands will still work, but it’s worth knowing what’s underneath. Consider writing your rules in nft syntax instead if you prefer.
Cloud provider firewalls: Check your provider’s security group or firewall panel separately. AWS, Oracle Cloud, and Hetzner Cloud all have external firewalls that block traffic regardless of what you configure on the box itself. You’ll need to allow UDP 51820, TCP 80, TCP 443, and TCP 22 there too. This trips people up all the time. You can have perfect iptables rules and still get nothing because the cloud firewall is dropping it upstream.
Start WireGuard
sudo wg-quick up wg0
sudo systemctl enable wg-quick@wg0
Verify:
sudo wg show
Should look like this:
interface: wg0
  public key: <Server_Public_Key>
  private key: (hidden)
  listening port: 51820
If this shows your interface and listening port, the VPS side is ready. If it shows nothing, go back and check that wg0.conf has valid syntax and your private key file is readable.
Test the Tunnel with a Temporary Client
Before configuring your firewall appliance as the permanent WireGuard client (covered in Part 3), verify the VPS side works with a quick throwaway Linux client. Any machine on your homelab network will do. You just need something that can run WireGuard long enough to confirm the tunnel is alive.
Install WireGuard and generate keys:
sudo apt install wireguard -y
wg genkey | tee client_private.key | wg pubkey > client_public.key
chmod 600 client_private.key
Copy the contents of client_public.key and paste it into the [Peer] section of your VPS wg0.conf.
cat client_public.key
On the VPS, paste the key into wg0.conf
sudo nano /etc/wireguard/wg0.conf
It should look like this:
[Interface]
Address = 10.10.10.1/24
PrivateKey = <Server_Private_Key>
ListenPort = 51820

[Peer]
PublicKey = <Client_Public_Key>
AllowedIPs = 10.10.10.2/32
Then restart WireGuard on the VPS:
sudo wg-quick down wg0
sudo wg-quick up wg0
Create a minimal config on the test client:
sudo nano /etc/wireguard/wg0.conf
It should look like this:
[Interface]
Address = 10.10.10.2/24
PrivateKey = <Client_Private_key>
MTU = 1420

[Peer]
PublicKey = <Server_Public_Key>
Endpoint = <VPS_Public_IP>:51820
AllowedIPs = 10.10.10.0/24
PersistentKeepalive = 25
PersistentKeepalive = 25 is required if your homelab is behind NAT or CGNAT. Without it, the NAT mapping expires, and the tunnel goes silent. If you’re not sure whether you need it, you need it.
Bring the tunnel up:
sudo wg-quick up wg0
Don’t enable it as a service. This is a test, not the permanent setup.
Now verify from both sides. On the test client:
ping 10.10.10.1
On the VPS:
ping 10.10.10.2
Check the handshake:
sudo wg show
If it is working it should look like this:
interface: wg0
  public key: <Client_Public_Key>
  private key: (hidden)
  listening port: 45365

peer: <Server_Public_Key>
  endpoint: <VPS IP>:51820
  allowed ips: 10.10.10.0/24
  latest handshake: 1 minute, 10 seconds ago
  transfer: 1.27 KiB received, 2.08 KiB sent
  persistent keepalive: every 25 seconds
You should see a recent handshake timestamp. If you don’t, jump to the troubleshooting section below.
If pings work in both directions, the VPS side is solid. Tear down the test client when you’re done:
sudo wg-quick down wg0
I will cover a permanent client setup on OPNsense or pfSense in next week’s post, including interface assignment, gateway creation, and LAN routing so all devices on your network can reach the tunnel.

Set Up Caddy on the VPS
Now expose services safely using Caddy as a reverse proxy. Caddy is installed directly on the VPS as a system package. No Docker required. It binds to ports 80 and 443 on the host, handles Let’s Encrypt certificates automatically, and proxies traffic through the WireGuard tunnel to your homelab. No bridge networks, no volume mounts, no container restarts to debug. One less layer between the internet and your services.
Install Caddy
Add the official Caddy repository and install:
sudo apt install -y debian-keyring debian-archive-keyring apt-transport-https curl
curl -1sLf 'https://dl.cloudsmith.io/public/caddy/stable/gpg.key' | \
  sudo gpg --dearmor -o /usr/share/keyrings/caddy-stable-archive-keyring.gpg
curl -1sLf 'https://dl.cloudsmith.io/public/caddy/stable/debian.deb.txt' | \
  sudo tee /etc/apt/sources.list.d/caddy-stable.list
sudo apt update
sudo apt install caddy -y
This installs Caddy as a systemd service. It starts automatically and runs as the caddy user. Verify it’s running:
sudo systemctl status caddy
You should see active (running). If it failed, check the journal:
journalctl -u caddy --no-pager -n 50
Configure the Caddyfile
The default Caddyfile lives at /etc/caddy/Caddyfile. Open it:
sudo nano /etc/caddy/Caddyfile
Replace the contents with your reverse proxy config:
flix.example.com {
        reverse_proxy 10.10.10.2:8096 {
                header_up Host {host}
                header_up X-Real-IP {remote_host}
                header_up X-Forwarded-Proto https

                flush_interval 5s

                transport http {
                        read_buffer 65536
                        write_buffer 65536
                        dial_timeout 30s
                        response_header_timeout 0
                }
        }
}

photos.example.com {
        reverse_proxy 10.10.10.2:2283 {
                header_up Host {host}
                header_up X-Real-IP {remote_host}
        }
}
After editing, reload Caddy to pick up the changes:
sudo systemctl reload caddy
Use reload, not restart. A reload validates the new config first and keeps the old config running if validation fails. A restart kills the process and hopes for the best. Get in the habit of using reload.
This forwards HTTPS traffic from the internet to the VPS, through WireGuard, to your homelab services.
Caddy handles Let’s Encrypt certificates automatically. Make sure each subdomain has a DNS A record pointing to the VPS public IP before you reload. Caddy will try to provision certificates immediately and will fail if DNS isn’t ready. Check journalctl -u caddy if certificates aren’t appearing.
Preserving Client IP
By default, Caddy sets X-Forwarded-For headers. If your homelab service needs the real client IP (Jellyfin’s fail2ban integration, for example), make sure the internal service trusts the VPS tunnel address (10.10.10.1) as a proxy. Without this, every request your services see will appear to come from the tunnel IP. Your access logs become useless and any IP-based rate limiting or banning breaks.

MTU Problems: The Silent Killer
This cost me hours. It will cost you hours too if you don’t read this section before you need it.
Symptoms:
- Small pings work.
- HTTPS loads halfway, then stalls.
- File uploads freeze.
- No obvious errors in logs.
Everything looks fine. Nothing works fine. The issue is usually an MTU mismatch between your VPS provider and home ISP. Packets too large for the tunnel get silently dropped because ICMP “fragmentation needed” messages are blocked somewhere along the path. This is called a PMTU black hole, and it is exactly as fun as it sounds.
WireGuard defaults to 1420. Some VPS networks require lower values.
How to Diagnose MTU Issues
On homelab:
ping -M do -s 1372 10.10.10.1
Start at 1372 and increase by 10 until packets fail. The highest working value plus 28 bytes (IP + ICMP headers) is your effective MTU.
If fragmentation fails above 1380, try:
MTU = 1280
Add it to both configs under [Interface], then restart WireGuard on both ends.
This small change fixes a surprising number of “random” tunnel issues. If you’re seeing intermittent stalls on large transfers, check MTU first. Always MTU first.
An MTU of 1380 is what worked best for me streaming Jellyfin on my RackNerd VPS.
Dual Reverse Proxy Architecture (Advanced)
For larger setups, a two-proxy approach keeps things clean:
- VPS: Caddy public-facing, handles TLS termination
- Homelab: Nginx, Traefik, or Caddy internally, handles service routing
Flow:
Internet
   |
VPS Caddy (TLS termination, public certificates)
   |
WireGuard tunnel
   |
Homelab Reverse Proxy (service routing, internal TLS optional)
   |
Service containers
Advantages:
- SSL termination at the VPS keeps certificate management in one place
- Adding new services means updating the homelab proxy only. The VPS side stays stable.
- Zero exposed home ports
The VPS proxy passes X-Forwarded-For and X-Real-IP headers. Your homelab proxy should trust the tunnel source IP (10.10.10.1) and preserve these headers for accurate logging.
Example: VPS Caddy + Homelab Nginx
On the VPS, edit /etc/caddy/Caddyfile to point everything at the homelab’s internal reverse proxy on a single port:
jellyfin.yourdomain.com {
    reverse_proxy 10.10.10.2:8080
}

nextcloud.yourdomain.com {
    reverse_proxy 10.10.10.2:8080
}

dashboard.yourdomain.com {
    reverse_proxy 10.10.10.2:8080
}
Then reload:
sudo systemctl reload caddy
On the homelab, Nginx listens on port 8080 and routes by hostname:
server {
    listen 8080;
    server_name jellyfin.yourdomain.com;

    set_real_ip_from 10.10.10.1;
    real_ip_header X-Forwarded-For;

    location / {
        proxy_pass http://127.0.0.1:8096;
        proxy_set_header Host $host;
        proxy_set_header X-Real-IP $remote_addr;
        proxy_set_header X-Forwarded-For $proxy_add_x_forwarded_for;
    }
}

server {
    listen 8080;
    server_name nextcloud.yourdomain.com;

    set_real_ip_from 10.10.10.1;
    real_ip_header X-Forwarded-For;

    location / {
        proxy_pass http://127.0.0.1:8443;
        proxy_set_header Host $host;
        proxy_set_header X-Real-IP $remote_addr;
        proxy_set_header X-Forwarded-For $proxy_add_x_forwarded_for;
    }
}
The key lines are set_real_ip_from 10.10.10.1 and real_ip_header X-Forwarded-For. Without these, every request your services see will appear to come from the tunnel IP instead of the real client.
This pattern scales well. You add new services by updating your homelab proxy config. The VPS Caddyfile just needs one more reverse_proxy block pointing at the same homelab port.
Using Private Internet Access WireGuard
If you already use Private Internet Access WireGuard, do not reuse that interface for your VPS tunnel. I cannot stress this enough. Mixing them on the same interface causes conflicting routes that silently break one tunnel or the other, default route overrides that send your VPS traffic through PIA, and DNS conflicts where PIA’s settings clobber your homelab DNS.
Keep them on separate interfaces:
- Use
wg0for the VPS tunnel. - Use
wg1for PIA.
If you need both active simultaneously, you’ll need policy routing with separate routing tables and fwmark rules to keep traffic on the right path. That’s a full topic on its own and easy to get wrong. I’ll cover it in a dedicated post. For now, the important thing is: separate interfaces, separate routing tables, no stacking.
Troubleshooting Checklist
No Handshake
- Is UDP 51820 open on the VPS? Check both the OS firewall (
sudo iptables -L INPUT -n -v) and the cloud provider’s security group. - Correct public key on both sides? One wrong character and the handshake silently fails.
- Correct endpoint IP and port?
- NAT blocking outbound UDP from the homelab?
PersistentKeepalive = 25set on the client?
Check:
sudo wg show
If no “latest handshake” time appears, the two sides aren’t talking at all. This is a network-level issue, not a WireGuard config issue. Focus on firewalls, security groups, and port reachability.
Caddy Returns 502 Bad Gateway
Caddy is running and serving certificates, but the proxied connection to your homelab is failing. This means the tunnel is probably up but the service on the other end isn’t reachable.
- Can the VPS ping the homelab?
ping 10.10.10.2 - Is the homelab service actually listening on the expected port? SSH into your homelab and check with
ss -tlnp | grep <port>. - Firewall on the homelab blocking inbound connections from the tunnel? Check
iptables -L INPUT -n -von the homelab side.
Caddy Not Serving or Certificates Failing
Check status and logs:
sudo systemctl status caddy
journalctl -u caddy --no-pager -n 50
Common causes: DNS A records not pointing at the VPS yet, port 80 or 443 already in use by another process (check with sudo ss -tlnp | grep ':80\|:443'), or a syntax error in the Caddyfile. Validate your config before reloading:
caddy validate --config /etc/caddy/Caddyfile
High Latency or Slow Throughput
- Check MTU first. Seriously. I said this already. I’ll say it again.
- Ensure no overlapping subnets between tunnel and LAN.
- Avoid double NAT when possible.
- Try lowering MTU to 1280 and test again.
- Check VPS provider for bandwidth caps or throttling.
Frequently Asked Questions
➤ How do I forward specific ports from VPS to homelab over WireGuard?
➤ Do I need IP forwarding enabled?
➤ Why is my WireGuard tunnel dropping packets?
ping -M do. If that fixes it, you’ve found your problem.➤ Do I need PersistentKeepalive?
➤ Can I run Caddy on the VPS and Nginx on my homelab?
➤ How do I generate and exchange keys securely?
Final Thoughts
WireGuard port forwarding through a VPS is one of the cleanest ways to expose your homelab to the internet.
The core steps covered in this post:
- Install WireGuard on the VPS.
- Generate keys.
- Configure
wg0.confon the VPS. - Lock down the VPS with iptables.
- Test the tunnel with a temporary Linux client.
- Install Caddy and configure reverse proxy for HTTPS.
- Fix MTU if large traffic stalls.
Next up: Part 3 covers setting up the permanent WireGuard client on OPNsense or pfSense with LAN routing so every device on your network can reach the tunnel.
The hardest part is rarely WireGuard itself. It’s understanding which traffic flows through which iptables chains, and MTU edge cases. Once you understand those pieces, the rest falls into place.
If you want to go further:
- Add fail2ban on the VPS for SSH and service protection.
- Use Cloudflare DNS with proxy mode for DDoS protection.
- Add a second VPS for high availability.
- Implement policy routing with multiple WireGuard tunnels.
Secure tunnels beat router port forwarding every time.
This is Part 2 of a 3-part series on building a VPS-fronted homelab. For the why behind this architecture, and how to route the tunnel into your LAN, see the other parts:

Part 1: Why Your Homelab Needs a VPS Why a VPS edge beats home port forwarding for public-facing services.

Part 3: Route the Tunnel to Your LAN Set up the WireGuard client on OPNsense or pfSense so every device on your network reaches the tunnel.