If you’re running services at home and want to expose them through a VPS reverse proxy, configuring a WireGuard client on OPNsense is one of the cleanest ways to do it.
Here’s the setup: a VPS running Caddy (or nginx, or whatever reverse proxy you prefer) accepts requests from the internet and forwards them through a WireGuard tunnel to services on your LAN. Jellyfin, Home Assistant, Nextcloud, whatever you’re running. Traffic enters through the tunnel and leaves the same way. Your home IP stays hidden. No ports open on your home router.
Most guides make this harder than it needs to be. They throw policy routing, full-tunnel configurations, and asymmetric routing fixes at you before you’ve even gotten a handshake. You don’t need any of that for a reverse proxy setup. The VPS initiates the connection, your LAN service replies, and the reply naturally goes back through the tunnel because that’s where it came from. Routing 101.
The only real work is on OPNsense: get the tunnel up, assign the interface, and write a tight firewall rule that lets the VPS reach your service and nothing else.
The pfSense details might be a little off as I haven’t used pfSense in a few years.
Set up a WireGuard client instance in OPNsense. Assign it as an interface. Add a firewall rule that allows VPS traffic to reach your specific service (like Jellyfin) and nothing else. On the VPS, add a route for your LAN subnet through the tunnel and point Caddy at your service’s LAN IP.
No policy routing. No outbound NAT. No asymmetric routing fixes. This is a reverse proxy setup, not a full tunnel.
pfSense can do the same with its WireGuard package, but OPNsense’s integration is cleaner.
How the Traffic Flows Before touching any config, understand what’s actually happening. If you skip this section and something breaks later, you’ll be guessing. Don’t guess.
- Internet client sends a request to
https://jellyfin.yourdomain.com - DNS resolves to your VPS public IP
- Caddy on the VPS terminates TLS and reverse proxies the request through the WireGuard tunnel to your Jellyfin server’s LAN IP (e.g., 192.168.0.50:8096)
- OPNsense receives the packet on the WireGuard interface
wg0, checks firewall rules, and routes it to your LAN - Jellyfin processes the request and replies to the source IP
10.10.10.1, the VPS tunnel IP - OPNsense sees the destination is in the tunnel subnet
10.10.10.0/24and sends it back outwg0 - VPS receives the reply, Caddy sends the response to the internet client
The key thing: replies go back through the tunnel naturally because the VPS tunnel IP 10.10.10.1 is in the tunnel subnet. OPNsense already knows how to reach it. No special routing needed.
This is why a reverse proxy setup is simpler than routing all your LAN traffic through a VPS. Traffic that enters through the tunnel leaves through the tunnel. No asymmetric routing, no state mismatches, no dropped packets, no Reddit posts asking why nothing works.
Prerequisites Before touching OPNsense:
- VPS running WireGuard server (already configured and tested)
- VPS public IP and WireGuard port, default 51820/UDP
- VPS WireGuard public key
- Tunnel IPs chosen (I use
10.10.10.1for the VPS,10.10.10.2for OPNsense) - Reverse proxy installed on VPS (Caddy, nginx, etc.)
- VPS WireGuard [Peer] block has your OPNsense public key, and its AllowedIPs includes your LAN subnet (e.g., 192.168.0.0/24) so the VPS knows to route LAN-bound traffic through the tunnel
Recommended:
- OPNsense 24.x or newer
- Config backup before changes. System > Configuration > Backups, download the XML. Do it now. Not after you’ve broken something. Now.
On OPNsense 25.x, WireGuard is built in. On 24.x and earlier, it’s a plugin.
If you’re on 24.x:
- Go to System > Firmware > Plugins
- Install
os-wireguard
Then regardless of version:
- Go to VPN > WireGuard > General
- Enable WireGuard
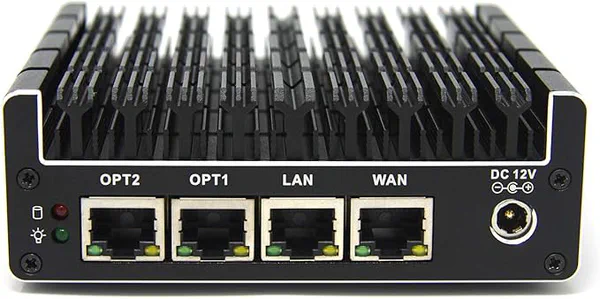
A fanless, six-port Intel-based firewall appliance built for pfSense/OPNsense, with Intel NICs and hardware AES-NI for fast, secure routing. Silent and compact yet expandable (RAM and SSD), it’s a favorite for gigabit-plus WANs, VLAN-heavy homelabs, and always-on IDS/IPS.
Step 2: Create the WireGuard Client Instance
Go to:
VPN > WireGuard > Instances > Add
Configure:
- Enabled: Yes
- Name:
VPS-WG - Generate a new key pair using the
Gear icon - Tunnel Address:
10.10.10.2/24 - MTU:
1420for bare metal,1380if OPNsense is virtualized (QEMU/KVM),1412if your WAN uses PPPoE - Disable Routes: Unchecked
Save.
Now add a Peer:
VPN > WireGuard > Peers > Add
- Enabled: Yes
- Name:
VPS - Public Key: your VPS server’s public key
- Tunnel Address (AllowedIPs):
10.10.10.0/24 - Endpoint Address:
Your VPS public IP - Endpoint Port:
51820 - Instances:
VPS-WG - Persistent Keepalive:
25seconds
After saving the peer, go back to your VPS-WG instance, and under Peers, select the VPS peer you just created. Save and Apply.
Why AllowedIPs is 10.10.10.0/24 and Not 0.0.0.0/0
You’re not routing LAN internet traffic through the VPS. You only need OPNsense to know about the tunnel subnet. Traffic destined for 10.10.10.1 goes through wg0. Everything else goes out WAN as usual.
0.0.0.0/0 is for full-tunnel setups where you want LAN devices to egress through the VPS. That’s a different guide with different problems: policy routing, outbound NAT, asymmetric routing. Don’t go there unless you mean to.
Step 3: Assign the WireGuard Interface
This is where many people stop too early. The tunnel works for OPNsense-to-VPS pings at this point. But without an interface assignment, you can’t write firewall rules for tunnel traffic. That means any traffic the VPS sends toward your LAN gets silently dropped. No log entry. No error. Just silence and confusion.
Go to:
Interfaces > Assignments
You should see wg0 available in the dropdown. Add it.
Then click on the newly created interface (it’ll show as something like OPT1) and configure:
- Enable: checked
- Description:
RackNerdVPS(or whatever name makes sense for your VPS provider) - IPv4 Configuration Type: None
Save and apply.
Why “None” and not “Static”? The tunnel address (10.10.10.2/24) is already configured on the WireGuard instance itself. Setting Static here and re-entering the same address can cause conflicts or weird behavior. Let the instance own the IP. The interface assignment just gives OPNsense a handle to attach firewall rules to. That’s the only reason you’re assigning it.
Step 4: Firewall Rule for VPS Access to Your LAN Service
This is the most important step, and it’s where most people get lazy and create a wide-open rule. Don’t be that person. You will regret it exactly once, and that once will ruin a weekend.
Go to:
Firewall > Rules > RackNerdVPS
Add a rule:
- Enabled: Yes
- Description:
Allow VPS to Jellyfin - Action: Pass
- Direction: In
- Protocol: TCP
- Source:
RackNerdVPS net(or10.10.10.0/24) - Destination: Single host,
192.168.0.50(your Jellyfin server’s IP) - Destination Port:
8096(Jellyfin’s default port) - Log: Enable
Save and apply.
This rule says: traffic arriving through the tunnel can reach Jellyfin and nothing else. If someone compromises your VPS, they can talk to Jellyfin on port 8096. They cannot reach your NAS, your Pi-hole, your Home Assistant, or anything else on your LAN. That’s a massive difference from a rule that passes any to any.
Adding More Services Later
If you add more services behind the VPS (Home Assistant, Nextcloud, etc.), don’t widen the existing rule. Add separate rules for each service with specific destination IPs and ports. Or create an alias:
- Go to Firewall > Aliases > Add
- Name:
VPS_Allowed_Hosts - Type: Host(s)
- Content:
192.168.0.50,192.168.0.51(add each service host IP)
Then use the alias as the destination in a single rule. Either way, keep it explicit. Blanket allow rules on a tunnel interface are how you wake up one morning with someone else browsing your NAS.

Full-featured, compact, rack-ready. Eight multi-gig ports, dual 10GbE uplinks, VLAN/QoS/ACL/LACP, and seamless integration with TP-Link’s Omada controller. It locks down your Jellyfin/NAS traffic while scaling effortlessly with your homelab.
Step 5: VPS-Side Configuration
The OPNsense side is done. Now the VPS needs to know how to reach your LAN through the tunnel.
Route for Your LAN Subnet
The VPS needs a static route so it knows that 192.168.0.0/24 is reachable through the tunnel. Without it, the VPS has no idea your LAN exists on the other side of wg0. The cleanest way is to add it to your WireGuard config:
# /etc/wireguard/wg0.conf on the VPS

[Interface]
Address = 10.10.10.1/24
ListenPort = 51820
PrivateKey = <VPS_PRIVATE_KEY>

[Peer]
PublicKey = <OPNSENSE_PUBLIC_KEY>
AllowedIPs = 10.10.10.2/32, 192.168.0.0/24
The important line is AllowedIPs on the peer. It includes 192.168.0.0/24. Without this, WireGuard on the VPS will refuse to send LAN-bound packets through the tunnel. It won’t know that subnet belongs to this peer.
After editing, restart WireGuard:
sudo systemctl restart wg-quick@wg0
Verify the route exists:
ip route | grep 192.168
You should see: 192.168.0.0/24 dev wg0 scope link
If you don’t see it, WireGuard didn’t come up cleanly. Check sudo wg show and journalctl -u wg-quick@wg0 for errors.
Working wg show example:
interface: wg0
  public key: <public key>
  private key: (hidden)
  listening port: 51820

peer: <public key>
  endpoint: <redacted>:5853
  allowed ips: 10.10.10.2/32, 192.168.0.0/24
  latest handshake: 1 minute, 28 seconds ago
  transfer: 42.86 GiB received, 950.45 MiB sent
Caddy Configuration
Point Caddy at your Jellyfin server’s LAN IP through the tunnel:
jellyfin.example.com {
        log {
                output file /var/log/caddy/jellyfin.access.log {
                        roll_size 100mb
                        roll_keep 5
                }
                format json
        }

        request_body {
                max_size 0
        }

        reverse_proxy <LAN IP>:8096 {
                header_up Host {host}
                header_up X-Real-IP {remote_host}
                header_up X-Forwarded-Proto https

                flush_interval 5s

                transport http {
                        read_buffer 65536 # 64KB - reasonable size
                        write_buffer 65536 # 64KB
                        dial_timeout 30s
                        response_header_timeout 0
                }
        }
}
Caddy sends the request to LAN IP. The VPS route table says 192.168.0.0/24 goes via 10.10.10.2 through wg0. The packet enters the tunnel, OPNsense receives it, the firewall rule allows it, and Jellyfin gets the request.
Test End-to-End
From the VPS:
# Can you reach OPNsense through the tunnel?
ping 10.10.10.2

# Can you reach Jellyfin through the tunnel?
curl -I http://<LAN IP>:8096
If the ping works but the curl doesn’t, the problem is almost certainly your OPNsense firewall rule. Check the firewall logs under Firewall > Log Files > Live View and filter on the RackNerdVPS interface. Look for blocked entries with the destination Jellyfin's LAN IP. If you see blocks, your rule is either missing, disabled, or the destination IP/port doesn’t match what Caddy is actually sending.
If both fail, go back to “Verify the Handshake” and start there.

A compact mini-workstation built around up to a 16-core Ryzen 9 9955HX, with dual 10GbE SFP+ plus dual 2.5GbE, flexible storage (U.2 + M.2 including 22110), and triple 8K display outputs. Great as a homelab node or small server with serious I/O.
MTU Tuning
If large requests stall (pages half-load, big video files buffer forever, SSH works but SCP hangs), your MTU is too high. This is the single most common “it works but not really” problem with WireGuard tunnels. Every time. Without fail. Someone in a forum will tell you it’s DNS. It’s not DNS. It’s your MTU.
WireGuard adds 60 bytes of overhead. Start with:
| Setup | Starting MTU |
|---|---|
| Bare metal, standard Ethernet WAN | 1420 |
| PPPoE WAN | 1412 |
| Virtualized OPNsense (QEMU/KVM/Proxmox) | 1380 |
| PPPoE + VLAN tagging | 1400 or lower |
Test with a do-not-fragment ping from OPNsense to the VPS tunnel IP:
ping -s 1352 -M do 10.10.10.1
The -s value should be your MTU minus 28 (that’s 20 bytes of IP header plus 8 bytes of ICMP header). If it fragments or times out, lower the MTU in your WireGuard instance settings (VPN > WireGuard > Instances, edit your instance) and test again. Drop by 20 each time until the ping goes through clean.
For a reverse proxy setup, MTU issues usually show up as Jellyfin streams that start playing and then stall, or web UIs that load the page skeleton but never finish rendering. Small requests work fine. Large ones die. That’s your MTU.
pfSense WireGuard Setup (Step-by-Step)
The concepts are identical, but the UI and some behaviors differ.
Installation
- Go to System > Package Manager > Available Packages
- Install the WireGuard package
Unlike OPNsense 25.x, pfSense doesn’t ship WireGuard integrated. It’s package-based. Recent versions improved stability significantly, but OPNsense still feels more cohesive for WireGuard setups.
pfSense Client Configuration
Go to:
VPN > WireGuard > Tunnels > Add
- Enable: Yes
- Description:
VPS-WG - Listen Port: leave blank (client mode)
- Interface Keys: generate or paste your private key
Save, then go to VPN > WireGuard > Peers > Add:
- Tunnel: select
VPS-WG - Public Key: VPS public key
- Endpoint:
VPS_PUBLIC_IP:51820 - Allowed IPs:
10.10.10.0/24 - Persistent Keepalive:
25
Save.
Assign the Interface in pfSense
Interfaces > Assignments
The WireGuard tunnel appears as tun_wgX. Add it, enable it, rename to RackNerdVPS.
Set IPv4 to Static, address 10.10.10.2/24.
This is the opposite of OPNsense. pfSense wants you to set the static IP on the interface assignment. OPNsense has the instance own the IP and the interface assignment uses “None.” Get this backwards on either platform and you’ll have a confusing afternoon.
Firewall Rule in pfSense
Firewall > Rules > RackNerdVPS
Same logic as OPNsense. Create a rule allowing traffic from the WG net to your Jellyfin host on its specific port. Don’t pass everything.
- Action: Pass
- Protocol: TCP
- Source:
RackNerdVPS net - Destination:
Jellyfin's LAN IP - Destination Port:
8096

Plug-and-play 2.5GbE PCIe card that unlocks multi-gig speeds for about $30. Works out of the box with Proxmox, Linux, and Windows. No drama, faster transfers.
pfSense vs OPNsense for WireGuard
| Feature | OPNsense | pfSense |
|---|---|---|
| WireGuard integration | Built-in (25.x) / Plugin (24.x) | Package (add-on) |
| Config model | Instances + Peers | Tunnels + Peers tabs |
| Stability (2024+) | Strong | Much improved, still package-based |
| Gateway monitoring | Straightforward | Requires more configuration |
| UI clarity | More intuitive | Functional but more legacy |
For WireGuard-heavy homelab setups, I’d lean OPNsense. But pfSense works. Both get the job done once configured.
Troubleshooting Guide
No Handshake
Check:
- VPS firewall allows UDP on the WireGuard port
- Endpoint IP and port are correct
- Keys match (double-check copy-paste errors, especially trailing whitespace)
- Run
wg showon both OPNsense and VPS
If behind NAT, ensure Persistent Keepalive is set to 25. Without it, the NAT mapping times out and the VPS can no longer reach your OPNsense.
Tunnel is Up but VPS Can’t Reach Jellyfin
The handshake works, ping 10.10.10.2 from the VPS works, but curl http://<Jellyfin's LAN IP>:8096 fails. Work through these in order.
No route on the VPS. Run ip route | grep 192.168 on the VPS. If there’s no route, add one. The VPS doesn’t magically know your LAN subnet exists behind the tunnel.
# Quick fix (doesn't survive reboot):
sudo ip route add 192.168.0.0/24 via 10.10.10.2 dev wg0
AllowedIPs on the VPS peer doesn’t include your LAN subnet. WireGuard won’t send packets to 192.168.0.0/24 through the tunnel unless that subnet is in the peer’s AllowedIPs. Check /etc/wireguard/wg0.conf on the VPS and make sure the [Peer] block includes 192.168.0.0/24.
OPNsense firewall is blocking it. Check Firewall > Log Files > Live View and filter on the RackNerdVPS interface. If you see blocks, your firewall rule is either missing, misconfigured, or the destination IP/port doesn’t match what Caddy is sending.
Jellyfin is only listening on localhost. Some services bind to 127.0.0.1 by default. Check Jellyfin’s network settings (Dashboard > Networking) and make sure it’s listening on 0.0.0.0 or its LAN IP. If it’s bound to localhost, it will ignore everything that isn’t coming from the same machine.
Jellyfin Loads but Streams Buffer or Stall
Small requests work (the web UI loads) but video playback stalls. This is almost always an MTU problem. Large packets are getting fragmented or dropped.
- Lower the MTU on your WireGuard instance (try
1380) - Test with a do-not-fragment ping (see MTU Tuning section above)
- If you’re on a virtualized OPNsense, the hypervisor network stack often shaves off extra bytes. Go lower.
“no such device wg0”
This means the WireGuard interface doesn’t exist yet. Either the instance isn’t enabled in WireGuard settings, or the WireGuard service isn’t started.
Check VPN > WireGuard > General and make sure the service is enabled and running. If it’s enabled but wg0 still doesn’t exist, try toggling it off and on again. Check System > Log Files > General for errors.
VPS Sees Replies From 10.10.10.2 Instead of the LAN IP
This means outbound NAT is rewriting the source address on the WireGuard interface. For a reverse proxy setup, you don’t need outbound NAT. Remove it if it’s there. The VPS has a route for your LAN subnet, so replies from Jellyfin’s LAN IP will route back through the tunnel without NAT.
If you haven’t manually added outbound NAT and you’re still seeing this, OPNsense’s automatic outbound NAT might be generating a rule for the WireGuard interface. Go to Firewall > NAT > Outbound, switch to Hybrid mode, and verify no auto-generated rules are matching tunnel traffic. If one is, switch to Manual mode or add a manual rule that explicitly excludes the WireGuard interface.
Frequently Asked Questions
➤ Do I need policy routing for a VPS reverse proxy setup?
10.10.10.1) is in the tunnel subnet.➤ Do I need outbound NAT on the WireGuard interface?
➤ Do I need a gateway defined for the WireGuard interface?
➤ How do I add more services behind the VPS?
Add a firewall rule on the RackNerdVPS interface for each new service, specifying the exact destination IP and port. Or create an alias with all your allowed hosts and use that in a single rule (see Step 4 above). Don’t widen an existing rule to pass all traffic. Each service should be explicitly allowed.
On the VPS side, add a new reverse_proxy block in your Caddyfile (or server block in nginx) pointing to the new service’s LAN IP and port.
➤ AllowedIPs 0.0.0.0/0 vs 10.10.10.0/24?
10.10.10.0/24 is correct. 0.0.0.0/0 tells OPNsense to send all traffic through the tunnel, which is a full-tunnel setup. Different use case, different guide, different headaches.➤ What if I also want some LAN devices to use the VPS as their internet gateway?
0.0.0.0/0, creating a gateway, adding policy-based routing rules on LAN, and setting up outbound NAT on the WireGuard interface. It’s doable, but it’s a separate project. Don’t try to bolt it onto this guide. You’ll break what’s already working.➤ What MTU should I use?
1420 on bare metal, 1412 on PPPoE, or 1380 if OPNsense is virtualized. Test with a do-not-fragment ping. If Jellyfin streams stall on large video files but the web UI loads fine, your MTU is too high. See the MTU Tuning section for the full procedure.➤ Is my home IP exposed in this setup?
Wrapping Up
A VPS reverse proxy setup through WireGuard is one of the simplest tunnel configurations you can run. The pieces that matter:
- WireGuard instance and peer configured on OPNsense
- Interface assigned so firewall rules can attach to it
- A tight firewall rule that only allows VPS traffic to your specific services
- A route and AllowedIPs entry on the VPS so it knows your LAN subnet lives behind the tunnel
Get those four things right and everything works. Get the firewall rule lazy (pass any to any) and you’ve just given anyone who compromises your VPS a direct path to your entire LAN. Don’t do that. I’ve seen the aftermath, and it’s not a fun weekend.
If you’re building a serious homelab, this setup unlocks:
- Secure VPS reverse proxy without exposing home ports
- Multiple services behind a single VPS IP
- TLS termination at the VPS edge
- Hidden home IP for all exposed services
Next step: experiment with adding more services behind the tunnel and segmenting them with per-service firewall rules.
This is Part 3 of a 3-part series on building a VPS-fronted homelab. If you landed here first, start with the why and the tunnel build:

Part 1: Why Your Homelab Needs a VPS Why a VPS edge beats home port forwarding for public-facing services.
Part 2: Install WireGuard on a VPS Build the VPS-to-homelab WireGuard tunnel with iptables port forwarding and a Caddy reverse proxy.
- Part 3: WireGuard Client on OPNsense and pfSense: LAN Routing for Your VPS Tunnel (this post)