
You upgraded to Proxmox 9.1.5 and now your Jellyfin, Plex, or Arr containers refuse to start. They worked for months, maybe years, and now all you get is a cryptic “Status 30” error. Proxmox 9.1.5 enforces idmapped mounts for unprivileged LXC containers, and FUSE-based filesystems like MergerFS want nothing to do with them. My best guess is that these changes were made to better support the new OCI-compliant images, which let Proxmox run Docker images without needing Docker installed.
The fix: ditch mpX mounts entirely, replace them with lxc.mount.entry lines, and configure explicit unprivileged ID mapping.
This guide is for Proxmox users running unprivileged LXC containers with bind mounts on MergerFS or NFS storage. If all your storage is native Proxmox (ZFS, ext4, local directories), your mpX mounts will probably still work. You can stop reading and go enjoy your day.
I hit this after updating to Proxmox 9.1.5. Every container with MergerFS bind mounts failed after a reboot. No useful error message. No graceful fallback. Just “Status 30” and silence. After digging through logs and testing half a dozen approaches, the solution turned out to be straightforward. Annoying, but straightforward.
mpX bind mounts. MergerFS and most NFS setups don’t support idmapped mounts, which causes LXC startup to fail with Status 30. The fix: remove your mpX mounts, use lxc.mount.entry instead, and explicitly define your unprivileged UID and GID mappings. Details below.
Quick Check: Does This Apply to You?
Your storage is probably fine if it’s:
- Local ext4, XFS, or ZFS on the Proxmox host
- Native Proxmox directories
You’re affected if your storage is:
- MergerFS pools
- NFS mounts
- Other FUSE-based filesystems
- External USB or hybrid storage setups
If you’re in the second group, keep reading. Everyone else, go do something more fun.
What Is the Proxmox Status 30 Error?
Status 30 is LXC’s way of telling you something went wrong during container startup without telling you what went wrong. It’s a generic failure code that masks deeper filesystem or permission problems.
You’ll see messages like:
startup for container '102' failedScript exited with status 30Read-only file system (os error 30)
To find out why the kernel said no, you need to watch the errors live. Run this on the Proxmox host, replacing XXX with your container ID:
lxc-start -n XXX -F -l DEBUG -o /dev/stdout
Look for lines mentioning idmapped, mount, or permission denied. Those will point you toward the actual cause.
What Changed in Proxmox 9.1.5?
Proxmox 9.1.5 ships with a newer Linux kernel and tighter security defaults. The specific change that breaks MergerFS setups is broader enforcement of idmapped mounts for unprivileged containers.
When you define a container mount like:
mp0: /mnt/media,mp=/media
Proxmox now automatically:
- Creates an idmapped mount
- Shifts ownership so container UID 1000 maps cleanly to host UID 1000
- Enforces isolation guarantees
This works great on native filesystems (ext4, XFS, ZFS) but, it completely fails on:
- MergerFS (FUSE-based, no idmap support)
- Most NFS exports (server-side ownership, no client idmap)
- Some custom or layered storage stacks
When the kernel refuses the idmapped mount, Proxmox kills the LXC startup rather than opening a security hole. This shows up as a Status 30 error.
The mpX Trap: Why Old Configs Break
Before Proxmox 9.1.5, mpX mounts were forgiving. You could bind-mount media directories owned by UID 1000, and LXC handled permission translation loosely. Nobody complained.
After the upgrade, mpX mounts trigger the idmapping hook automatically. If your underlying filesystem doesn’t support it, three things happen:
- Container fails to start
- Misleading “read-only filesystem” errors appear in logs
- Ghost mounts get left behind on the host (more on this in Step 5)
This is why containers without bind mounts start fine while your media servers all failed at the same time. Ask me how I know.
The Fix: Manual Mounting and Explicit Unprivileged ID Mapping
The temptation here is to flip your containers to privileged mode. Don’t. Privileged containers run as root on the host. If your Jellyfin or Plex container gets exploited, the attacker has root on your entire Proxmox host and can pivot to every other VM and container you’re running. That’s not a theoretical risk. Container escape vulnerabilities in shared-kernel setups are well-documented, and if you’re running services that download files from the internet (every Arr app, every torrent client), you’re handing a potential attacker the keys to your entire homelab. Keep your containers unprivileged.
The fix has three parts:
- Remove
mpXmounts so Proxmox stops trying to idmap them - Use raw
lxc.mount.entrylines that LXC handles directly - Define clean, contiguous UID and GID maps so permissions work correctly
This keeps your containers unprivileged while sidestepping the MergerFS/NFS incompatibility entirely.
Prerequisites checklist. Before starting, confirm you have the following ready. Experienced readers: don’t skip Steps 1 and 2. The ID delegation and mpX removal on the host are required before anything else works.
- SSH or console access to your Proxmox host (not the container)
- Your media user’s UID and GID (run
id your_media_usernameon the host) - Your render group’s GID if you use GPU passthrough (run
getent group renderon the host) - The container ID(s) you need to fix
- A backup of your container config file(s)
Step 1: Configure UID and GID Delegation on the Host
Before LXC can map host IDs into an unprivileged container, Proxmox needs explicit permission to use those IDs. That permission lives in two files on the host: /etc/subuid and /etc/subgid.
First, figure out your actual media user’s UID and GID. Run this on the host:
id your_media_username
The examples below assume UID 1000 and GID 1001. Replace these with your actual values throughout. If you copy-paste blindly and your IDs don’t match, you’ll be right back at Status 30. I won’t feel sorry for you.
Next, check your render group GID if you need GPU passthrough:
getent group render
This usually returns render:x:104 but it’s not guaranteed. On some distributions or custom setups, the render group could be GID 105, 128, or something else entirely. Whatever number you see here is the one you’ll use in every step below. If the command returns nothing, you don’t have a render group and can skip the render-related lines in Steps 1 and 4.
Edit these files on the Proxmox host.
Start with subuid:
nano /etc/subuid
Paste this:
root:1000:1
root:100000:65536
Next, edit subgid:
nano /etc/subgid
Paste this:
root:104:1
root:1001:1
root:100000:65536
What each line means:
root:1000:1allows root to delegate host UID 1000 (your media user) into a containerroot:104:1allows root to delegate host GID 104 (therendergroup, for GPU passthrough). Replace104with whatevergetent group renderreturned on your system.root:1001:1allows root to delegate host GID 1001 (your media group)root:100000:65536is the standard unprivileged ID range. Leave it alone.
If any of these entries are missing or wrong, LXC cannot construct a valid idmap and your container won’t start. There’s no partial credit here.
Step 2: Remove mpX Mounts from the Container
Back up your container config first. I mean it. Copy it somewhere safe before you touch anything.
cp /etc/pve/lxc/XXX.conf /root/XXX.conf.bak
Now open the config:
nano /etc/pve/lxc/XXX.conf
Delete or comment out any lines like:
mp0: /mnt/media,mp=/media
mp1: /mnt/downloads,mp=/downloads
Every single one. Leaving even one mpX entry triggers the idmapping hook, and you’re back to Status 30.
Step 3: Add Direct lxc.mount.entry Bind Mounts
At the bottom of the container config file, add manual mount entries:
lxc.mount.entry: /media/storage/Movies media/Movies none bind,create=dir,ro 0 0
lxc.mount.entry: /media/storage/Shows media/Shows none bind,create=dir,ro 0 0
Pay attention to these details. They’ll bite you if you get them wrong:
- The container path (second field) is relative, no leading slash. Write
media/Movies, not/media/Movies. This trips people up constantly. bindtells LXC to handle the mount directly, bypassing Proxmox’s storage helpers.create=dirtells LXC to create the mount point inside the container if it doesn’t exist. Without this, you’ll get a mount failure if the directory is missing.- Set
roorrwexplicitly based on what the container actually needs. Read-only where possible. Your Jellyfin container doesn’t need write access to your movie library.
These mounts are handled by LXC itself, not Proxmox. That’s the whole point.
Step 4: Define Clean Unprivileged ID Mapping
This is the part where most people get tripped up. Unprivileged containers require a fully contiguous UID and GID map covering the range 0 through 65535. No gaps. No overlaps. If the math doesn’t add up to exactly 65536 IDs, the container will not start. LXC is merciless about this.
Customize these values. Replace 1000 with your actual media user’s UID. Replace 1001 with your actual media group’s GID. Replace 104 with your actual render group GID.
How the math works
Every lxc.idmap line maps a range of container IDs to host IDs. The format is:
lxc.idmap: <u|g> <container_start> <host_start> <count>
The rule is simple: every count value across all your lines for a given type (u or g) must add up to exactly 65536. When you pass through a specific ID (like your media UID), you split the range around it. Here’s the formula:
Range before passthrough:  count = passthrough_id
Passthrough itself:        count = 1
Range after passthrough:   count = 65536 - passthrough_id - 1
For multiple passthroughs (like the GID map), you split around each one in order, and the counts between them fill the gaps.
Example A: UID 1000, GID 1001, render GID 104
This is the most common homelab setup. Add these lines to your container config:
UID Mapping:
lxc.idmap: u 0 100000 1000
lxc.idmap: u 1000 1000 1
lxc.idmap: u 1001 101001 64535
Table:
| Container UIDs | Host UIDs | Count | Purpose |
|---|---|---|---|
| 0 - 999 | 100000 - 100999 | 1000 | Unprivileged range |
| 1000 | 1000 | 1 | Media user passthrough |
| 1001 - 65535 | 101001 - 165535 | 64535 | Unprivileged range |
| 65536 | Total |
GID Mapping:
lxc.idmap: g 0 100000 104
lxc.idmap: g 104 104 1
lxc.idmap: g 105 100105 896
lxc.idmap: g 1001 1001 1
lxc.idmap: g 1002 101002 64534
Table:
| Container GIDs | Host GIDs | Count | Purpose |
|---|---|---|---|
| 0 - 103 | 100000 - 100103 | 104 | Unprivileged range |
| 104 | 104 | 1 | Render group passthrough |
| 105 - 1000 | 100105 - 101000 | 896 | Unprivileged range |
| 1001 | 1001 | 1 | Media group passthrough |
| 1002 - 65535 | 101002 - 165535 | 64534 | Unprivileged range |
| 65536 | Total |
Verify: 104 + 1 + 896 + 1 + 64534 = 65536. Contiguous. No gaps.
Example B: UID 1001, GID 1002, render GID 128
If your media user is UID 1001 with GID 1002, and your render group is GID 128, the math shifts:
UID Mapping:
lxc.idmap: u 0 100000 1001
lxc.idmap: u 1001 1001 1
lxc.idmap: u 1002 101002 64534
Verify: 1001 + 1 + 64534 = 65536.
GID Mapping:
lxc.idmap: g 0 100000 128
lxc.idmap: g 128 128 1
lxc.idmap: g 129 100129 873
lxc.idmap: g 1002 1002 1
lxc.idmap: g 1003 101003 64533
Verify: 128 + 1 + 873 + 1 + 64533 = 65536.
Notice the pattern: the gap between your two GID passthroughs (128 and 1002) is 1002 - 128 - 1 = 873. That’s the count for the middle range. The final range is always 65536 minus the sum of everything before it.
Don’t forget: if you use different IDs, you also need to update /etc/subuid and /etc/subgid from Step 1 to match. Those files must list every host ID you’re passing through.
count values for your u lines and all the count values for your g lines. Both totals must equal exactly 65536. If either one doesn’t, your container will not start.
Step 5: Clear Stale Mounts Before Restarting
Failed startups leave behind ghost mounts on the host. If you try to start the container again without cleaning these up, it can fail in new and exciting ways.
On the host, run:
umount -l /var/lib/lxc/.pve-staged-mounts/mp* 2>/dev/null
The -l flag performs a lazy unmount, which detaches the filesystem immediately and cleans up references once they’re no longer busy. This is safe for cleaning up after failed mount attempts. One caveat: don’t use lazy unmount as a habit for mounts that keep failing. It detaches the mount without fixing whatever caused the failure, so if you find yourself running this repeatedly, something deeper is wrong. Go back and check your config.
Now start your container:
pct start XXX
Step 6: Verify Everything Works
Don’t just check that the container started. Confirm that permissions are actually correct end-to-end.
Check that mounts exist and ownership is correct:
pct enter XXX
ls -la /media/Movies
You should see your media files with the correct ownership. If the ownership looks wrong (everything owned by nobody or 65534), your idmap entries are off. Go back to Step 4 and double-check your math.
Test file operations (if using rw mounts):
Inside the container:
touch /media/Downloads/testfile
ls -la /media/Downloads/testfile
rm /media/Downloads/testfile
The test file should be owned by your media user, not root or nobody.
Confirm services start cleanly:
Inside the container, check your media service:
systemctl status jellyfin # or plex, sonarr, radarr, etc.
If the service is running and can see your library, you’re done. If it starts but can’t find media files, the mount exists but the path inside the container doesn’t match what the service expects. Double-check the container path in your lxc.mount.entry lines from Step 3.
Check LXC logs for clean startup (from the host):
lxc-start -n XXX -F -l DEBUG -o /dev/stdout
A clean startup will show your mount entries being applied without any idmapped errors or permission denials. If you see warnings but the container still starts, investigate them. Warnings that you ignore today become outages after the next update.
Why This Works
By switching from mpX to lxc.mount.entry, you:
- Skip Proxmox’s idmapped mount helpers entirely
- Bypass kernel-level idshift enforcement that FUSE filesystems can’t handle
- Let LXC translate IDs at runtime using your explicit mapping
This is how LXC handled unprivileged containers before Proxmox 9.1.5 added automatic idmapping. You’re not doing anything weird or unsupported. You’re just being explicit about what Proxmox used to do implicitly.
This configuration should survive future Proxmox updates since lxc.mount.entry is a stable LXC feature, not a Proxmox-specific shortcut. That said, major version upgrades can always change defaults, so keep your config backups current and check release notes before upgrading.
Troubleshooting Status 30 Errors
Container Still Fails With Status 30
Work through this checklist:
- Confirm that no
mpXentries remain in/etc/pve/lxc/XXX.conf. Grep for them:grep '^mp' /etc/pve/lxc/XXX.conf - Verify
/etc/subuidand/etc/subgidinclude entries for every ID you’re passing through - Check that your idmap ranges are contiguous and total 65536 for both UIDs and GIDs
- Confirm the host paths in your
lxc.mount.entrylines actually exist:ls -la /media/storage/Movies - Clear stale mounts (Step 5) and try again
Storage Appears Read-Only Inside the Container
Test write access directly on the host first:
touch /mnt/media/testfile && rm /mnt/media/testfile
If this fails, the problem is at the storage level, not LXC. Check your MergerFS config, underlying disk health, and filesystem mount options. If the host can write but the container can’t, double-check that your lxc.mount.entry line uses rw and not ro.
NFS Mounts Fail
NFS typically lacks idmapped mount support, so the same lxc.mount.entry approach applies. The extra wrinkle: your NFS export must allow access from the UIDs and GIDs you’re mapping.
/etc/exports on the NFS server. Make sure no_root_squash or appropriate user mapping is configured for the host IDs you’re passing through. This is easy to miss and will cause silent permission failures even if everything else is configured correctly.
Multiple Media Users or Docker Inside LXC
If you have more than one media user that needs passthrough (for example, separate users for Sonarr and Jellyfin), you need to add a passthrough line for each UID and GID in Step 4 and a delegation entry for each in Step 1. The same splitting logic applies: break the range around each passthrough ID and make sure the counts still total 65536.
If you’re running Docker inside an unprivileged LXC container (first WHY?!), you’ll hit additional nesting issues. Docker needs its own ID namespace, which adds complexity on top of the LXC mapping. This is solvable but outside the scope of this guide. The Proxmox wiki has a section on nested containers that covers the basics.
FAQs
➤ What causes Read-only file system (os error 30) in Proxmox?
mpX to lxc.mount.entry fixes it.➤ Is this specific to Proxmox 9.1.5?
➤ Should I switch to privileged containers?
➤ Does this affect VMs too?
➤ Will this survive the next Proxmox update?
lxc.mount.entry directive is a stable LXC feature, not a Proxmox hack. It should survive point releases without issue. Major version upgrades could change defaults, so always read release notes and keep config backups before upgrading.Conclusion
Proxmox 9.1.5 tightened its security defaults, which is a good thing. The side effect is that FUSE-based filesystems like MergerFS and certain NFS configurations got caught in the crossfire.
If you rely on MergerFS or NFS with unprivileged containers, the old mpX approach is dead. Replacing it with lxc.mount.entry and explicit ID mapping restores stability without giving up security.
Once configured correctly, containers start cleanly and survive updates. Status 30 becomes a bad memory. It’s an hour of config work that saves you from this headache permanently.
Recommended Hardware
If you’re building or upgrading a homelab media server, here’s what I actually use and recommend.

Solid high-capacity drive for MergerFS pools. I run several of these as the backing storage for the exact setup described in this guide. Not the cheapest per-TB option, but reliable and widely available.
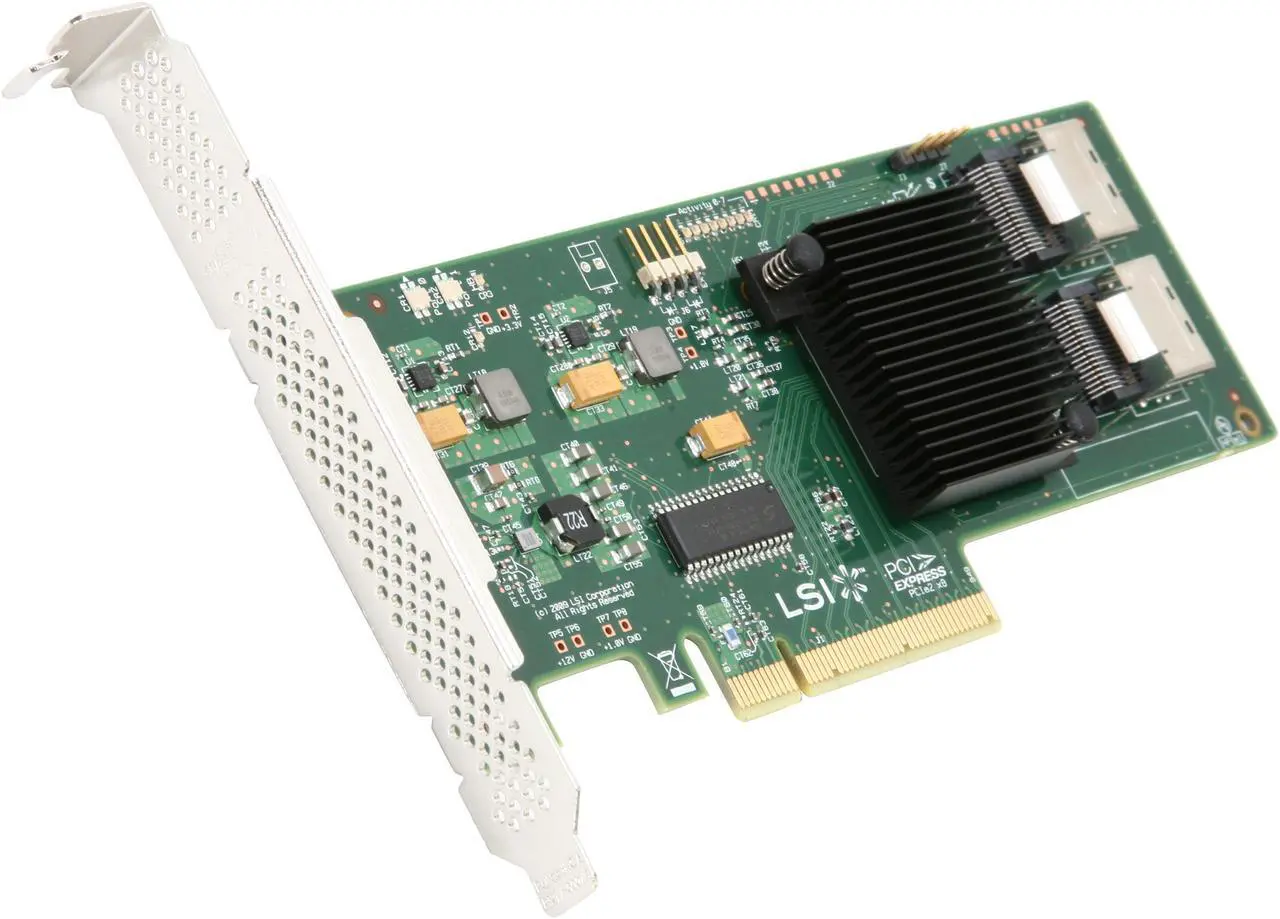
An HBA flashed to IT mode passes drives directly to the OS without a hardware RAID layer. This is what you want for MergerFS or ZFS setups where the OS needs raw disk access. Cheap on eBay, rock-solid, and still the default recommendation in most homelab communities.
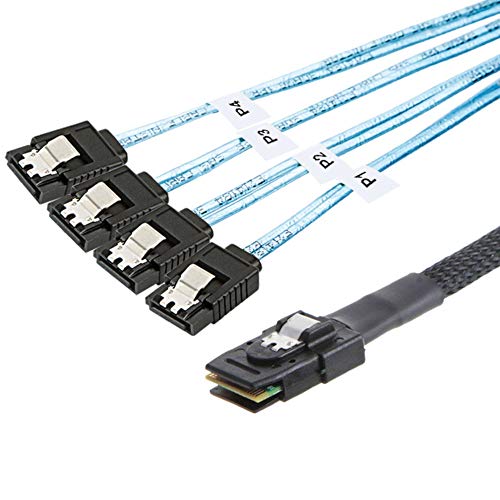
You’ll need these breakout cables to connect SATA drives to the LSI HBA above. One cable handles four drives. Grab two if you’re filling a larger chassis.