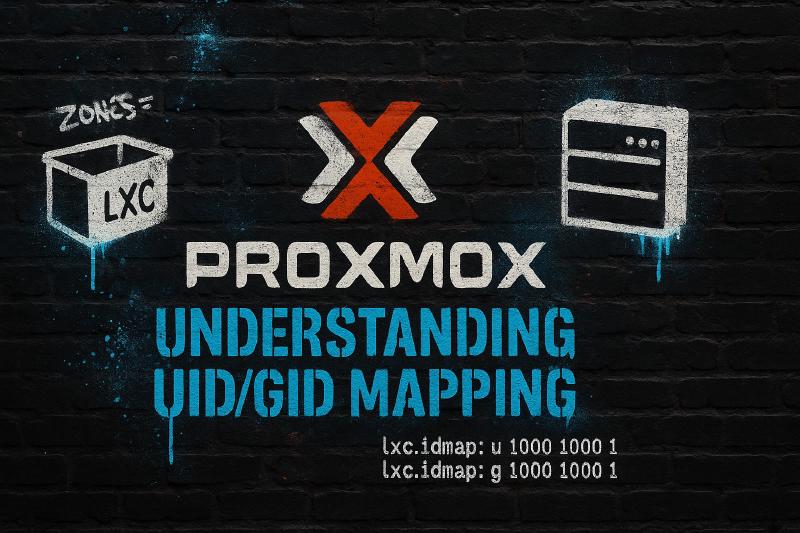
Mastering UID/GID Mapping in Proxmox LXC Containers
If you’ve ever shared files between your Proxmox host and an LXC container and wondered why permissions look “off” or why bind mounts throw permission errors, you’ve already bumped into UID/GID mapping. It’s one of those behind-the-scenes mechanisms that keeps your containers safe and sane, but it can also be the source of confusing file ownership problems.
Understanding UID (User ID) and GID (Group ID) mapping is crucial for anyone running unprivileged containers on Proxmox. It’s what prevents a container’s root from being actual root on the host. It’s also the key to properly mapping shared directories and keeping your security in place.
Here’s the thing: UID/GID mapping sounds intimidating, but once you understand the basic concept, it becomes a powerful tool rather than a mysterious source of frustration. We’ll walk through how it works in Proxmox LXCs, how to customize it when needed, and how to fix the common headaches it causes, especially for media server setups like Jellyfin.
Understanding this mapping helps you avoid the common trap of switching to privileged containers, which sacrifices security for convenience.

Why UID/GID Mapping Matters
User and group IDs in Linux define ownership and permissions. UID 0 is root, UID 1000 might be your first host user, and so on. Normally, these IDs are global across a single OS instance, but containers complicate that picture. Without remapping, the “root” user inside a container would also be UID 0 on the host. If someone managed to escape that container, they’d have full system privileges.
To solve this, Proxmox defaults to unprivileged containers, where the container’s UID/GID space is remapped to a non-privileged range on the host. Think of it as giving each container its own private numbering system that translates to harmless IDs on the host side.
Visualizing the Mapping
Here’s what happens with default mapping:
Container Namespace          Host System
┌────────────────────┐      ┌──────────────────┐
│ UID 0 (root)       │ ───> │ UID 100000       │
│ UID 1 (daemon)     │ ───> │ UID 100001       │
│ UID 1000 (user)    │ ───> │ UID 101000       │
│ UID 65535 (nobody) │ ───> │ UID 165535       │
└────────────────────┘      └──────────────────┘
With custom mapping for media server access:
Container Namespace          Host System
┌────────────────────┐      ┌──────────────────┐
│ UID 0 (root)       │ ───> │ UID 100000       │
│ UID 999            │ ───> │ UID 100999       │
│ UID 1000 (user)    │ ───> │ UID 1000         │ ← Direct map!
│ UID 1001           │ ───> │ UID 101001       │
└────────────────────┘      └──────────────────┘
Why 100000 as the Starting Point?
Proxmox chose 100000 as the default offset for good reasons:
- System UIDs (0-999): Reserved for system services and the root user
- User UIDs (1000-60000): Normal user accounts on most Linux systems
- Container offset (100000+): Far enough from everything else to avoid conflicts
This ensures that even if you have 99 regular users on your host (UID 1000-1099), their IDs will never collide with container-mapped IDs.
Privileged vs Unprivileged: What You Need to Know
Unprivileged Containers (unprivileged: 1 - Default):
- UID/GID mapping is enforced by the kernel
- Container root = UID 100000 on host (harmless)
- Recommended for 99% of use cases including media servers
- Security isolation is maintained even if container is compromised
Privileged Containers (unprivileged: 0):
- NO UID/GID mapping
- Container root = actual root on host
- Major security risk: Container escape = full host compromise
- Rarely needed for media servers, avoid unless absolutely necessary
For Jellyfin, Plex, and similar media servers, you should always use unprivileged containers with proper UID mapping. The performance is identical and security is much better.
Understanding the Default Mapping
When you create a new unprivileged LXC container in Proxmox, it automatically sets up UID/GID mappings to keep your container isolated from the host system.
Check your container’s configuration file:
cat /etc/pve/lxc/101.conf
You’ll see something like:
arch: amd64
cores: 2
hostname: jellyfin
memory: 2048
rootfs: local-lvm:vm-101-disk-0,size=8G
unprivileged: 1
That unprivileged: 1 line triggers automatic UID/GID offset mapping defined in /etc/subuid and /etc/subgid on the host.
The Default Mapping Files
Check your host’s subordinate ID files:
cat /etc/subuid
cat /etc/subgid
You’ll see:
root:100000:65536
This means:
- Container UID 0 → Host UID 100000
- Container UID 1 → Host UID 100001
- Container UID 1000 → Host UID 101000
- Container UID 65535 → Host UID 165535
This is why your media files show weird ownership! When your Jellyfin container (running as a user inside) creates or accesses files, they appear on the host owned by UIDs in the 100000+ range instead of your normal user account.
Prerequisites
Before configuring UID/GID mapping, ensure:
- You’re running Proxmox VE 7.0 or later
- Container is stopped (or not yet created)
- You know your host user’s UID (run
idon host) - You have root access to Proxmox host
- Media files exist on host with known ownership
Step-by-Step: Setting Up UID/GID Mapping for Media Servers
Here’s the practical guide for getting Jellyfin (or Plex, Emby, etc.) working with your media library.
Step 1: Identify Your Host Media Directory Ownership
First, check who owns your media files on the host:
ls -ln /media/movies
ls -ln /media/tv
You’ll see output like:
drwxr-xr-x 10 1000 1000 4096 Oct 20 10:30 /media/movies
The 1000 1000 shows UID and GID. This is typically your primary user account. Remember this number, you’ll need it later.
Step 2: Stop Your Container
If container is already running:
pct stop 101
Skip this step if you’re configuring a new container that hasn’t started yet
Step 3: Edit the Container Configuration
Open the container’s config file:
nano /etc/pve/lxc/101.conf
Add these lines at the end:
lxc.idmap: u 0 100000 1000
lxc.idmap: g 0 100000 1000
lxc.idmap: u 1000 1000 1
lxc.idmap: g 1000 1000 1
lxc.idmap: u 1001 101001 64535
lxc.idmap: g 1001 101001 64535
# Our mapping covers exactly 65,536 IDs (0-65535):
# Line 1: 1000 IDs (container 0-999)
# Line 2: 1 ID (container 1000)
# Line 3: 64535 IDs (container 1001-65535)
# Total: 1000 + 1 + 64535 = 65,536 ✓
What this does:
- Maps container UIDs 0-999 to host UIDs 100000-100999 (keeps container root isolated)
- Maps container UID 1000 directly to host UID 1000 (your user)
- Maps container GID 1000 directly to host GID 1000 (your user’s group)
- Resumes offset mapping at UID 1001 → host UID 101001 (100000 base + 1001 offset), maintaining security isolation for all remaining users
Save and exit (Ctrl+X, Y, Enter).
Step 4: Add Bind Mounts for Your Media
Add your media directories to the config file (if not already open from Step 3, use nano /etc/pve/lxc/101.conf):
mp0: /media/movies,mp=/media/movies
mp1: /media/tv,mp=/media/tv
mp2: /media/music,mp=/media/music
Or use the command line:
pct set 101 -mp0 /media/movies,mp=/media/movies
pct set 101 -mp1 /media/tv,mp=/media/tv
Step 5: Verify Subordinate UID Files
Check that your host has the necessary UID range:
cat /etc/subuid
cat /etc/subgid
You should see at least:
root:100000:65536
Now edit both files and add this line at the top:
# In /etc/subuid:
root:1000:1

# In /etc/subgid:
root:1000:1
What this means:
- Allows the root user (who runs LXC) to map a single ID (1000) directly through to the container
- Change 1000 to match your host user’s UID/GID (find it with
idcommand)
Step 6: Start and Configure Container
pct start 101
Enter the container:
pct enter 101
Create or modify the user to match your host UID:
# Check if jellyfin user already exists
id jellyfin 2>/dev/null

# If user doesn't exist yet, create it:
useradd -u 1000 -m jellyfin

# If user already exists with wrong UID, modify it:
usermod -u 1000 jellyfin
usermod -g 1000 jellyfin  # Also update primary group
Step 7: Verify Permissions
Test that Jellyfin can access your media:
su - jellyfin -s /bin/bash
ls -la /media/movies
touch /media/movies/test.txt
If these commands work without “Permission denied” errors, you’re good!
On the host, verify:
ls -ln /media/movies
Remove the test file:
rm /media/movies/test.txt
Files created by Jellyfin should show UID 1000, matching your host user.
Step 8: Configure Jellyfin Libraries
Access Jellyfin’s web interface (usually http://container-ip:8096) and add your media libraries pointing to:
/media/movies/media/tv/media/music
Jellyfin should now scan and access everything without permission issues.
Common Media Server Patterns
Pattern 1: Single User Media Library (Most Common)
Use case: All media owned by one user (UID 1000)
lxc.idmap: u 0 100000 1000
lxc.idmap: g 0 100000 1000
lxc.idmap: u 1000 1000 1
lxc.idmap: g 1000 1000 1
lxc.idmap: u 1001 101001 64535
lxc.idmap: g 1001 101001 64535
mp0: /media,mp=/media
Pattern 2: Multiple Media Users
Use case: Media owned by different users (UID 1000, 1001, 1002)
lxc.idmap: u 0 100000 1000
lxc.idmap: g 0 100000 1000
lxc.idmap: u 1000 1000 3
lxc.idmap: g 1000 1000 3
lxc.idmap: u 1003 101003 64533
lxc.idmap: g 1003 101003 64533
mp0: /media,mp=/media
Troubleshooting Media Server Permission Issues
➤ Problem: Jellyfin Can’t See Media Files
Symptoms: Library scan shows no files or “Permission denied” in logs
Solution:
# Check mapping is active
pct exec 101 -- cat /proc/self/uid_map

# Verify file ownership
pct exec 101 -- ls -ln /media/movies

# Check Jellyfin user UID
pct exec 101 -- id jellyfin

# Ensure they match your mapping
➤ Problem: Can’t Write Subtitles or Metadata
Symptoms: Jellyfin complains about read-only filesystem
Solution:
# Verify mount isn't read-only
cat /etc/pve/lxc/101.conf | grep mp0

# Should NOT have 'ro' option
# Correct: mp0: /media,mp=/media
# Wrong: mp0: /media,mp=/media,ro

# Verify write permissions
pct exec 101 -- su - jellyfin -s /bin/bash -c "touch /media/test.txt"
➤ Problem: Transcoding Fails with Permission Errors
Symptoms: Playback works but transcoding fails
Solution:
# Check transcode directory permissions
pct exec 101 -- ls -ln /var/lib/jellyfin/transcodes

# Should be owned by jellyfin user
pct exec 101 -- chown -R jellyfin:jellyfin /var/lib/jellyfin

# If using host directory for transcoding
pct set 101 -mp1 /fast-storage/transcodes,mp=/transcodes
➤ Problem: Files Show as UID 100000 on Host
Symptoms: Host can’t manage files created by Jellyfin
Solution: Your mapping isn’t working. Go back to Step 3 and verify your lxc.idmap configuration, then restart the container.

Advanced: Running Multiple Media Servers
If you’re running both Jellyfin and Plex, or want separate containers for different media types:
Strategy: Shared Mapping, Separate Containers
Container 101 (Jellyfin):
lxc.idmap: u 0 100000 1000
lxc.idmap: g 0 100000 1000
lxc.idmap: u 1000 1000 1
lxc.idmap: g 1000 1000 1
lxc.idmap: u 1001 101001 64535
lxc.idmap: g 1001 101001 64535
mp0: /media,mp=/media,ro
Container 102 (Plex):
lxc.idmap: u 0 100000 1000
lxc.idmap: g 0 100000 1000
lxc.idmap: u 1000 1000 1
lxc.idmap: g 1000 1000 1
lxc.idmap: u 1001 101001 64535
lxc.idmap: g 1001 101001 64535
mp0: /media,mp=/media,ro
Both containers can read the same media library. Use ro (read-only) flag to prevent accidental modifications.
Understanding lxc.idmap Syntax
For those who want to customize beyond these common patterns:
lxc.idmap: [u|g] [first_id_in_container] [first_id_on_host] [number_of_ids]
Example breakdown:
lxc.idmap: u 0 100000 1000
u= UID mapping (usegfor GID)0= Start at container UID 0100000= Map to host UID 1000001000= Map 1000 consecutive IDs (0-999)
Critical rules:
- You must map all 65536 IDs (0-65535)
- No gaps allowed
- No overlaps within same container
- Order matters. Later lines override earlier ones
FAQs
➤ Will UID mapping slow down my media server?
➤ Can I use the same mapping for multiple containers?
➤ What if my media is owned by a different UID?
Adjust the mapping. If your media is owned by UID 1500 instead of 1000, change:
lxc.idmap: u 1500 1500 1
lxc.idmap: g 1500 1500 1
And adjust the other ranges accordingly to ensure you still map all 65536 IDs.
➤ Do I need to map GID separately from UID?
➤ Can I change mapping on an existing Jellyfin container?
Yes, but be prepared to fix file ownership:
- Stop container
- Modify mapping in config
- Start container
- Run
chown -R jellyfin:jellyfin /var/lib/jellyfininside container
Your media files on the host should maintain correct ownership since they’re already owned by your user.
➤ Should I ever use a privileged container for Jellyfin?
Conclusion: Media Servers and UID Mapping
UID/GID mapping is the key to running secure, functional media servers in Proxmox LXC containers. The default isolation protects your host system, while custom mapping gives you seamless access to media libraries.
Your Media Server Checklist
- Identify media directory ownership on host (usually UID 1000)
- Configure
lxc.idmapto map that UID directly - Add bind mounts for media directories
- Create or modify media server user to match mapped UID
- Test file access from inside container
- Verify host sees correct ownership
- Configure media server libraries
- Run a scan and test playback
Key Takeaways for Media Servers
Use unprivileged containers always. The security benefit is enormous, and the setup is straightforward once you understand UID mapping.
Map your user UID directly. The single-user passthrough pattern (mapping UID 1000 to 1000) handles 90% of media server scenarios.
Document your setup. Write down which UIDs you mapped and why. You’ll thank yourself during troubleshooting or migration.
Test before going live. Verify file access, transcoding, and metadata writing all work before importing your entire library.
The small investment in understanding UID/GID mapping pays off with a secure, maintainable media server setup that just works.
