You spin up an NFS share and think you’re done. Your media server is humming, files are flowing, everything looks perfect. But here’s what you probably missed: you just gave every client’s root user complete administrative access to your server. That “quick setup” you found online? It basically handed out master keys to anyone on your network.
Don’t panic. We’ve all been there. The good news? Setting up NFS properly isn’t rocket science once you understand what’s actually happening under the hood. Let me walk you through building an NFS setup that’s fast, secure, and won’t make you lose sleep at night.
UGREEN NASync DXP4800 Plus 4-Bay Desktop NAS UGREEN NASync DXP4800, 4-Bay NAS with Intel N100 Quad-Core CPU (Up to 3.4GHz) 8GB DDR5, 2x M.2 PCIe Slots and a 2.5GbE Port (Diskless). This is perfect if you don’t want to DIY your NAS.
Contains affiliate links. I may earn a commission at no cost to you.
Why NFS Matters for Your Home Lab
Network File System (NFS) is the backbone of most serious home media setups. Unlike Samba (which can be sluggish) or FTP (which is a pain for media apps), NFS gives you near-native filesystem performance across your network. Your Jellyfin server, Sonarr, Radarr, and download clients can all share the same storage seamlessly.
But here’s the catch: NFS was designed back when networks were trusted and security was someone else’s problem. It assumes every client is honest about who they are. Spoiler alert: that’s not how the real world works.
Understanding NFS Security: Why Your Setup Matters
Before we dive into the technical stuff, let’s talk about why NFS security isn’t just paranoid overthinking. When you share a folder via NFS, you’re essentially saying “hey network, here’s some storage you can use.” The problem is that NFS trusts whatever user ID (UID) the client claims to be.
Think about it: if your client machine says “hey, I’m root (UID 0), give me access,” NFS just shrugs and says “sure thing, boss.” That client can now read, write, delete, and modify permissions on anything in your share. Not exactly what you had in mind when you just wanted to stream some movies.
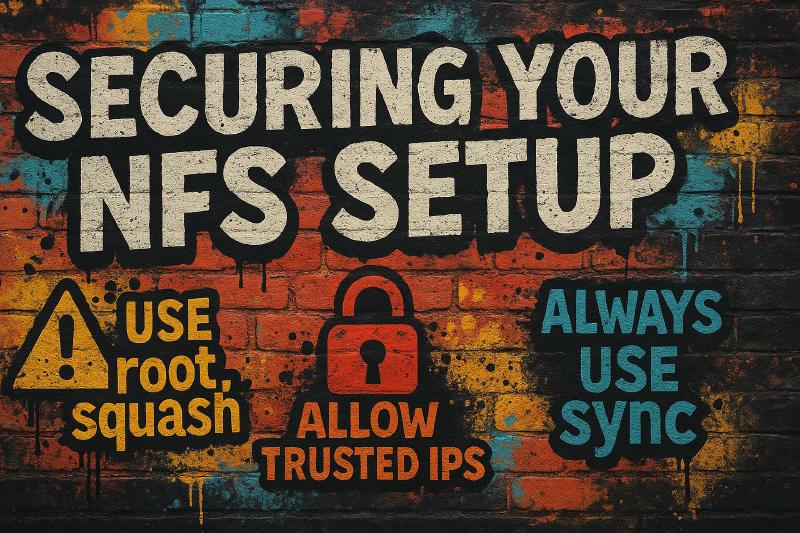
This is where “squashing” comes in. This is NFS’s way of saying “I don’t care who you claim to be, you’re getting mapped to this safe user instead.”
Setting Up the NFS Server
- Install NFS server:
sudo apt update && sudo apt install nfs-kernel-server
- Create your share directory. For media servers, something like
/media/storage:
Create the folder:
sudo mkdir -p /media/storage
Set the ownership of the folder:
sudo chown -R nobody:nogroup /media/storage
Set the permissions on the folder:
sudo chmod 755 /media/storage
nobody:nogroup? This gives us a safe default owner that unprivileged processes can work with.
-
Configure Your Exports
Open up
/etc/exportsin your favorite editor and add your share configuration. Here’s where the magic happens:
/media/storage 192.168.1.0/24(rw,sync,no_subtree_check,root_squash)
Let’s break this down:
/srv/media: The directory you’re sharing192.168.1.0/24: Your network subnet (adjust this to match your actual network)rw: Read-write accesssync: Wait for writes to complete before responding (more on this later)no_subtree_check: Skip path validation for better performanceroot_squash: Map remote root to nobody user
- Apply and Start NFS
sudo exportfs -ra sudo systemctl restart nfs-kernel-server sudo systemctl enable nfs-kernel-server
Note: The -ra flag tells NFS to re-export all shares and apply your new configuration.
NFS Squash Options: Your Security Toolkit
This is where most people get confused, so let’s make it crystal clear.
root_squash: The Sensible Default
/media/storage 192.168.1.100(rw,sync,root_squash)
When you use root_squash, any client claiming to be root (UID 0) gets mapped to the nobody user instead. This means:
- Root can’t change file ownership
- Root can’t set special permissions
- Root can’t access files owned by other users
- Your server stays safe from root-level shenanigans
Use this for: Pretty much everything unless you have a specific reason not to.
all_squash: Maximum Security (This is what I use)
/media/storage 192.168.1.100(rw,sync,all_squash,anonuid=1000,anongid=1000)
With all_squash, everyone gets mapped to the anonymous user you specify. This is like having a shared account where nobody can tell who did what.
no_root_squash: Danger Zone
/media/storage 192.168.1.100(rw,sync,no_root_squash)
This disables squashing entirely. Remote root stays root with full privileges.
| Option | Who’s Root on Client | Permissions on Server | Best For | Danger Level |
|---|---|---|---|---|
root_squash |
Root becomes nfsnobody |
Limited, can’t chown/setuid | Multi-user environments | 🟢 Low |
all_squash |
Everyone becomes anonuid |
Everyone writes as same safe user | Guest shares, dropzones | 🟡 Medium |
no_root_squash |
Root stays root | Full control | Proxmox backups (maybe) | 🔴 High |
NFS Client Setup: Connecting the Pieces
Now let’s get your client machines connected properly.
Install Client Tools
sudo apt update && sudo apt install nfs-common
Create Mount Points
sudo mkdir -p /mnt/media
Test Your Connection
Before making anything permanent, test your mount:
sudo mount -t nfs 192.168.1.5:/media/storage /mnt/media
If this works, you should be able to ls /mnt/media and see your shared content.
Make It Permanent
Add this line to /etc/fstab to mount automatically on boot:
192.168.1.5:/media/storage /mnt/media nfs defaults,nfsvers=4,hard,intr 0 0
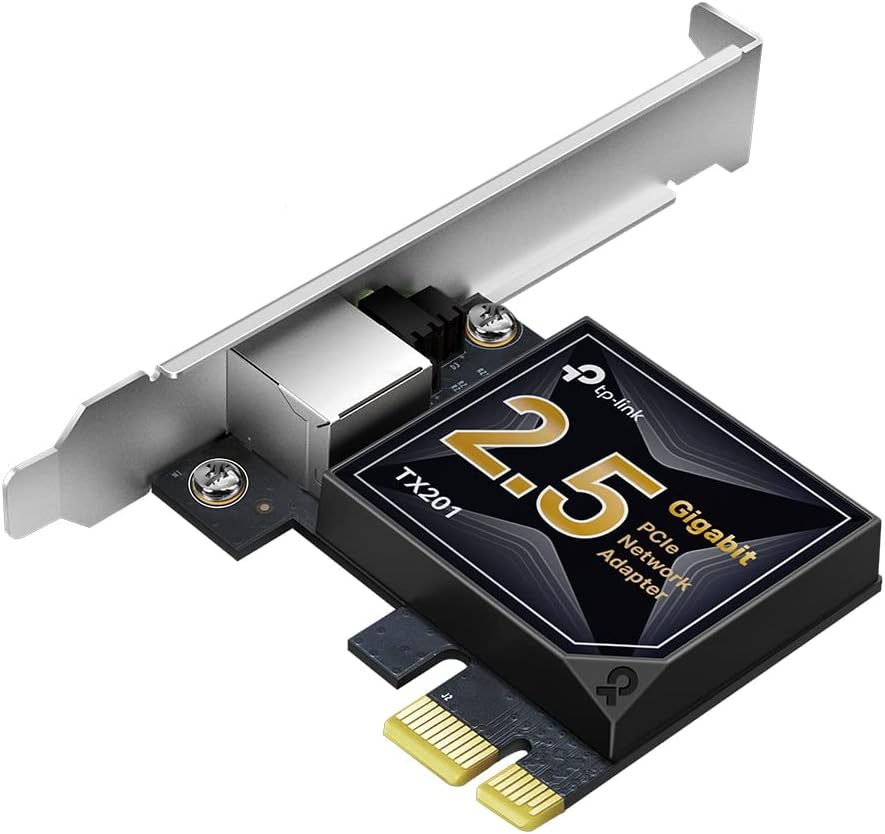
TP-Link 2.5GB PCIe Network Card (TX201) Plug-and-play 2.5GbE PCIe card that unlocks multi-gig speeds for about $30. Works out of the box with Proxmox, Linux, and Windows. No drama—just faster transfers.
Contains affiliate links. I may earn a commission at no cost to you.
Additional Details
The sync vs async Debate: Why Data Integrity Matters
Here’s a crucial decision that affects both performance and safety.
sync: The Safe Choice
With sync, your NFS server waits for each write to actually hit the disk before telling the client “yep, that’s saved.” It’s slower, but your data is actually safe.
async: The Fast and Furious Option
With async, the server says “sure, I’ll save that” and returns immediately, even if the data is still sitting in memory. It’s faster, but if your server crashes, you might lose recent writes.
The verdict: Use sync unless you’re running benchmarks or you enjoy living dangerously. Your media library is worth the small performance hit.
Solving the UID/GID Nightmare
This is where many NFS setups fall apart. Here’s the problem: your Jellyfin server runs as user ID 998 on one machine, but your download client runs as user ID 1001 on another. When they try to access the same files over NFS, permissions explode.
The Manual Approach
Align user IDs across all your machines:
# On each client machine
sudo usermod -u 1000 jellyfin
sudo usermod -u 1000 sonarr
sudo groupmod -g 1000 media
The Group Approach (Recommended)
Create a shared group and add all your media services to it:
# On the NFS server
sudo groupadd -g 2000 mediausers
sudo chgrp -R mediausers /media/storage
sudo chmod -R 775 /media/storage

# On each client
sudo usermod -a -G mediausers jellyfin
sudo usermod -a -G mediausers sonarr
This way, everyone in the mediausers group can read and write, regardless of their individual user IDs.
NFSv3 vs NFSv4: Choosing Your Version
Understanding the differences helps you make the right choice.
NFSv3: The Old Reliable
- Uses multiple ports (2049 plus random high ports)
- Separate daemons for locking and status
- Simpler protocol, potentially faster for basic operations
- Pain in the neck for firewalls
NFSv4: The Modern Choice
- Single port (2049)
- Built-in locking and security
- Better support for ACLs and modern features
- Slightly more overhead but much easier to secure
Mount Options That Actually Matter
The default mount options are okay, but you can do better:
192.168.1.5:/media/storage /mnt/media nfs hard,intr,nfsvers=4,rsize=1048576,wsize=1048576,noatime 0 0
Let’s break down what each option does:
hard: Don’t give up on network failures, keep retryingintr: Allow interruption with Ctrl+C if things get stucknfsvers=4: Force NFSv4 for better security and single-port operationrsize/wsize=1048576: Use 1MB read/write buffers for better performancenoatime: Don’t update access timestamps, reduces I/O overhead
Docker and NFS: The Right Way
Here’s a common mistake: mounting NFS shares directly inside Docker containers. Don’t do this. It’s unreliable and causes weird permission issues.
Instead, mount NFS on your Docker host and bind-mount into containers:
# Mount on the host first
sudo mount 192.168.1.5:/media/storage /mnt/media

# Then use in docker-compose.yml
    volumes:
      - /mnt/media:/data/movies
    user: "1000:1000"  # Match your media user
This approach is more reliable and gives you better control over permissions.
Firewall Configuration: Locking Down Access
Out of the box, NFSv3 can open multiple ports, which is a security nightmare. Here’s how to lock it down:
For NFSv3 (If You Must)
You’ll need to pin the additional services to specific ports. Add this to /etc/default/nfs-kernel-server:
RPCMOUNTDOPTS="--manage-gids --port 32767"
STATDOPTS="--port 32765 --outgoing-port 32766"
Then restart NFS and open the ports:
sudo systemctl restart nfs-kernel-server
sudo ufw allow from 192.168.1.0/24 to any port 2049
sudo ufw allow from 192.168.1.0/24 to any port 32765:32767
For NFSv4 (Recommended)
sudo ufw allow from 192.168.1.0/24 to any port 2049
Common NFS Problems and How to Fix Them
Stale File Handles
This happens when you move or delete files on the server while clients are accessing them. The fix is usually a remount:
sudo umount /mnt/media
sudo mount 192.168.1.5:/media/storage /mnt/media
To prevent this, avoid editing files directly on the NFS share. Instead, work on files locally and then move them into place when complete.
For example, if you’re processing a video file, edit it in /tmp/processing/movie.mkv and then mv /tmp/processing/movie.mkv to /mnt/media/movies/movie.mkv when done. This way, NFS clients either see the old file or the new file, never a half-written mess that causes stale handles.
Performance Issues
If NFS feels slow:
- Check your network, gigabit Ethernet minimum for media streaming
- Verify your disk I/O isn’t the bottleneck with
iostat -x 1 - Try increasing rsize/wsize values in your mount options
- Consider NFSv4 if you’re still on v3
Permission Denied Errors
Usually a UID/GID mismatch. Check:
- What user/group owns the files on the server?
- What user/group is your client process running as?
- Are your squash settings allowing the access you need?
Performance Tuning and Benchmarking
Don’t just assume your NFS setup is fast, measure it:
Basic Write Test
dd if=/dev/zero of=/mnt/media/testfile bs=1M count=1000
Real-World Performance Testing
Install fio for more realistic testing:
sudo apt install fio
Test random read/write (simulates media streaming)
fio --name=nfs-test --ioengine=libaio --rw=randrw --bs=64k --size=1G --numjobs=4 --runtime=60 --group_reporting --filename=/mnt/media/fiotest
Look for:
- Sustained throughput above 100MB/s for 4K media streaming
- Low latency (under 10ms for most operations)
- No dramatic performance drops under load
Advanced Security: Beyond Basic IP Filtering
Using hosts.allow and hosts.deny
Add an extra layer of access control:
Add this to /etc/hosts.allow:
rpcbind mountd nfsd statd lockd rquotad : 192.168.1.0/24
Add this to /etc/hosts.deny:
rpcbind mountd nfsd statd lockd rquotad : ALL
Network Segmentation
Consider putting your NFS traffic on a dedicated VLAN or subnet. This limits the blast radius if something goes wrong and makes monitoring easier.
Your NFS Pre-Flight Checklist
Before you call your setup “done,” verify:
- ✅ Squash options are configured for your security needs
- ✅ You’re using
syncfor data safety - ✅
no_subtree_checkis enabled for performance - ✅ IP restrictions are tight and tested from allowed/denied hosts
- ✅ Firewall rules only allow access from trusted networks
- ✅ User IDs are aligned or properly squashed
- ✅ Docker containers use host bind mounts, not direct NFS mounts
- ✅ Mount options include
hard,intr,nfsvers=4 - ✅ You’ve tested normal operations and permissions
Wrapping Up: NFS That Actually Works
Look, anyone can copy-paste some commands and get NFS technically functioning. But there’s a massive difference between “technically working” and “rock-solid reliable.” One approach gets you streaming tonight but leaves you troubleshooting permission disasters next month. The other gets you streaming tonight and still working flawlessly two years from now.
The security stuff isn’t paranoia, it’s insurance. Those squash settings and firewall rules seem like overkill until the day they save you from a client machine that’s been compromised or misconfigured. Your media server should be boring in the best possible way: it just works, day after day, without drama.
When you’ve done NFS right, you’ll forget it exists. Your Jellyfin scans will run smoothly, your download clients will move files without hiccups, and you’ll never get woken up by permission errors. That’s not luck, that’s good engineering.
Build it once, build it right, then move on to the next cool project in your lab. Your future self will thank you for not cutting corners.