If you’ve ever looked at your media collection and wondered why a 4K movie is eating up 50GB of storage while looking identical to a 10GB version, you’re ready for Tdarr. This powerful automation tool handles the tedious work of transcoding your video files, converting them to more efficient formats without sacrificing quality you’ll actually notice.
Tdarr isn’t just another media converter. It’s a complete workflow system that watches your library, analyzes your files, and automatically optimizes them based on rules you set. Think of it as having a dedicated assistant who never sleeps, constantly working to make your media collection smaller, more compatible, and easier to stream.
In this guide, I’ll walk through setting up Tdarr from scratch. You’ll learn how to install it and configure your first Intel QuickSync transcoding workflow. By the end, you’ll have a basic understanding on how to keep your media library optimized without any ongoing effort from you.
Intel® Core™ i5-12500 12th Generation Desktop Processor The Intel® Core™ i5-12500 offers strong single-thread performance and built-in Quick Sync hardware transcoding, making it an excellent CPU for running Tdarr and handling multiple concurrent transcodes. It’s ideal for DIY homelab builders who want efficient, reliable media processing without needing a discrete GPU. This processor is a great foundation for a Tdarr server.
Contains affiliate links. I may earn a commission at no cost to you.
If you manage a large media library, you know the drill: storage fills up fast, and manually transcoding files is about as fun as watching paint dry. This is where Tdarr comes in.
Tdarr is a transcoding and media management tool that handles the grunt work for you. Instead of babysitting HandBrake for hours, you set up rules once and let Tdarr automatically process your entire video collection in the background. It can remove unwanted audio tracks, compress, re-encode, and standardize files based on whatever criteria you define. All in the name of saving space. Hard drives have only gotten more expensive so now is the time to try and save space before adding another expensive hard dirve to your server.
The real game-changer? Distributed transcoding. You can spread the workload across multiple machines, turning that old laptop gathering dust into a transcoding workhorse. Set it up once, let it run, and watch terabytes of space magically reappear without sacrificing playable quality. It’s exactly what Plex, Jellyfin, and Emby users have been waiting for.
This guide covers will only cover installing, configuring, and troubleshooting Tdarr in an unprivileged LXC container. Whether you’re new to transcoding or haven’t touched it since the early HandBrake days, you’ll walk away with a practical setup that saves both time and storage without the usual headaches.
Why LXC Instead of Docker?
You might be wondering why this guide uses LXC containers instead of Docker, especially since most Tdarr tutorials out there are Docker-based. Here’s the reasoning behind this approach:
Direct Hardware Access
LXC containers run closer to the host system than Docker containers. When you’re sharing an iGPU between multiple services (like Jellyfin and Tdarr), LXC makes hardware passthrough significantly more straightforward. You get:
- Simpler GPU sharing: The iGPU can be accessed by multiple LXC containers simultaneously without complex device mapping or privileged modes
- Native performance: LXC containers have almost zero overhead compared to bare metal, making them ideal for transcoding workloads
- Persistent hardware access: The GPU stays available even after container restarts without additional Docker flags or volume mounts
Resource Isolation Without the Overhead
Docker adds multiple layers of abstraction that aren’t necessary for long-running services like Tdarr. LXC gives you:
- Lower memory footprint: No Docker daemon consuming resources in the background
- Direct systemd integration: Services start and stop like native system services
- Filesystem efficiency: No overlay filesystems slowing down video file I/O operations
Better Integration with Proxmox
If you’re running Proxmox (which most homelabbers are), LXC is first-class:
- Native Proxmox management: Create, clone, and backup containers through the web UI
- Snapshot support: Take instant snapshots before major configuration changes
- Built-in monitoring: Resource usage graphs and stats without installing additional tools
- No nested virtualization issues: Docker-in-VM can be problematic; LXC just works
When Docker Makes More Sense
Docker isn’t wrong—it’s just optimized for different use cases:
- Portability: If you need to move Tdarr between different hosts frequently, Docker’s image format makes this trivial
- Quick testing: Spinning up and destroying Docker containers is faster for experimentation
- No Proxmox: If you’re running on bare Ubuntu/Debian without Proxmox, Docker is simpler to set up
For a dedicated media server running on Proxmox where you want maximum transcoding performance and are already sharing GPU resources with other services, LXC is the better architectural choice. You get native performance, simpler hardware access, and better integration with your virtualization platform—all while using fewer system resources.
Understanding Tdarr and Why It Matters
Before we start spinning up containers and tweaking codec settings, let’s get clear on what Tdarr actually does. And more importantly, what it doesn’t do.
What Is Tdarr?
Tdarr is a conditional transcoding application. It looks at each video file in your library, runs it through a set of rules you define (like “Is this still using H.264?” or “Is the bitrate ridiculously high?”), and then decides whether to transcode it, leave it alone, or skip it entirely.
Picture Tdarr as a quality control inspector on an assembly line. Each file gets examined, processed if needed, and passed along based on the standards you’ve set. Behind the scenes, it leverages proven tools like FFmpeg and HandBrake to do the heavy lifting, so you get reliable performance and industry-standard compression without having to become a command-line wizard.
Why Use Tdarr?
Here’s why I swear by Tdarr:
- Storage Efficiency: Convert those space-hogging H.264 or MPEG-2 files to modern H.265 (HEVC) and watch your storage usage drop by up to 50% without sacrificing watchable quality.
- Uniform Playability: Standardize your codecs and container formats so everything plays smoothly across Plex, Jellyfin, smart TVs, and mobile apps. No more “this format is not supported” messages.
- Set-and-Forget Automation: Configure your preferences once, and Tdarr handles the monitoring, processing, and updating automatically. Your media library maintains itself.
- Scalability: Add multiple worker nodes for distributed transcoding when you need to process hundreds or thousands of files without waiting weeks.
If you’ve ever watched Jellyfin refuse to play an unsupported codec, or wondered why your server storage is maxed out despite regular cleanup, Tdarr solves both problems for the long haul.
Seagate Barracuda 24TB Internal Hard Drive A large-capacity hard drive like the Seagate Barracuda 24TB is crucial for storing your growing media library and transcoded files managed by Tdarr. Its reliability and size make it perfect for bulk storage in a homelab or media server environment. This drive ensures you have plenty of space for all your media needs.
Contains affiliate links. I may earn a commission at no cost to you.
Step 1: Installing Tdarr via Unprivileged LXC
Why an LXC? Because I’m sharing my iGPU with Jellyfin who is also installed in an LXC.
My Jellyfin guide:
Jellyfin + Intel QuickSync in Unprivileged LXC - The Complete Guide
Prerequisites Checklist
Before starting, ensure you have:
- Proxmox VE with an unprivileged LXC running Debian 13
- Intel CPU with QuickSync (12th gen or newer recommended)
- Basic command-line familiarity
- Network access to your LXC container
- Media files stored on your Proxmox host with known paths
- At least 8GB RAM allocated to the LXC
Add the Debian Non-Free Component
sudo nano /etc/apt/sources.list.d/debian.sources
On the components line add non-free to the end.
Types: deb
URIs: http://deb.debian.org/debian
Suites: trixie trixie-updates
Components: contrib main non-free
Signed-By: /usr/share/keyrings/debian-archive-keyring.gp
Add a new source for MKVToolNix
Pull the gpg key:
wget -O /etc/apt/keyrings/gpg-pub-moritzbunkus.gpg https://mkvtoolnix.download/gpg-pub-moritzbunkus.gpg
Create a new source File:
sudo nano /etc/apt/sources.list.d/mkvtoolnix.sources
Paste this:
Types: deb
URIs: https://mkvtoolnix.download/debian/
Suites: trixie
Components: main
Signed-By: /etc/apt/keyrings/gpg-pub-moritzbunkus.gpg
Install HandBrake, ffmpeg, MKVtoolNix and other required tools
sudo apt update && sudo apt install -y sudo curl unzip ca-certificates gnupg wget vainfo libva2 intel-media-va-driver-non-free libva-drm2 libva2 pciutils handbrake-cli ffmpeg mkvtoolnix
Add Users and Groups
Create your media group that has read and write access to your media files. I use media with a gid of 1001 for mine make sure to use yours if it is different.
sudo addgroup --gid 1001 media
Create the Tdarr User:
sudo useradd -r -m -d /opt/tdarr -s /usr/sbin/nologin tdarr
Add the video, render and media groups to the Tdarr user:
sudo usermod -aG render,video,media tdarr
Reset the group membership without logging out:
sudo loginctl enable-linger tdarr 2>/dev/null || true
Step 2: LXC Config Changes
Stop the container.
Add these lines to your /etc/pve/lxc/CT#.conf
# Bind mounts your media to the LXC
mp0: /media/Storage/Movies,mp=/media/Movies
mp1: /media/Storage/Shows,mp=/media/Shows
# Maps permissions to the host
lxc.idmap: u 0 100000 65536
lxc.idmap: g 0 100000 992
lxc.idmap: g 992 104 1 # 992 is the LXC's Render GID and 104 is the Host's
lxc.idmap: g 993 100994 7
lxc.idmap: g 1001 1001 1 # 1001 is both the LXC's and Host's GID for my media group
lxc.idmap: g 1002 101002 64534
# Passthrough the iGPU
lxc.mount.entry: /dev/dri/ dev/dri/ none bind,optional,create=dir
lxc.cgroup2.devices.allow: c 226:* rwm
Here is my Host’s /etc/subgid file:
root:1000:1
root:1001:1
root:100000:65536
# Render Group
root:104:1
# Media Group
root:1001:1
These lines need to be in here to properly map the GIDs for permissions to work properly. Restart the container.
lxc.idmap lines map user and group IDs between your LXC container and the Proxmox host. This allows the tdarr user inside the container to access your media files and the GPU on the host. The numbers (992, 1001, etc.) must match your specific system. If you’re unfamiliar with LXC ID mapping, check out Unprivileged LXC containers first.
Step 3: Install Tdarr
Now we are ready to install Tdarr
Navigate to /opt/tdarr:
cd /opt/tdarr
Pull the Tdarr install script:
wget https://storage.tdarr.io/versions/2.17.01/linux_x64/Tdarr_Updater.zip
Unzip the install package:
unzip Tdarr_Updater.zip
Create two additional directories for Tdarr’s temporary files and cache:
mkdir temp cache
Make the script executable:
sudo chmod +x Tdarr_Updater
Run the installer:
sudo ./Tdarr_Updater
groups tdarr and verify you see: tdarr video render media
Inital Tdarr Run
Initial Run of Tdarr_Server:
/opt/tdarr/Tdarr_Server/Tdarr_Server
Let this run for a minute or so. Errors are fine for now. We are just creating the JSON config file.
Initial run of Tdarr_Node:
/opt/tdarr/Tdarr_Node/Tdarr_Node
Again errors are fine.
Now set the owner for the Tdarr folders:
sudo chown -R tdarr:tdarr /opt/tdarr/
Tdarr Server JSON Config
You now have a basic config file for the server. We need to set the serverIP, handbrakePath, and ffmpegPath
nano /opt/tdarr/configs/Tdarr_Server_Config.json
After modifying, it should look something like this:
{
  "serverPort": "8266",
  "webUIPort": "8265",
  "serverIP": "172.27.0.14",
  "serverBindIP": false,
  "serverDualStack": false,
  "handbrakePath": "/usr/bin/HandBrakeCLI",
  "ffmpegPath": "/usr/bin/ffmpeg",
  "logLevel": "INFO",
  "mkvpropeditPath": "",
  "ccextractorPath": "",
  "openBrowser": true,
  "cronPluginUpdate": "",
  "auth": false,
  "authSecretKey": "tsec_NotARealKey",
  "maxLogSizeMB": 10,
  "seededApiKey": ""
}
Tdarr Node JSON Config
open the basic config file. We need to set serverURL, ServerIP, handbrakePath, ffmpegPath, and mkvpropeditPath
nano /opt/tdarr/configs/Tdarr_Node_Config.json
After modifying, it should look something like this:
{
  "nodeName": "jaded-joey",
  "serverURL": "http://172.27.0.14:8266",
  "serverIP": "172.27.0.14",
  "serverPort": "8266",
  "handbrakePath": "/usr/bin/HandBrakeCLI",
  "ffmpegPath": "/usr/bin/ffmpeg",
  "mkvpropeditPath": "/usr/bin/mkvpropedit",
  "pathTranslators": [
    {
      "server": "",
      "node": ""
    }
  ],
  "nodeType": "mapped",
  "unmappedNodeCache": "/opt/tdarr/unmappedNodeCache",
  "logLevel": "INFO",
  "priority": -1,
  "cronPluginUpdate": "",
  "apiKey": "",
  "maxLogSizeMB": 10,
  "pollInterval": 2000,
  "startPaused": false
}
Create Tdarr Services
To make sure it starts automatically we need to create two services. One for the server and one for the node.
Server
sudo nano /etc/systemd/system/tdarr-server.service
Paste this:
[Unit]
Description=Tdarr Server
After=network-online.target
Wants=network-online.target

[Service]
Type=simple
User=tdarr
Group=tdarr
WorkingDirectory=/opt/tdarr/Tdarr_Server
Environment=TDARR_DATA=/opt/tdarr/configs
Environment=TDARR_LOGS=/opt/tdarr/logs
ExecStart=/opt/tdarr/Tdarr_Server/Tdarr_Server
Restart=on-failure
# Resource limits (tune as desired)
CPUAccounting=true
MemoryAccounting=true
CPUQuota=100%
MemoryMax=2G

[Install]
WantedBy=multi-user.target
Node
sudo nano /etc/systemd/system/tdarr-node.service
Paste this (Make sure to change the TDARR_SERVER_HOST to your IP):
[Unit]
Description=Tdarr Node
After=tdarr-server.service
Wants=tdarr-server.service

[Service]
Type=simple
User=tdarr
Group=tdarr
WorkingDirectory=/opt/tdarr/Tdarr_Node
Environment=TDARR_NODE_NAME=tdarr-node-01
Environment=TDARR_SERVER_HOST=172.27.0.14
Environment=TDARR_FFMPEG=/usr/bin/ffmpeg
Environment=TDARR_LOGS=/opt/tdarr/logs
Environment=TDARR_TEMP=/opt/tdarr/temp
Environment=TDARR_CACHE=/opt/tdarr/cache
ExecStart=/opt/tdarr/Tdarr_Node/Tdarr_Node
Restart=on-failure
# Resource limits (tune as desired)
CPUAccounting=true
MemoryAccounting=true
CPUQuota=150%
MemoryMax=6G
IOSchedulingClass=best-effort
IOSchedulingPriority=7

[Install]
WantedBy=multi-user.target
Enable and Start the new Services
sudo systemctl daemon-reload
sudo systemctl enable tdarr-server
sudo systemctl start tdarr-server
sudo systemctl enable tdarr-node
sudo systemctl start tdarr-node
Check the status of the services to make sure they are running:
Server
sudo systemctl status tdarr-server
Should look like this:
* tdarr-server.service - Tdarr Server
     Loaded: loaded (/etc/systemd/system/tdarr-server.service; enabled; preset: enabled)
     Active: active (running) since Wed 2025-10-15 11:15:48 MDT; 1 day 20h ago
 Invocation: 5adc45d529564e898b9e51e29917de75
   Main PID: 7535 (Tdarr_Server)
      Tasks: 21 (limit: 76615)
     Memory: 281.5M (max: 2G, available: 1.7G, peak: 2G, swap: 31.6M, swap peak: 38.3M)
        CPU: 42min 13.105s
     CGroup: /system.slice/tdarr-server.service
             |-7535 /opt/tdarr/Tdarr_Server/Tdarr_Server
             `-7541 Tdarr_Server
Node
sudo systemctl status tdarr-node
Should look like this:
* tdarr-node.service - Tdarr Node
     Loaded: loaded (/etc/systemd/system/tdarr-node.service; enabled; preset: enabled)
     Active: active (running) since Wed 2025-10-15 11:44:19 MDT; 1 day 20h ago
 Invocation: 40a1033a1c984181a6f4c4c399398d4b
   Main PID: 8673 (Tdarr_Node)
      Tasks: 187 (limit: 76615)
     Memory: 2.7G (max: 6G, available: 3.2G, peak: 6G, swap: 11.3M, swap peak: 184.3M)
        CPU: 5h 37min 41.929s
     CGroup: /system.slice/tdarr-node.service
Step 4: Testing QuickSync
Before we go any further we need to make sure QuickSync is working.
Run this quick test
sudo -u tdarr env LIBVA_DRIVER_NAME=iHD \
  vainfo --display drm --device /dev/dri/renderD128 | head -n 60
➤ Expected Results
libva info: VA-API version 1.22.0
libva info: User environment variable requested driver 'iHD'
libva info: Trying to open /usr/lib/x86_64-linux-gnu/dri/iHD_drv_video.so
libva info: Found init function __vaDriverInit_1_22
libva info: va_openDriver() returns 0
Trying display: drm
vainfo: VA-API version: 1.22 (libva 2.22.0)
vainfo: Driver version: Intel iHD driver for Intel(R) Gen Graphics - 25.2.3 ()
vainfo: Supported profile and entrypoints
      VAProfileNone                   : VAEntrypointVideoProc
      VAProfileNone                   : VAEntrypointStats
      VAProfileMPEG2Simple            : VAEntrypointVLD
      VAProfileMPEG2Simple            : VAEntrypointEncSlice
      VAProfileMPEG2Main              : VAEntrypointVLD
      VAProfileMPEG2Main              : VAEntrypointEncSlice
      VAProfileH264Main               : VAEntrypointVLD
      VAProfileH264Main               : VAEntrypointEncSlice
      VAProfileH264Main               : VAEntrypointFEI
      VAProfileH264Main               : VAEntrypointEncSliceLP
      VAProfileH264High               : VAEntrypointVLD
      VAProfileH264High               : VAEntrypointEncSlice
      VAProfileH264High               : VAEntrypointFEI
      VAProfileH264High               : VAEntrypointEncSliceLP
      VAProfileVC1Simple              : VAEntrypointVLD
      VAProfileVC1Main                : VAEntrypointVLD
      VAProfileVC1Advanced            : VAEntrypointVLD
      VAProfileJPEGBaseline           : VAEntrypointVLD
      VAProfileJPEGBaseline           : VAEntrypointEncPicture
      VAProfileH264ConstrainedBaseline: VAEntrypointVLD
      VAProfileH264ConstrainedBaseline: VAEntrypointEncSlice
      VAProfileH264ConstrainedBaseline: VAEntrypointFEI
      VAProfileH264ConstrainedBaseline: VAEntrypointEncSliceLP
      VAProfileHEVCMain               : VAEntrypointVLD
      VAProfileHEVCMain               : VAEntrypointEncSlice
      VAProfileHEVCMain               : VAEntrypointFEI
      VAProfileHEVCMain               : VAEntrypointEncSliceLP
      VAProfileHEVCMain10             : VAEntrypointVLD
      VAProfileHEVCMain10             : VAEntrypointEncSlice
      VAProfileHEVCMain10             : VAEntrypointEncSliceLP
      VAProfileVP9Profile0            : VAEntrypointVLD
      VAProfileVP9Profile0            : VAEntrypointEncSliceLP
      VAProfileVP9Profile1            : VAEntrypointVLD
      VAProfileVP9Profile1            : VAEntrypointEncSliceLP
      VAProfileVP9Profile2            : VAEntrypointVLD
      VAProfileVP9Profile2            : VAEntrypointEncSliceLP
      VAProfileVP9Profile3            : VAEntrypointVLD
      VAProfileVP9Profile3            : VAEntrypointEncSliceLP
      VAProfileHEVCMain12             : VAEntrypointVLD
      VAProfileHEVCMain12             : VAEntrypointEncSlice
      VAProfileHEVCMain422_10         : VAEntrypointVLD
      VAProfileHEVCMain422_10         : VAEntrypointEncSlice
      VAProfileHEVCMain422_12         : VAEntrypointVLD
      VAProfileHEVCMain422_12         : VAEntrypointEncSlice
      VAProfileHEVCMain444            : VAEntrypointVLD
      VAProfileHEVCMain444            : VAEntrypointEncSliceLP
      VAProfileHEVCMain444_10         : VAEntrypointVLD
      VAProfileHEVCMain444_10         : VAEntrypointEncSliceLP
      VAProfileHEVCMain444_12         : VAEntrypointVLD
      VAProfileHEVCSccMain            : VAEntrypointVLD
      VAProfileHEVCSccMain            : VAEntrypointEncSliceLP
      VAProfileHEVCSccMain10          : VAEntrypointVLD
      VAProfileHEVCSccMain10          : VAEntrypointEncSliceLP
      VAProfileHEVCSccMain444         : VAEntrypointVLD
      VAProfileHEVCSccMain444         : VAEntrypointEncSliceLP
      VAProfileAV1Profile0            : VAEntrypointVLD
If you see Driver version: Intel iHD driver for Intel(R) Gen Graphics - 25.2.3 it is working and we can move on to installing Tdarr.
intel_gpu_top
Step 5: Access the web interface & Initial Configuration Walkthrough
Open your browser and navigate to: http://YourServerIP:8265.
The Tdarr dashboard should greet you, ready for configuration.
If it opens CONGRATULATIONS! you have Tdarr up and running.
/opt/tdarr/configs/Tdarr_Server_Config.json by setting "auth": true and configuring credentials, or restrict access using your firewall. For local network-only use, this isn’t a concern.
When you first access Tdarr, you’ll see the main dashboard with several tabs across the top. Here’s what to do first:
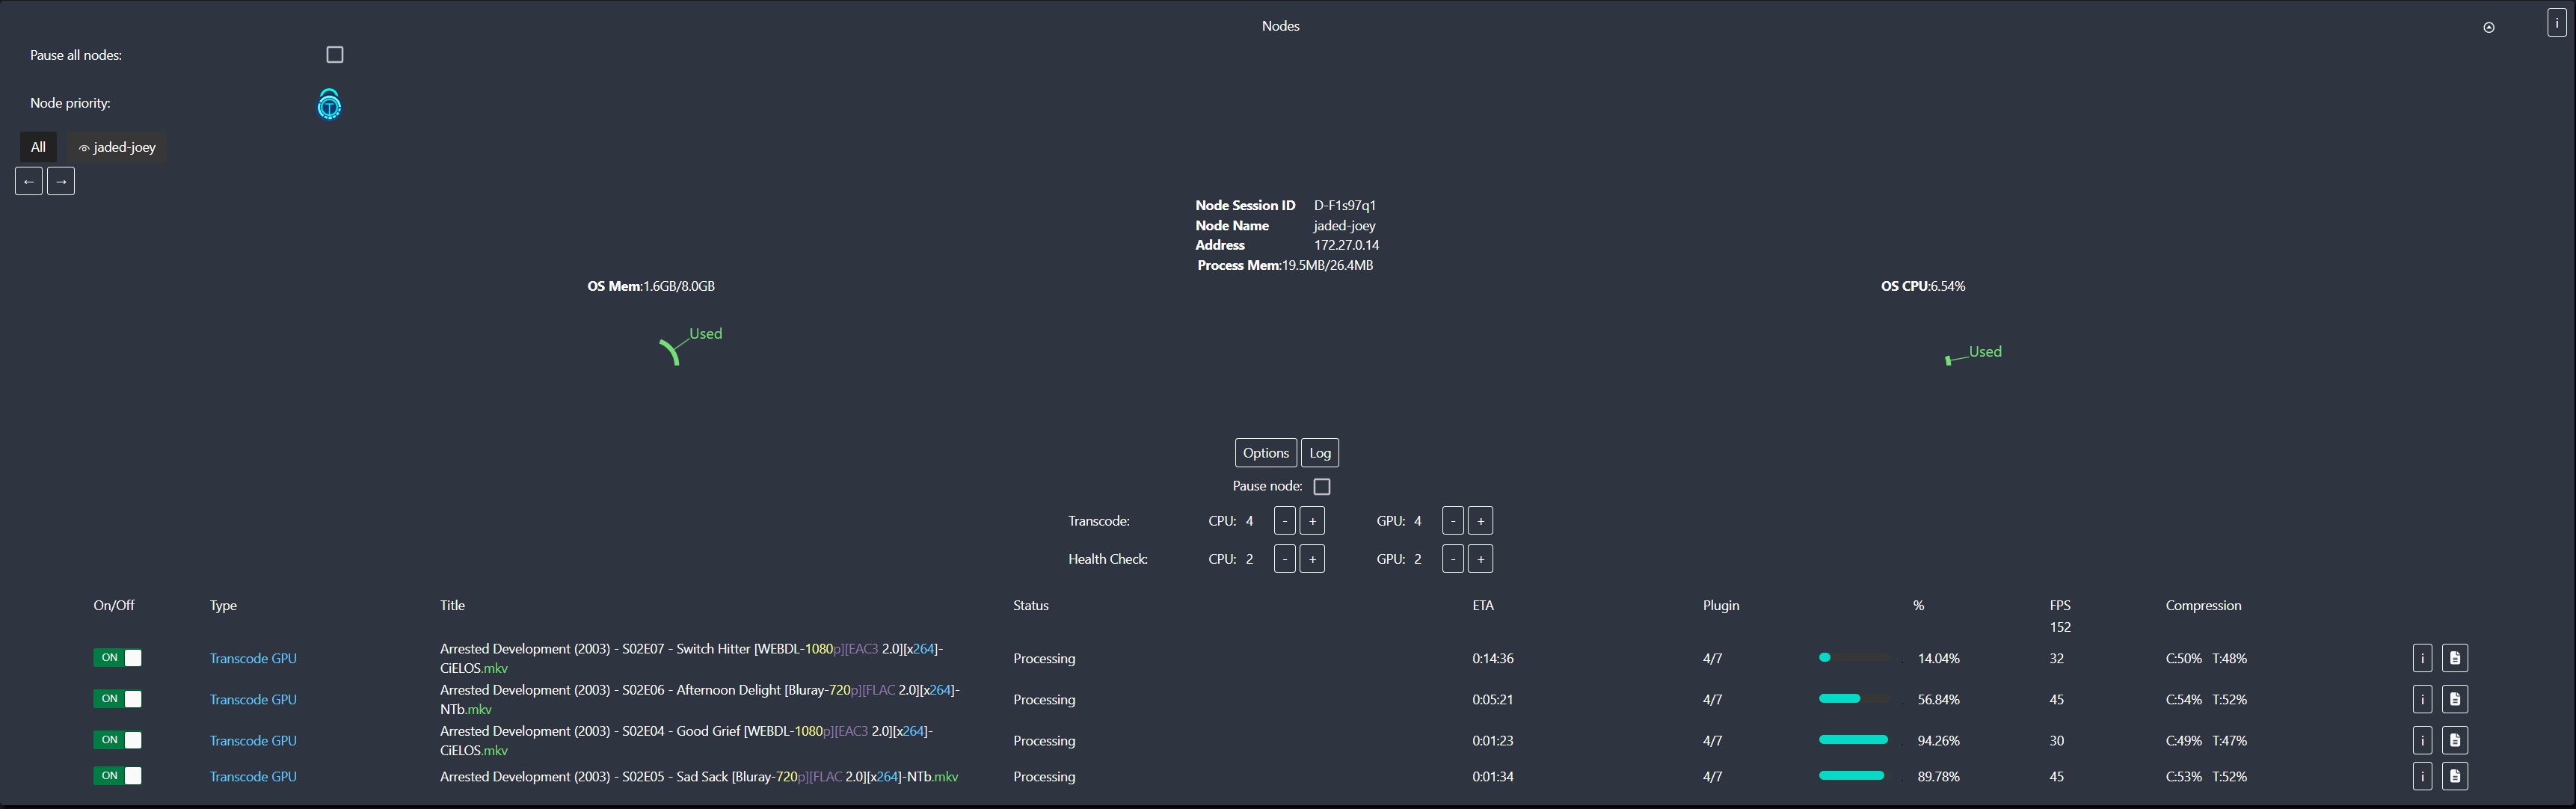
Verify Your Node is Connected
- Look for the Nodes section on the main page
- You should see your node listed (named something like “jaded-joey”)
- Click on the node name to see detailed stats
If your node isn’t showing up:
- Double-check the node service is running:
sudo systemctl status tdarr-node - Verify the
serverIPmatches in both JSON configs - Check the logs:
sudo journalctl -u tdarr-node -f
This is what it should look like:
Configure Hardware Acceleration
Before adding libraries, make sure Tdarr knows to use QuickSync:
- Click on your node in the Nodes tab
- Scroll down to Transcode Options
- Under Hardware Encoding, select “Any (nvenc,qsv,vaapi)”
- Save the changes
This ensures Tdarr uses your iGPU instead of hammering your CPU.
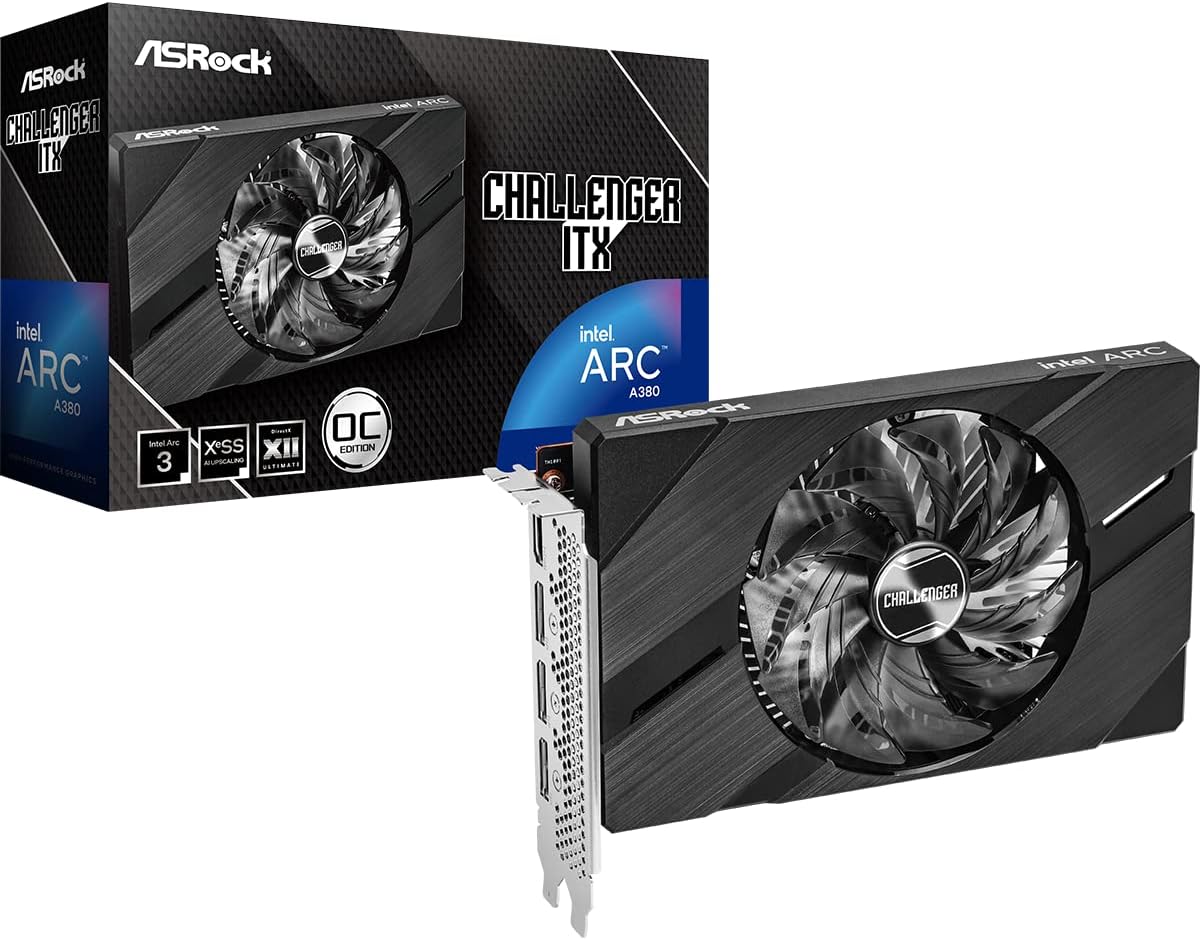
ASRock Intel ARC A380 Challenger The ASRock Intel ARC A380 Challenger provides modern hardware transcoding support (AV1/HEVC/H.264), which is essential for efficient and fast media processing in Tdarr. Offloading transcoding tasks from your CPU, it ensures smooth operation and maximizes your server’s performance. It’s a cost-effective way to boost your Tdarr setup for self-hosted media servers.
Contains affiliate links. I may earn a commission at no cost to you.
Step 6: Getting Comfortable With Tdarr
Now for the fun part: Tdarr’s web dashboard is your command center for everything media transcoding. The interface is refreshingly straightforward, organized into four main sections that actually make sense:
- Libraries: Tell Tdarr which folders to watch and process
- Transcode Settings: Set up your conversion rules and choose plugins
- Nodes: Monitor your transcoding workers (yes, you can run multiple)
- Logs: Watch the real-time activity feed and catch any hiccups
Setting Up Your First Library
Time to point Tdarr at your media collection. This is where those bind mount mappings from earlier pay off:
- In the sidebar, click Libraries → Add Library.
- Give it a descriptive name like “Movies” or “TV Shows” (you’ll thank yourself later).
- Set the folder path to match what you mapped in your LXC (like
/media/Movies). - Set the library type to “Video.”
- Click Save.
Tdarr immediately starts scanning that directory, cataloging every video file it finds. Depending on your collection size, this initial scan might take a few minutes, but you’ll see the progress in real time through the logs.
Step 7: Defining Transcoding Rules
Here’s where Tdarr gets interesting. Rules are the brain of your operation: they decide which files get processed and how. Think of them as your personal media assistant that never sleeps.
Creating Conditional Rules
Every rule follows a simple IF → THEN logic. If a file meets certain conditions, Tdarr takes a specific action. For example:
- Condition: File codec is H.264
- Action: Transcode to H.265
Setting this up is straightforward:
- Navigate to the Plugins & Settings menu.
- Add a new plugin chain for your library.
- Select relevant plugins (e.g., “Transcode using FFmpeg to H.265”).
- Adjust plugin parameters like bitrate or CRF (Constant Rate Factor) for quality control.
- Add pre-check plugins like “Skip file if already H.265” to avoid unnecessary work.
Once configured, Tdarr automatically queues any file that doesn’t meet your requirements for conversion. No more manual checking or guesswork.
Choosing the Right Codec and Container
Your codec and container choices should match where you actually watch your content. There’s no point optimizing for mobile if you’re streaming to a 65-inch TV.
| Playback Environment | Recommended Codec | Container | Notes |
|---|---|---|---|
| Plex / Jellyfin | H.265 (HEVC) | MKV or MP4 | Widely supported, efficient |
| Direct-to-TV | H.264 (AVC) | MP4 | Safest, but larger size |
| Mobile | H.265 | MP4 | Excellent compression |
| Archival Storage | H.265 + 10-bit | MKV | High quality, smaller storage |
For most home server setups, H.265 MKV hits the sweet spot: great compression, broad compatibility, and future-proof enough that you won’t be doing this again next year.
A Practical Example: H.264 to H.265 Conversion
Let’s walk through setting up a real transcoding rule. This example converts H.264 files to H.265 while maintaining quality:
- Navigate to Libraries and select your library
- Click Transcode Options → Plugin Stack
- In the Pre-Processing section, add:
- Check if file is H264 (this filters which files to process)
- In the Transcode section, add:
- Transcode using FFmpeg - H265 QuickSync
- Configure the plugin settings:
- CRF: Set to 23 (good balance of quality/size)
- Preset: Use “medium”
- Hardware Acceleration: Enabled
- In Post-Processing, add:
- Check file health (validates the transcode worked)
- Click Save Plugin Stack
Now Tdarr will automatically:
- Scan your library for H.264 files
- Transcode them to H.265 using your iGPU
- Verify the output is valid
- Replace the original file (or keep both, depending on your settings)
Here is what I’m currently using:
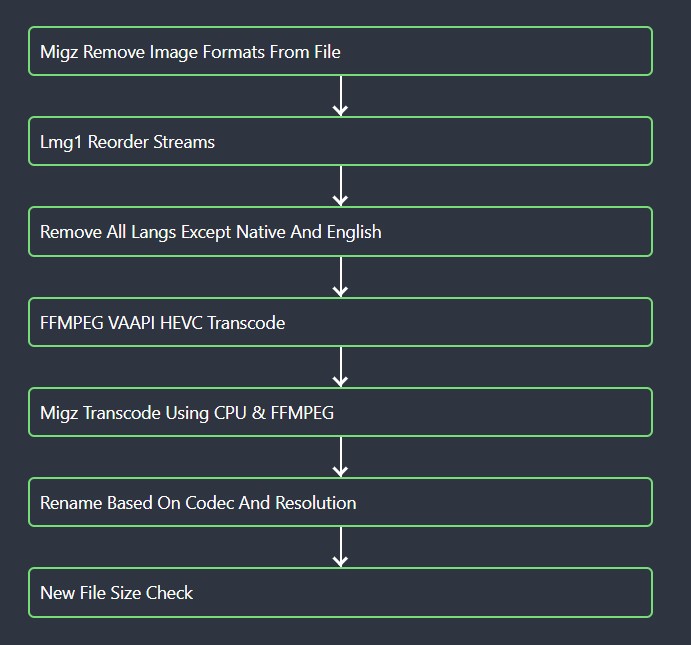
Start with one folder to test before applying this to your entire library.
Monitoring Your Transcodes
Once you’ve set up your rules, here’s how to track what’s happening:
Check the Queue:
- Go to Transcode → Queue to see pending files
- The queue shows how many files are waiting and their estimated completion time
Watch Active Transcodes:
- Click the Staging tab to see files currently being processed
- You’ll see real-time stats: current FPS, progress percentage, and time remaining
Review Completed Files:
- The Transcode → History tab shows finished jobs
- Look for the “Healthy” status to confirm successful transcodes
- Check the space savings column to see how much storage you’ve reclaimed
sudo journalctl -u tdarr-node -f in terminal) to catch any errors early.
Step 8: Verifying Output Quality
Here’s the thing about Tdarr: it’ll happily transcode your entire library without questioning whether the results actually look good. Quality control is entirely on you, which means you need to define what “acceptable” means for your setup.
Options for Quality Verification
- Visual spot-checking: Grab a few random transcoded videos and watch them side-by-side with the originals. Your eyes are still the best quality detector.
- Bitrate inspection: Fire up MediaInfo or similar tools to verify the output bitrate and codec specs match what you configured.
- Plugin-based checks: Some community plugins can automate verification by comparing resolution, color depth, or other metrics before marking a transcode as complete.
If your output quality isn’t hitting the mark, start by tweaking your CRF value. Remember: lower CRF means higher quality but larger file sizes. You can also adjust bitrate ceilings if you’re using constant bitrate encoding instead.
The key is finding that sweet spot between file size savings and visual quality that works for your library and viewing habits.
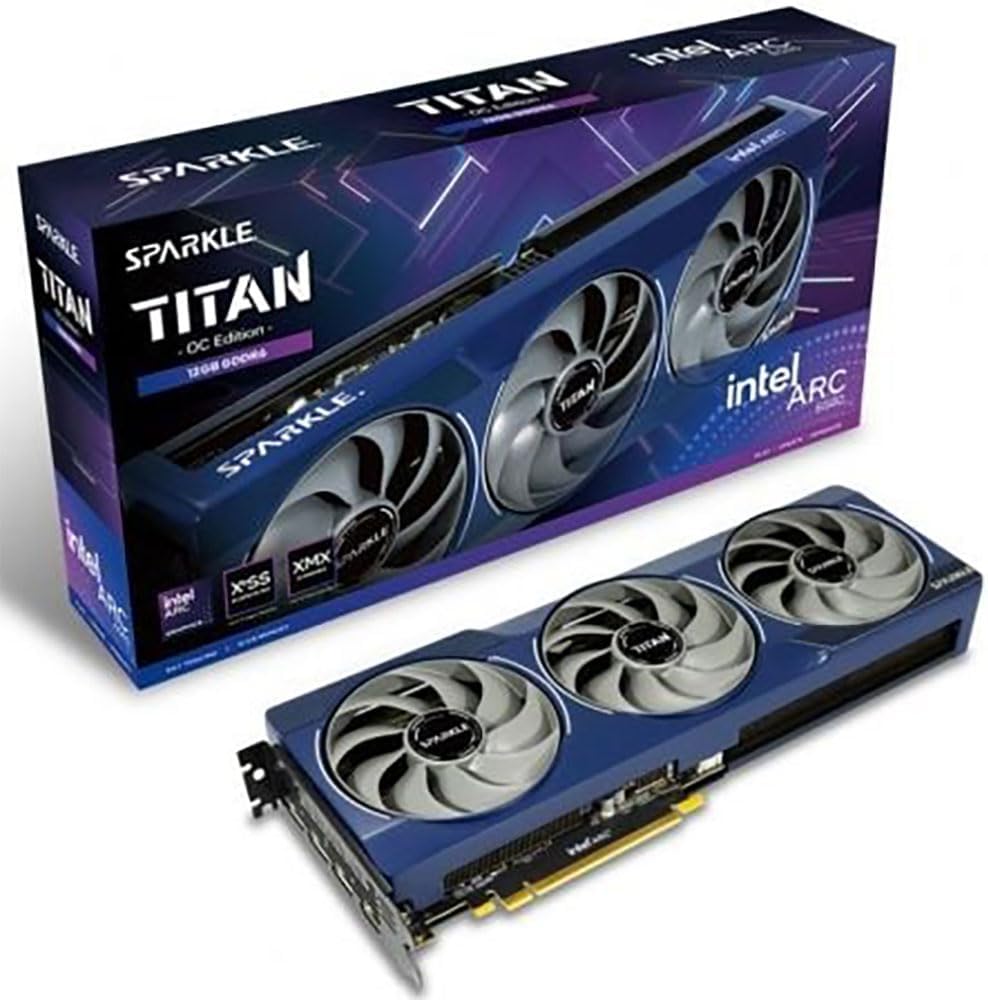
Sparkle Intel Arc B580 Titan A midrange Battlemage card with 12GB GDDR6 and a tri-fan TORN 2.0 cooler that punches hard at 1080p–1440p, plus full-stack media engines (AV1/HEVC/H.264 encode/decode) that make it great for gaming rigs or Plex/Jellyfin transcoding. Outputs include HDMI 2.1 and DP 2.1 with support for up to four displays.
Contains affiliate links. I may earn a commission at no cost to you.
Step 9: Common Pitfalls & How to Avoid Them
Even with the best setup, Tdarr can throw you some curveballs. Here are the mistakes that trip up most people and how to dodge them:
| Pitfall | Description | Solution |
|---|---|---|
| Missing codecs | FFmpeg plugins fail due to missing libraries | Use official FFmpeg installations |
| Slow transcoding | Low CPU or using software encoding | Enable hardware acceleration if supported (e.g., Intel Quick Sync, NVIDIA NVENC) |
| Files not being processed | Rule misconfiguration | Double-check rule logic (“if already H.265” can skip intended files) |
| Node not connecting | Firewall or wrong IP | Verify Tdarr_ServerIP and matching port (8266) |
| No storage gain | Using generous bitrate | Lower CRF or target bitrate levels in transcoding profile |
The “files not being processed” issue deserves special attention. I’ve seen people scratch their heads for hours because they set up a rule that says “skip if already H.265” but then wonder why their H.265 files aren’t getting processed. The rule is doing exactly what you told it to do.
Troubleshooting Tdarr
Even the best Tdarr setup will occasionally throw you a curveball. Here are the most common issues you’ll encounter and how to fix them without losing your sanity:
Problem 1: “Plugin failed” messages
When plugins refuse to cooperate, it’s usually one of these culprits:
Possible causes:
- Syntax errors in parameters
- Missing dependency
- FFmpeg unable to read specific container types
Fix:
- Update to the latest Tdarr first. Half the time, someone already fixed your problem.
- Double-check plugin settings against the FFmpeg syntax.
- Try another plugin (e.g., HandBrake-based instead of FFmpeg).
Problem 2: Transcodes crawling along at glacial speed
Nothing kills enthusiasm like watching a 2-hour movie take 8 hours to transcode.
Possible causes:
- Software-only encoding (your CPU is doing all the heavy lifting)
- High CRF (quality) or filters causing slowdowns
- Storage bottleneck from slow I/O
Fix:
- Ensure your hardware acceleration for your iGPU is working.
- Test with a higher CRF number or skip extra filters temporarily.
Problem 3: Quality looks terrible
Fix:
- Lower your CRF value (e.g., from 28 to 23). Lower numbers mean better quality.
- Use two-pass encoding for higher fidelity when quality matters most.
- Make sure you’re not transcoding already compressed H.265 files again unnecessarily. That’s like photocopying a photocopy.
FAQs About Tdarr
➤ What is the primary purpose of Tdarr?
➤ How does Tdarr handle distributed transcoding?
➤ Can Tdarr be used with Jellyfin or Plex?
➤ How do I verify the quality of transcoded files?
➤ What are common transcoding options?
Conclusion
Tdarr is one of those rare tools that, once set up, silently makes your digital life better. By combining automation, compression efficiency, and extensibility, it turns the painful, time-consuming process of media re-encoding into a set-it-and-forget-it workflow.
For media server owners, especially those running Plex or Jellyfin, Tdarr doesn’t just save time: it saves terabytes. Whether you want to reclaim disk space, reduce network stress, or enjoy smoother playback across all devices, Tdarr’s rules-based automation and distributed transcoding give you a scalable, future-proof solution.
If you’ve been putting off optimizing your library because transcoding sounds like a weekend-killing chore, try Tdarr through an LXC this weekend. You’ll be amazed how much cleaner and lighter your media setup feels by Monday.
Next Steps
- Explore Tdarr’s official documentation for advanced plugin scripting.
- Consider integrating hardware acceleration for maximum speed.
- Dive into creating complex workflows to manage your media.
- Join the Tdarr community forum to exchange plugin recipes and troubleshooting tips.