Do you need to keep a monitor and keyboard connected to your server? Nope. SSH lets you access your server’s command prompt directly from your Windows, Mac, or Linux computer. You’ve probably heard about SSH in tech forums or tutorials—it’s a powerful tool that allows you to control your server from anywhere on your local network.
But before we dive in, there’s one crucial rule to remember: Do not expose your SSH connection to the internet unless you’re absolutely sure of what you’re doing and have a solid reason for it.
So, what exactly is SSH, and how can you use it? Let’s break it down step by step.
What Is SSH, and Why Should You Care?
SSH stands for Secure Shell, a protocol that allows you to securely access and manage a server over a network. Imagine being able to control your server from your laptop while sitting on the couch—no monitor or keyboard required. That’s the power of SSH.
With SSH, you can run commands, transfer files, and troubleshoot issues without ever touching your server physically. It’s a game-changer when setting up a media server or managing other home-based projects.
Why You Shouldn’t Expose SSH to the Internet
Before we get into the details, let’s talk about a crucial security concern. Exposing your SSH server to the internet can be risky. Bots and hackers are constantly scanning for open SSH ports. If they find yours, they’ll try to brute-force their way in by guessing your username and password.
Here’s why it’s safer to keep SSH local:
-
Reduced Risk: When SSH is only accessible on your local network, only devices connected to your home network can attempt to access the server.
-
Peace of Mind: You won’t have to worry about configuring firewalls or securing your server against online threats.
-
Ease of Use: No need for complicated setups like VPNs, PKI certificates, or port forwarding.
Keeping your SSH access local keeps things simple and secure. Let’s move on to setting it up.
Step-by-Step Guide to SSH into Your Linux Server
1. Check Your Server’s IP Address
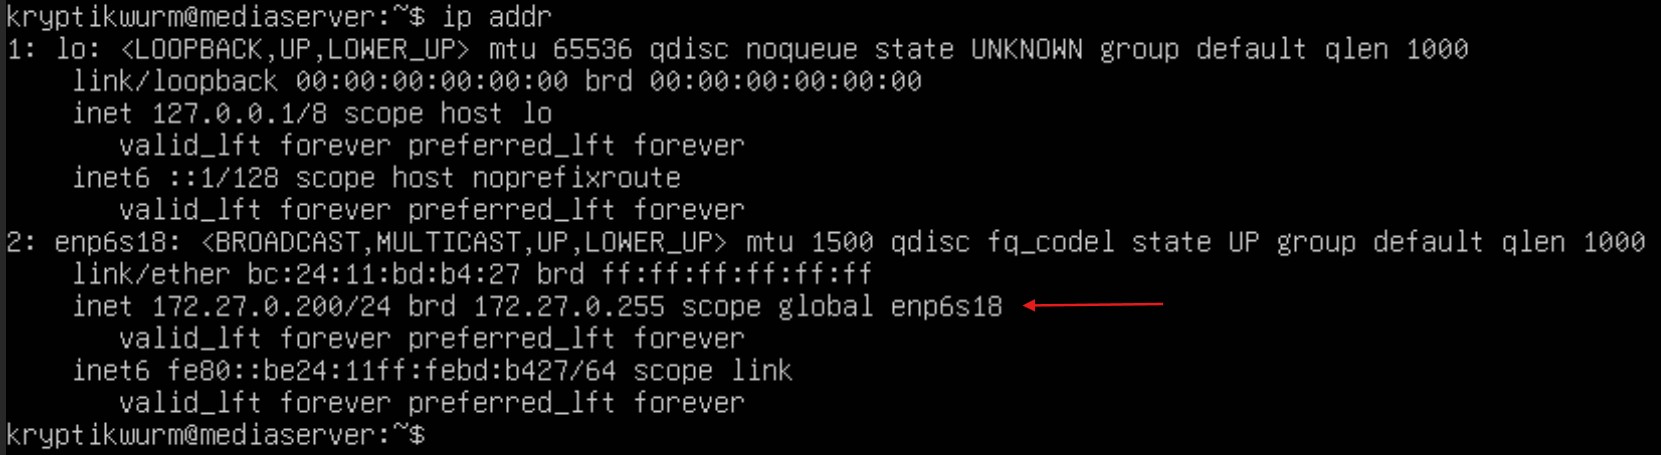
Before you can SSH into your server, you need its local IP address. You can find this by logging into the server directly and running:
ip addr
Look for the section labeled inet. The number will look something like 192.168.x.x. That’s your server’s IP address.
Example:
2. Install an SSH Client on Your Computer
-
Windows: Use the built-in PowerShell tool or download a program like PuTTY.
-
Mac/Linux: Your terminal already has an SSH client installed.
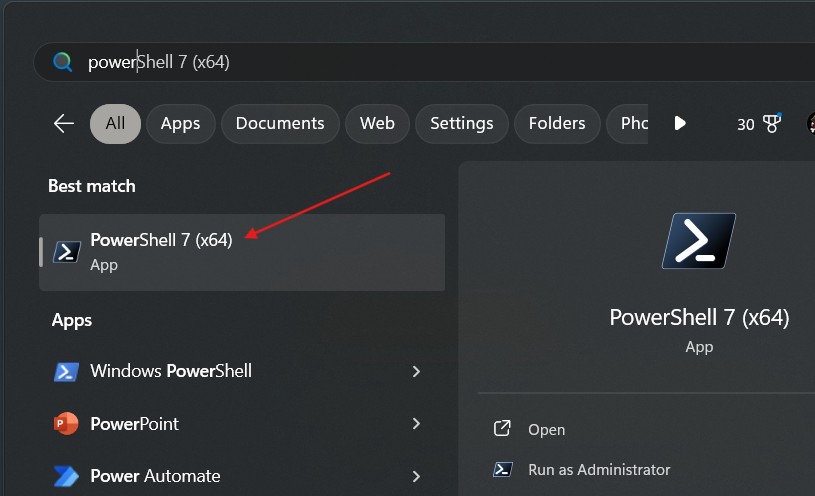
3. Connect to the Server via SSH via PowerShell
Press the Start button on your keyboard and type PowerShell - Click the icon that says Windows PowerShell.
Replace username with your Linux user account and 192.168.x.x with your server’s IP address.
For example:
4. Enter Your Password
After you hit enter, the server will ask for your password. Type it in carefully (you won’t see the characters as you type for security reasons) and press enter.
If the connection is successful, you’ll see a prompt that looks something like this:
KryptikWurm@mediaserver:~$
Congrats! You’re now remotely connected to your server.
5. Troubleshooting Common Issues
- “Connection Refused”: Make sure the SSH service is running on your server. Run:
sudo systemctl start ssh
-
“Permission Denied”: Double-check your username and password.
-
Can’t Find IP: Ensure your server and computer are on the same local network.
Keep It Local, Keep It Safe SSH is an incredibly powerful tool, but with great power comes great responsibility. Keeping your SSH access local minimizes security risks while still giving you all the perks of remote server management.
So, open up your terminal, connect to your server, and start navigating the world of Linux like a pro. Just remember, safety third!
Ready to Level Up? Now that you’ve nailed the basics, you’re well on your way to mastering your home media server. Keep learning, keep experimenting, and don’t be afraid to take on new challenges. You’ve got this!