
Turn an Old Computer Into a Media Server Part 1 Hardware and Installing Linux
The Best Way to Start Without Breaking the Bank.
Do you have an old computer collecting dust in the closet—the one you kept around thinking it might be useful someday? Well, today is the day it finally gets its moment to shine. Instead of dropping hundreds (or even thousands) on brand-new hardware, you can turn that old machine into a fully functional media server. It’s a great way to explore the world of home media servers without spending a lot of money.
The best part? It doesn’t take much to get started. With just a little effort and some free software, you’ll be streaming your favorite movies, TV shows, and music right from that old computer. Let’s go through what you’ll need and how to get your server up and running in no time.
Why Start With an Old Computer?
When getting into home media servers, there’s one golden rule: Start small and upgrade later. A common mistake is jumping straight into expensive, custom-built setups, only to realize it’s more than they bargained for. Using an old computer is a low-risk way to learn the basics and see if this hobby is right for you.
Think of it like using training wheels. You can learn how to install software, organize your media, and troubleshoot issues—all without worrying about wasting money on high-end hardware. Plus, it’s eco-friendly. Instead of throwing out that old PC, you’re giving it a new purpose.
Minimum Specifications: What Does Your Old Computer Need?
To run a basic Ubuntu-based Jellyfin server, you don’t need the latest gaming rig or high-end processors. Both Ubuntu Server and Jellyfin are lightweight and versatile, so your old machine can likely handle it. Here’s the bare minimum you’ll need to get started:
Bare Minimum Hardware Requirements:
-
Processor (CPU): Intel Core i3 2nd Gen or AMD equivalent
-
RAM: 4 GB
-
Storage: At least 100 GB of free space (more if you plan to store lots of media locally).
-
Operating System: Ubuntu Server 24.04 LTS
-
USB Stick: 32 GB for the OS installation
-
Network: An Ethernet connection (wired or Wi-Fi)
This setup is more than enough to get started with Jellyfin. As your media library grows or if you want to add more features, you can always upgrade later.
Best Experience Recommended Hardware
-
Processor: No change
-
RAM: 8 GB
-
OS Storage: 200 GB of SSD storage
- Kingston 240GB SSD: Amazon Link / Newegg Link
-
Media Storage: 8 TB or more depending on the size of your media collection
- Seagate BarraCuda 8TB Internal Hard Drive: Amazon Link / Newegg Link
-
Network: Wired ethernet connection is best
- PCIe Gigabit Network Card with Intel I210AT Amazon Link / Newegg Link
If your computer meets these requirements, you’re ready to go. If it doesn’t, you might still be able to make it work with a few tweaks, especially if you don’t need heavy-duty transcoding (converting video files on the fly). Transcoding will be covered in a later post.
Proof Old Computers Will Work
To show you that this can absolutely be done using old hardware, I’m going to build a media server with the following components:
-
Processor: i5-2500k – This CPU was released back in 2011.
-
RAM: 16 GB
-
OS Storage: 500 GB SSD
-
Media Storage: Two 2 TB Hard Drives
-
Video Card: NVIDIA 750ti (Only needed for the installation)
Now that you’ve found an old computer suitable for this project, it’s time to turn it into a fully functional media server by installing Ubuntu Server 24.04 LTS. This version of Ubuntu is designed for robust, secure, and efficient server performance—even on older hardware. Let’s dive into the installation process and bring your old computer back to life as a high-performing media server.
And yes, you could use Debian or pretty much any other Linux distro for this. I chose Ubuntu because it’s popular, well-documented, and widely supported.
Installing Ubuntu Server 24.04 LTS
Now it is time for the fun part: Bringing your media server to life. Follow these steps to get Ubuntu 24.04 installed and running:
1. Prepare Your Old Computer and Thumb Drive
- Find a monitor, keyboard, and mouse to temporarily hook up for the setup.
- Download the Ubuntu Server 24.04 LTS ISO file from Ubuntu.com.
- Use a tool like Rufus (on Windows) or Etcher (on macOS/Linux) to create a bootable USB drive with the ISO.
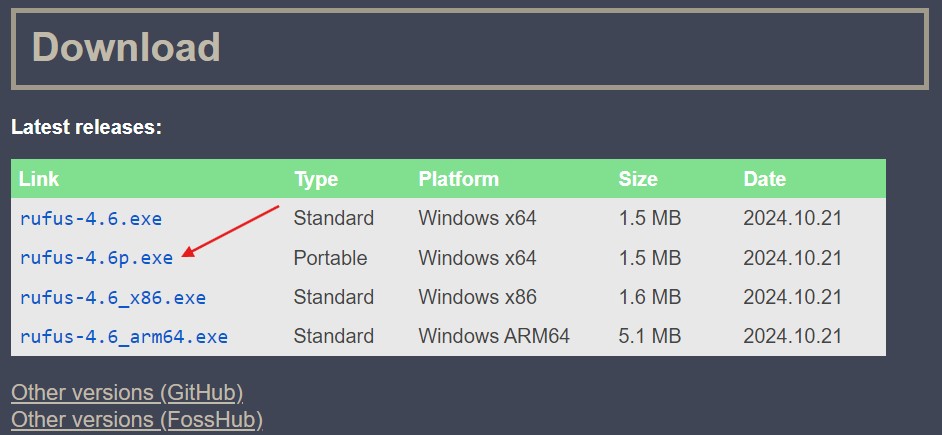
2. Use Rufus to Create a Bootable Thumb Drive
-
Download the portable version of Rufus
-
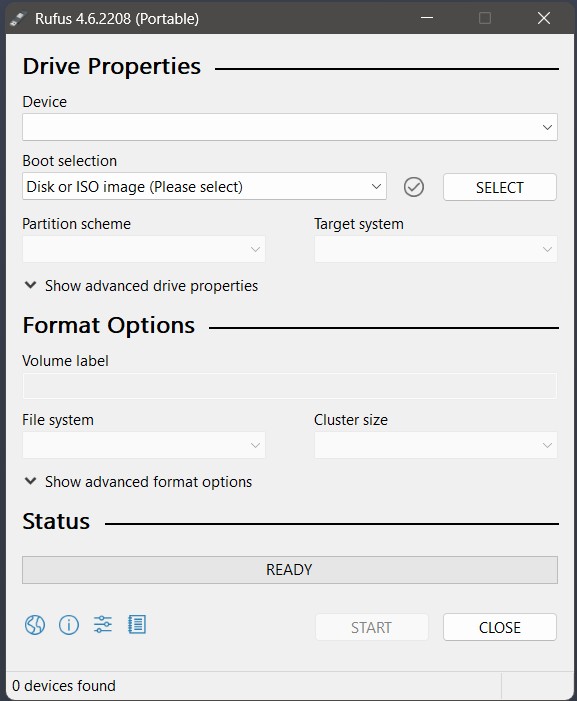
Open Rufus
-
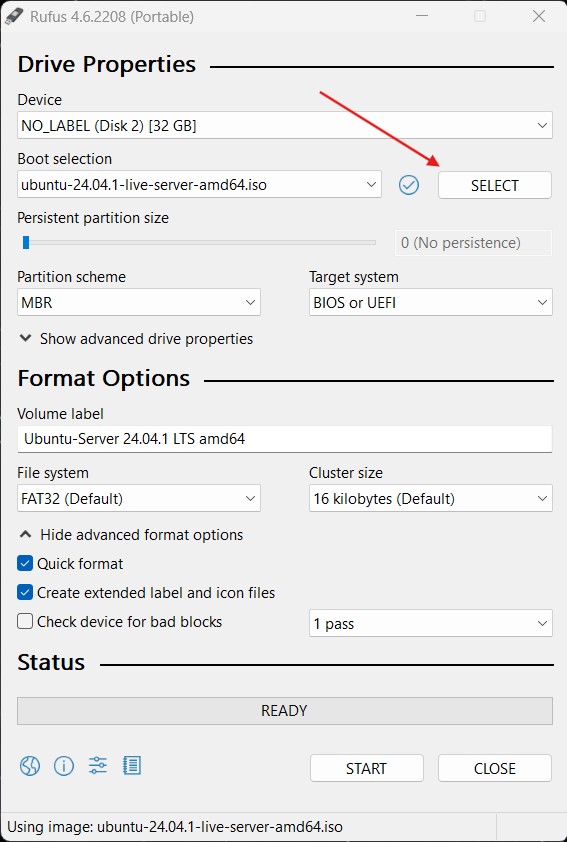
Press SELECT to select the Ubuntu Server ISO you just downloaded and press START
-
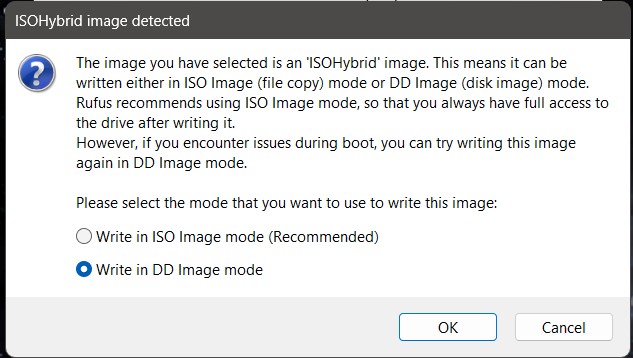
Select write in DD Image mode when prompted
-
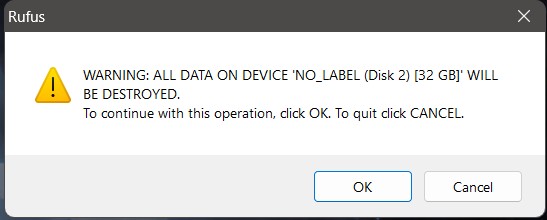
Press OK to format you USB stick
- This will erase everything on the drive
- This will erase everything on the drive
You should now have a bootable USB Stick with Ubuntu Server on it.
3. Boot from USB
-
Insert the bootable USB into the computer you’re installing Ubuntu on.
-
Power on the computer and enter the BIOS/UEFI settings (usually by pressing F2, F12, Del, or Esc during boot).
-
Make sure the boot order places USB before the hard drive. This way if a USB is detected it will boot off of it first.
-
Save and exit the BIOS settings. Your system will reboot and load the Ubuntu Server installer.
4. Begin the Installation
-
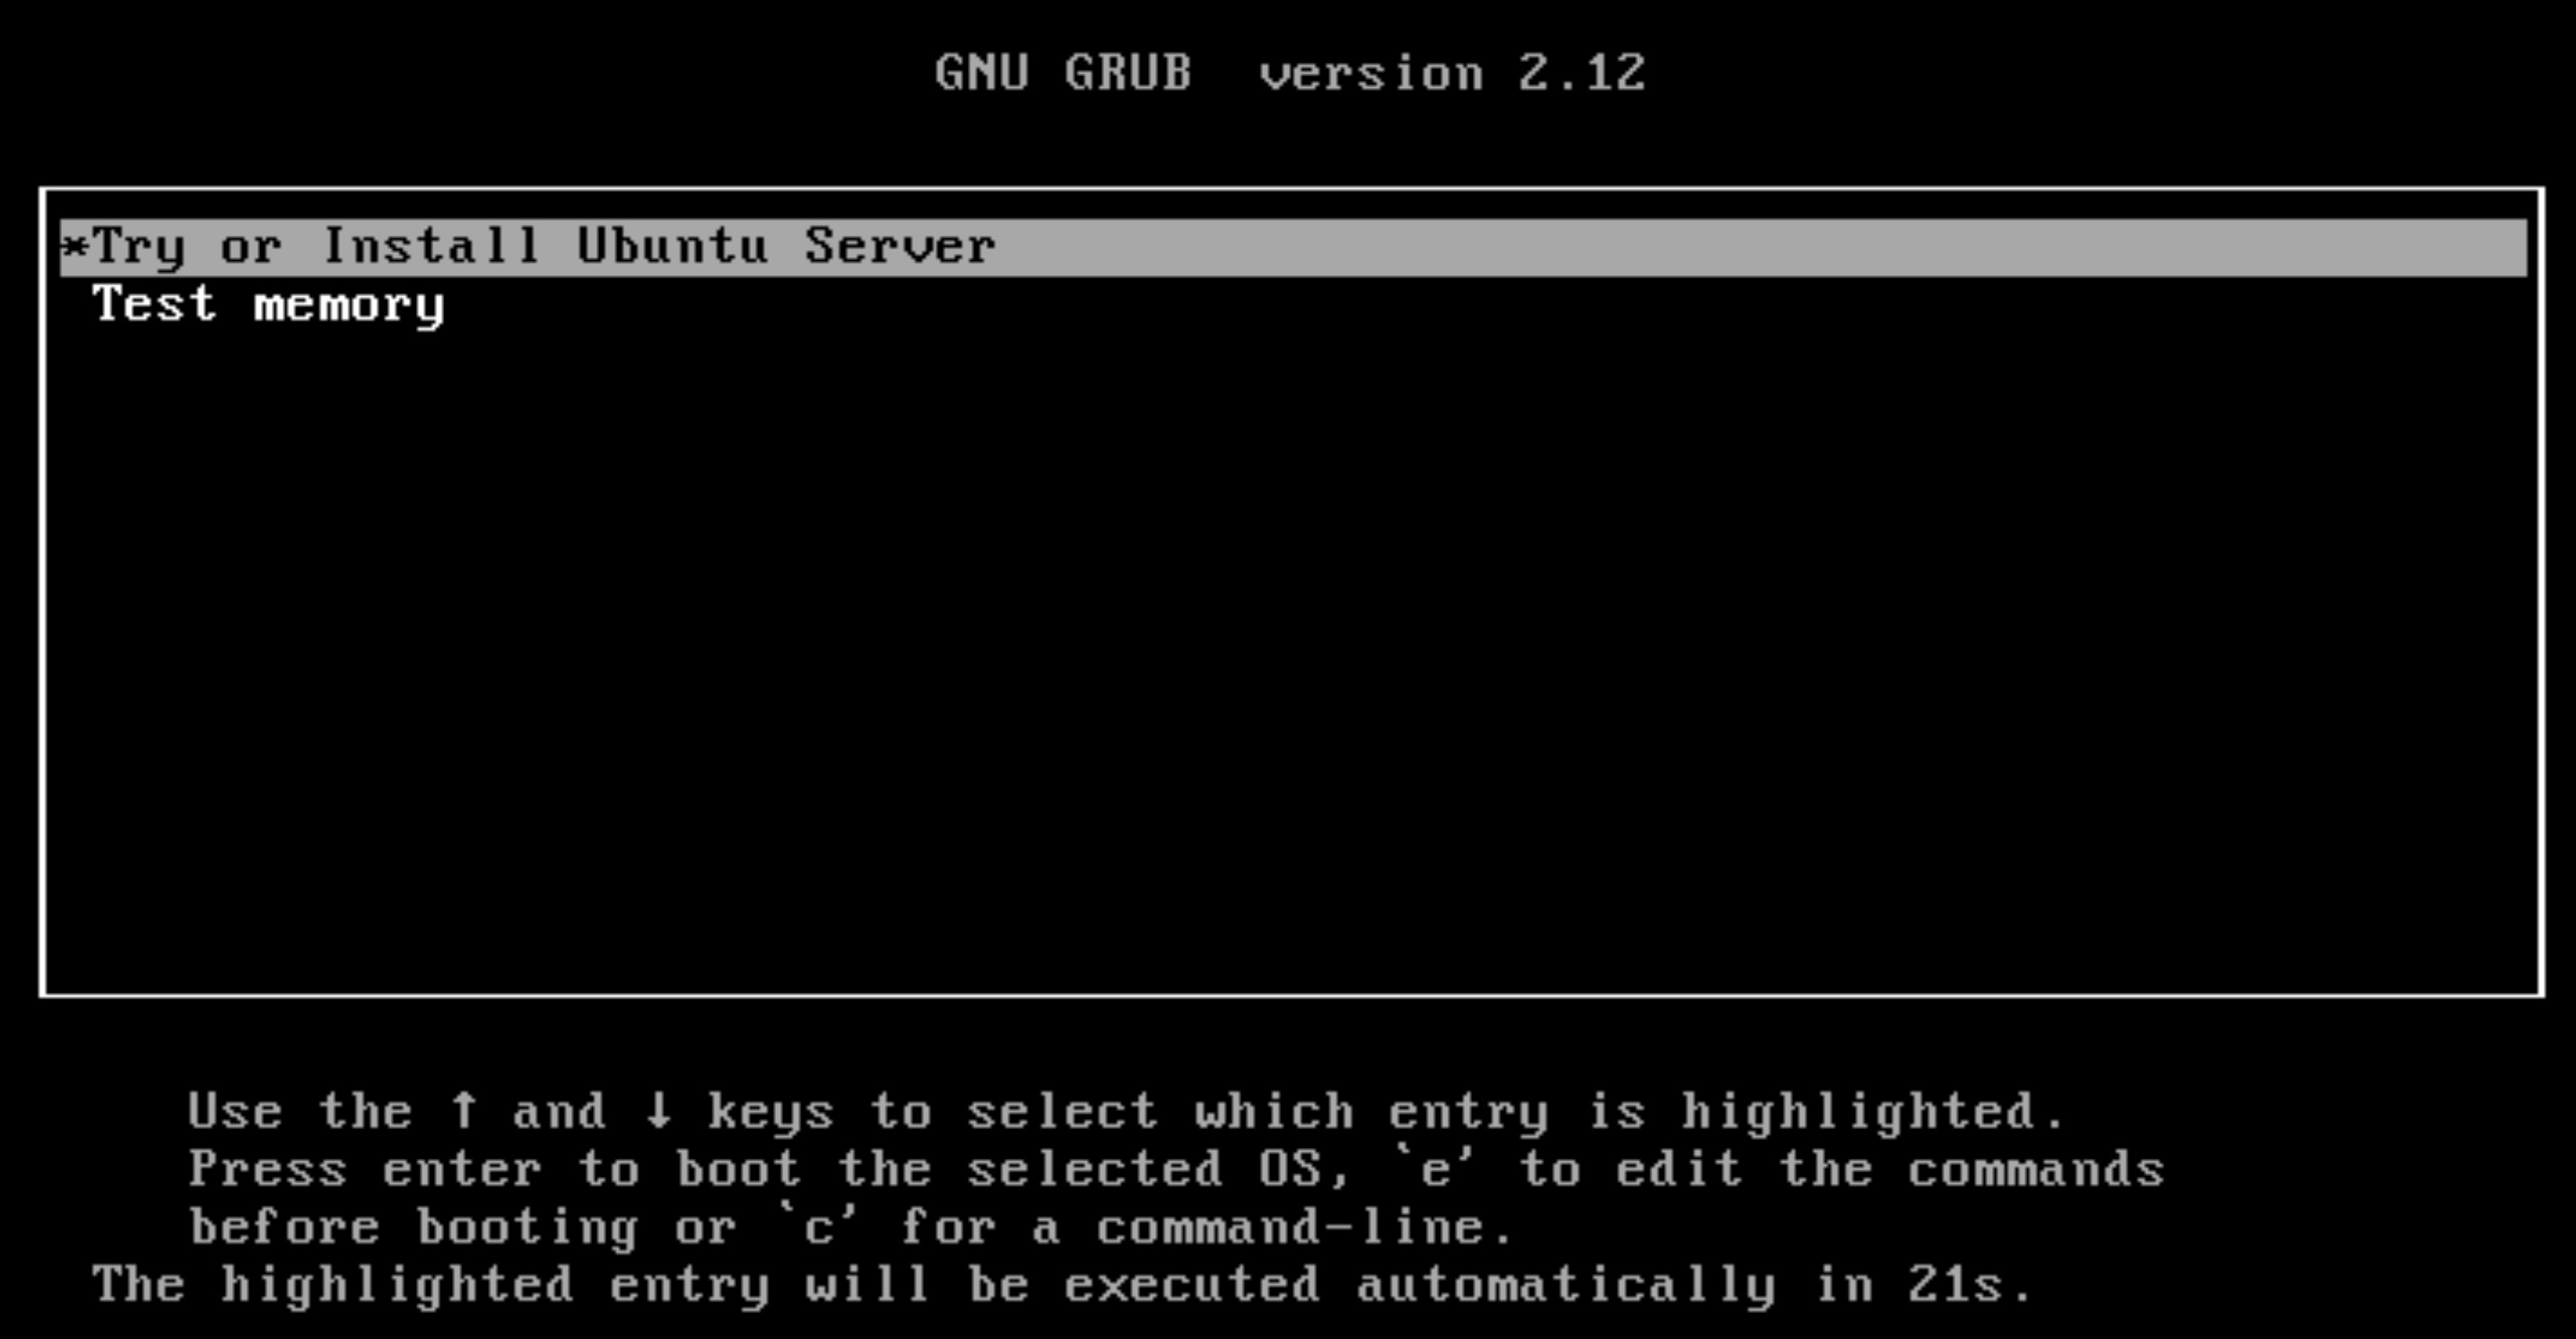
GNU Grub Menu - When prompted press enter
-
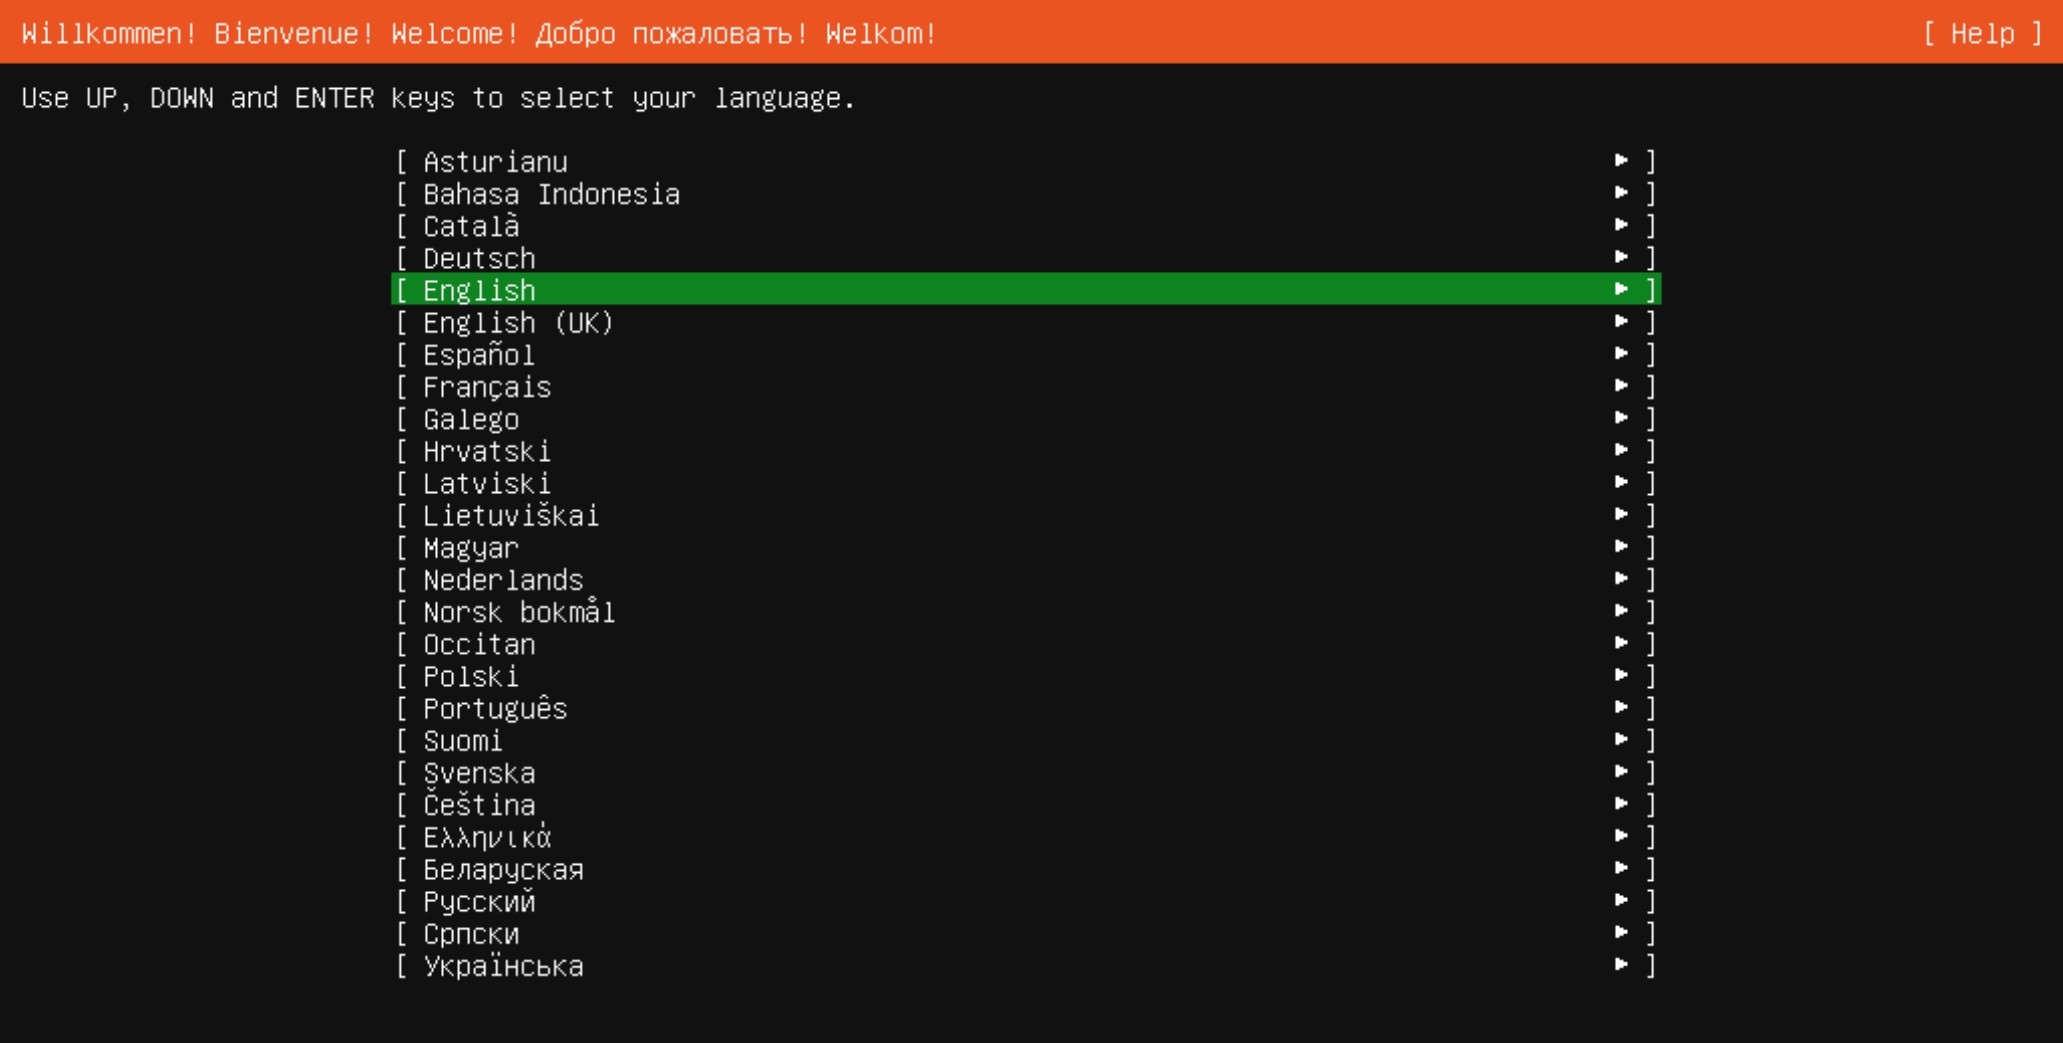
Select your default language
-
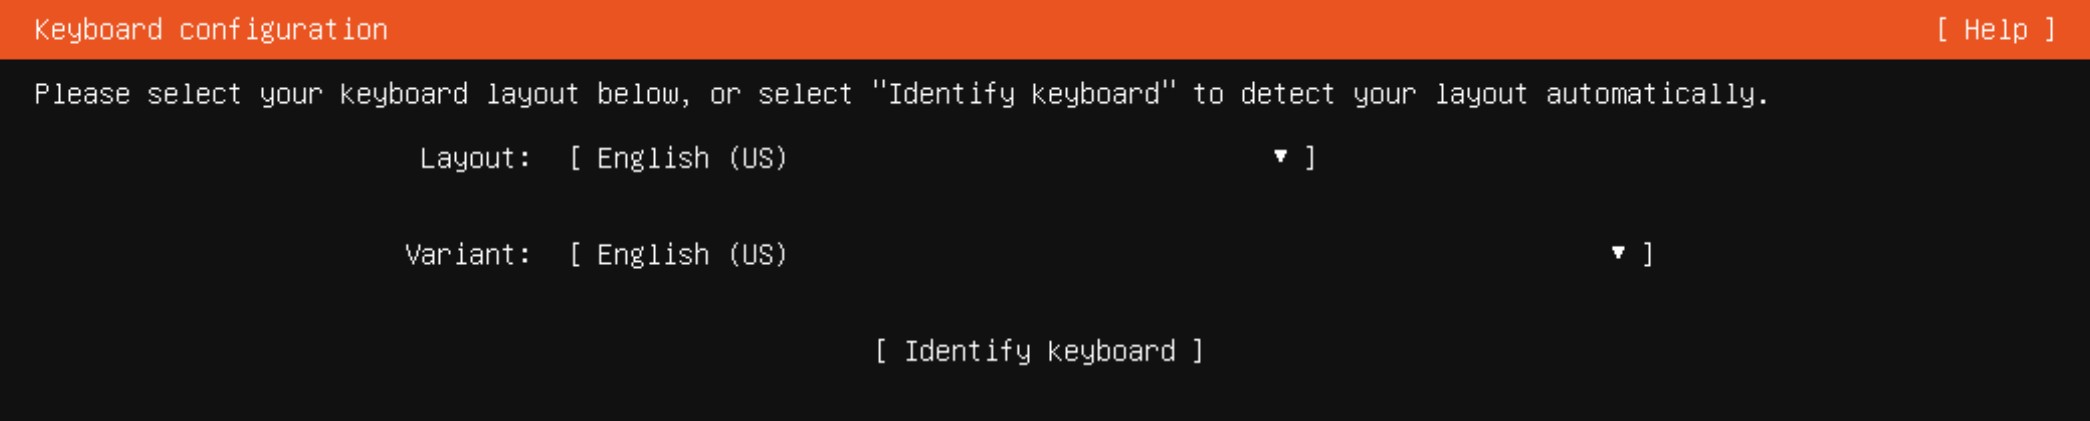
Select your keyboard layout
-
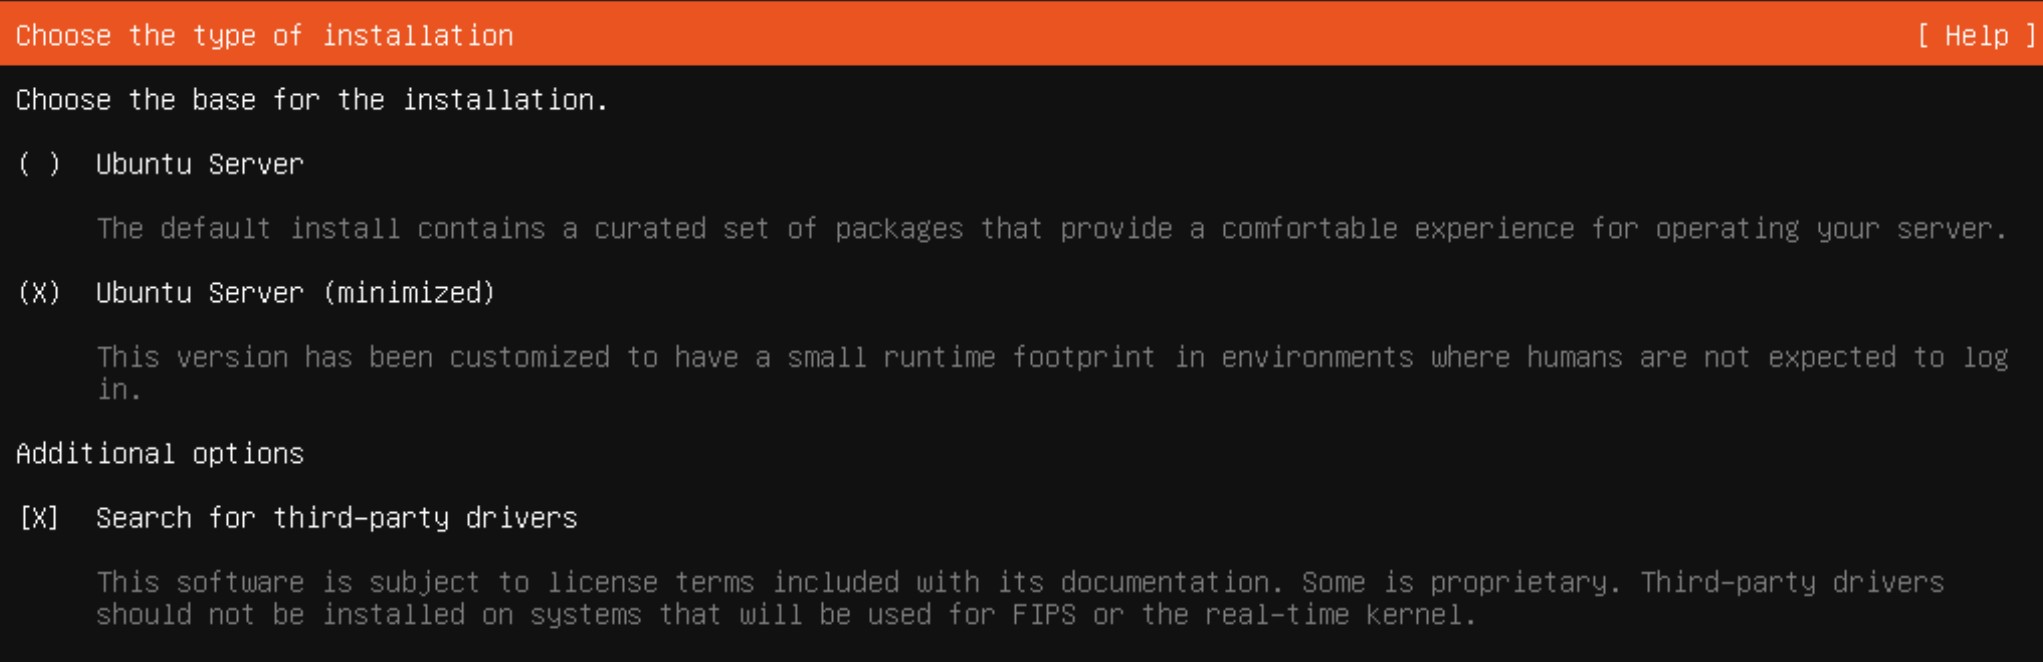
Choose the type of installation - Select Ubuntu Server (minimized) and Search for third-party drivers
-
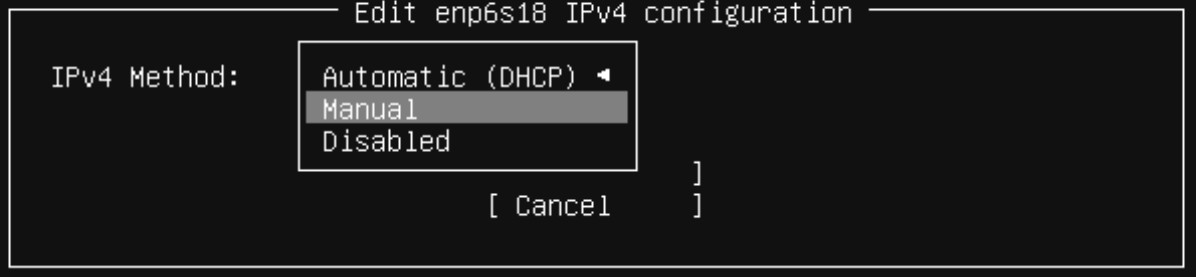
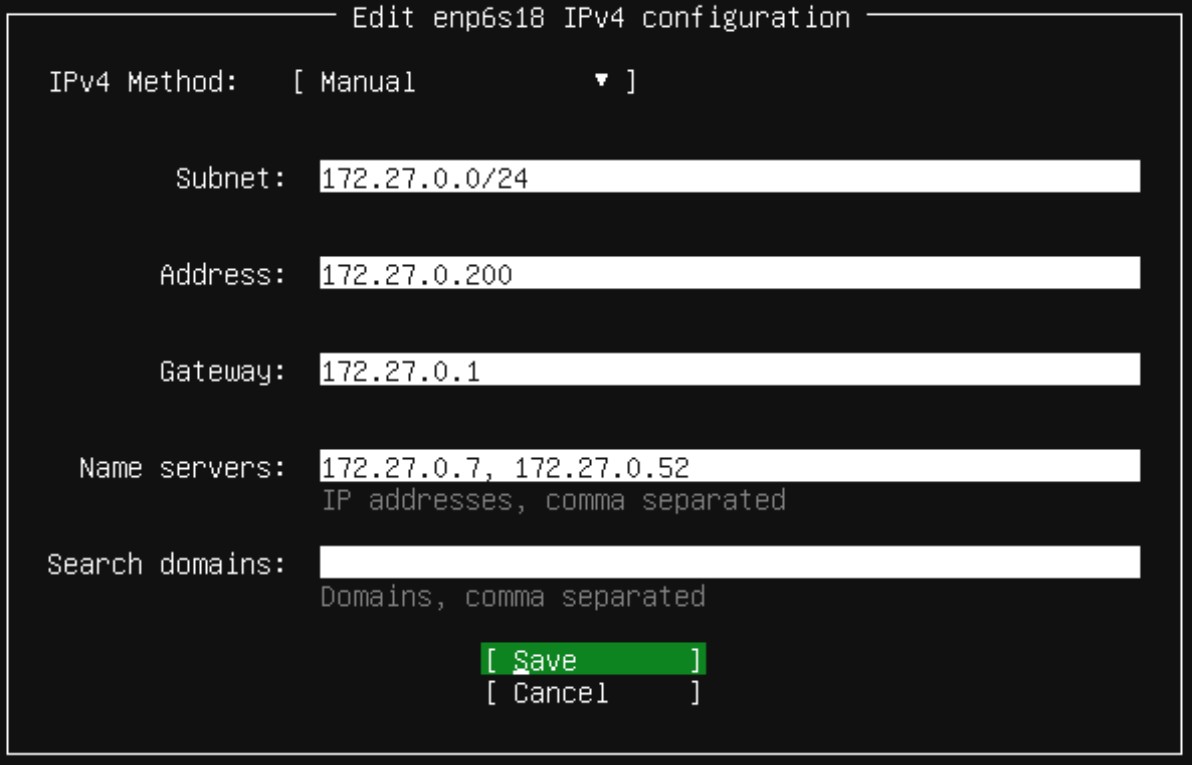
Network Config - Because this is a server, we need to set a static IP (one that doesn’t change) Tab up to the location that lists the network device name (yours will be different) and press enter

-
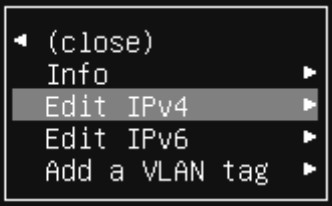
You will now see this menu - Select Edit IPv4 and press enter
-
Select Manual from the menu and press enter
-
My network config will be different than yours. Chances are your network is on the 192.168.0.0/24 or 192.168.1.0/24 network. If you don’t know what your network is, you can open PowerShell on your Windows system and run this command:
ipconfig -all
-
the ipconfig command will give you everything need for the IPv4 config page.
-
However, something that will be different is how the subnets are displayed. On windows you will likely see 255.255.255.0 for Linux you will need to your IP address but change the last number to a 0 and add /24 like this:
192.168.0.0/24
or
192.168.1.0/24
-
Proxy Config - Leave this blank unless you know you are using a proxy.

-
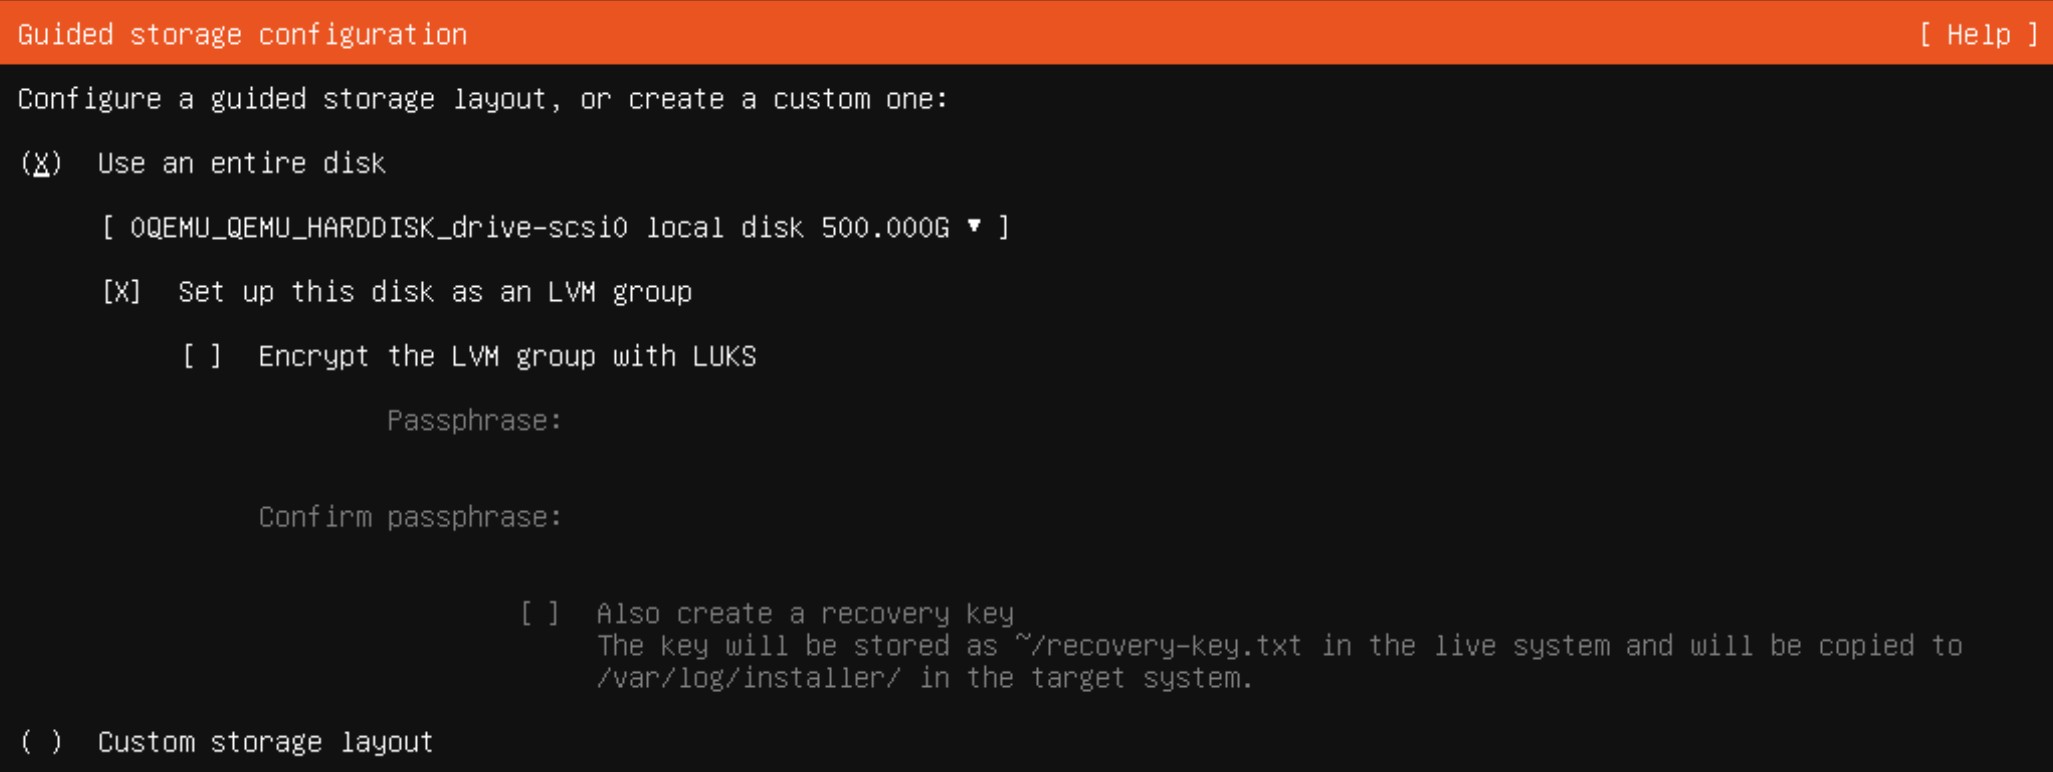
Guided Storage Configuration - For this initial setup leave everything default. I’ll cover a more advanced storage layout in another post.
-
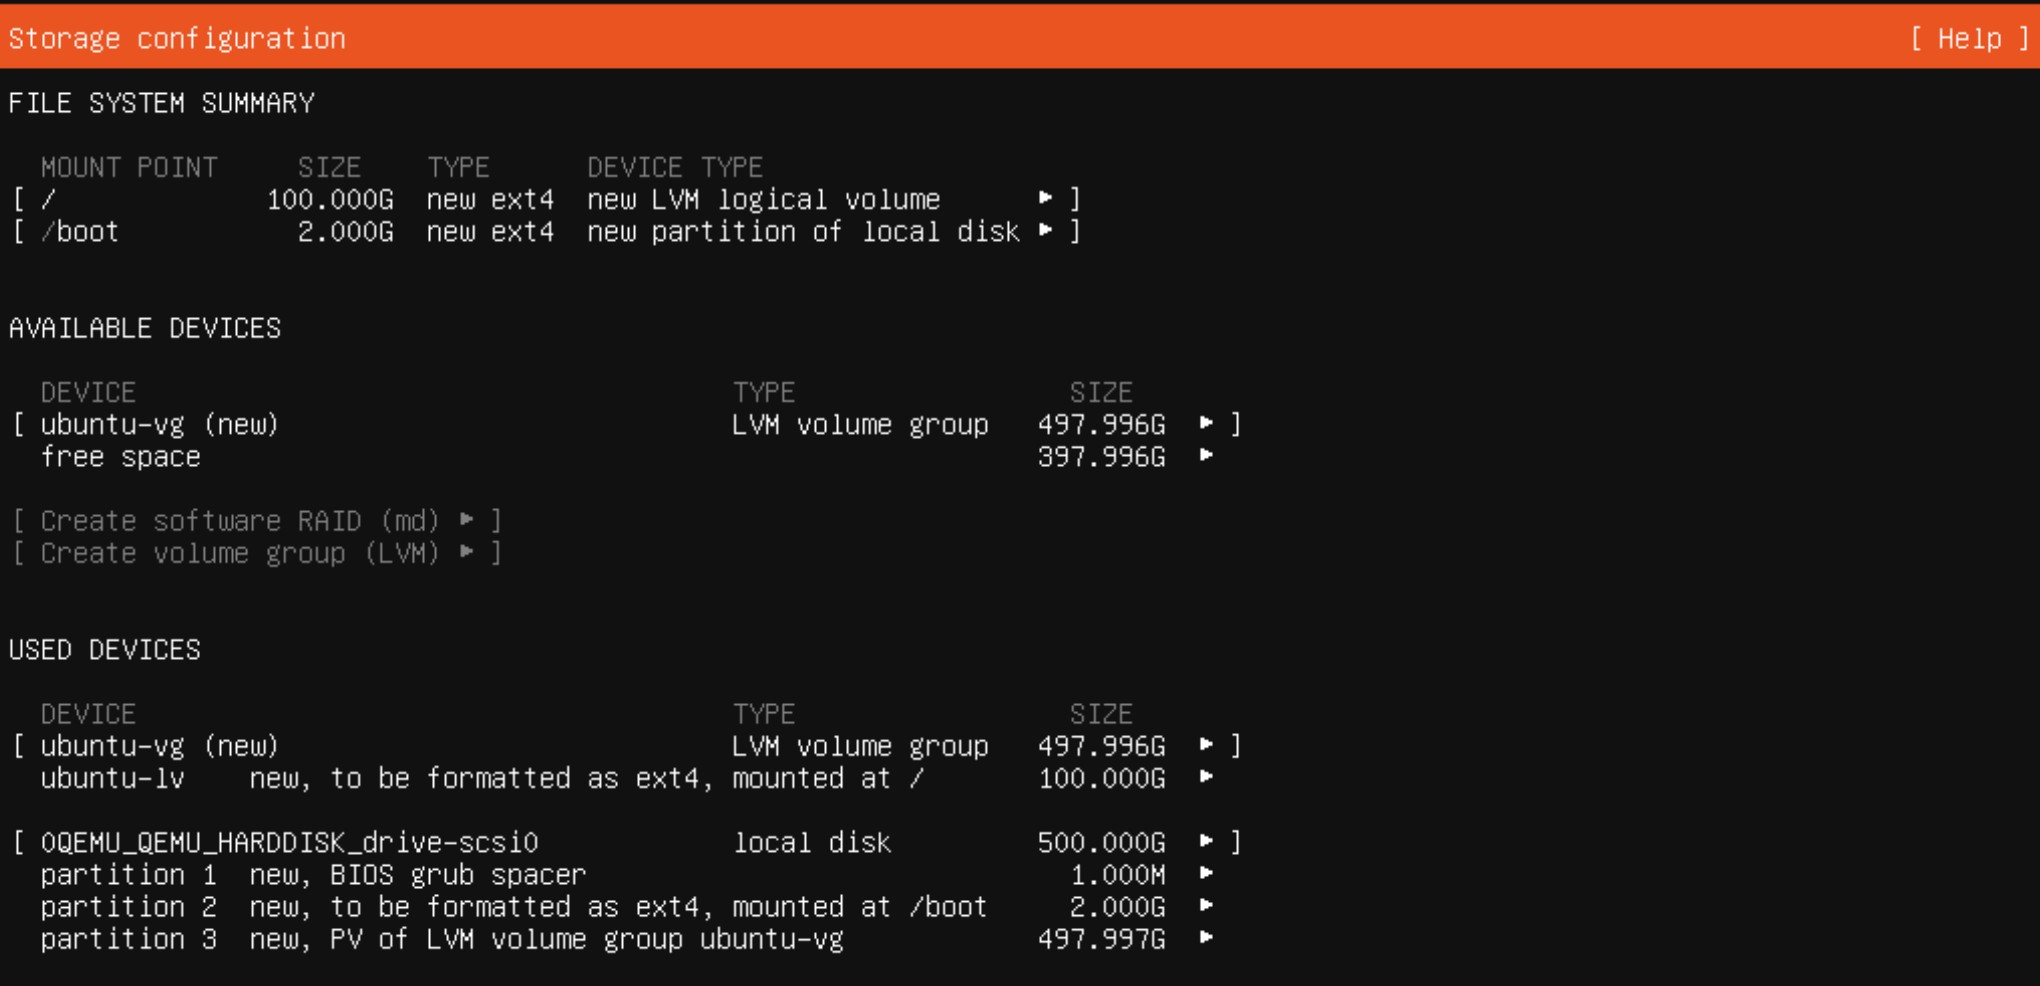
Storage Config Summary
-
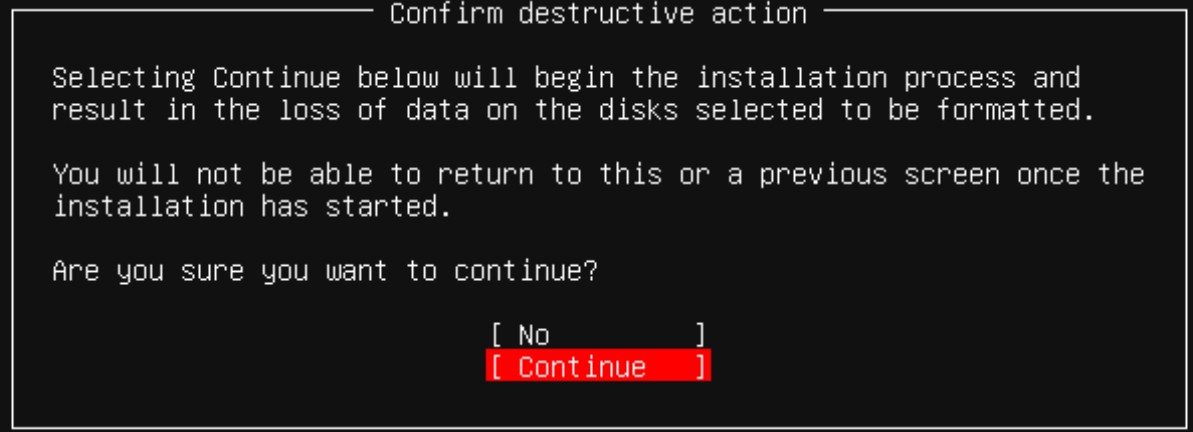
Confirm Destructive Action - This will wipe everything from the selected drive.
-
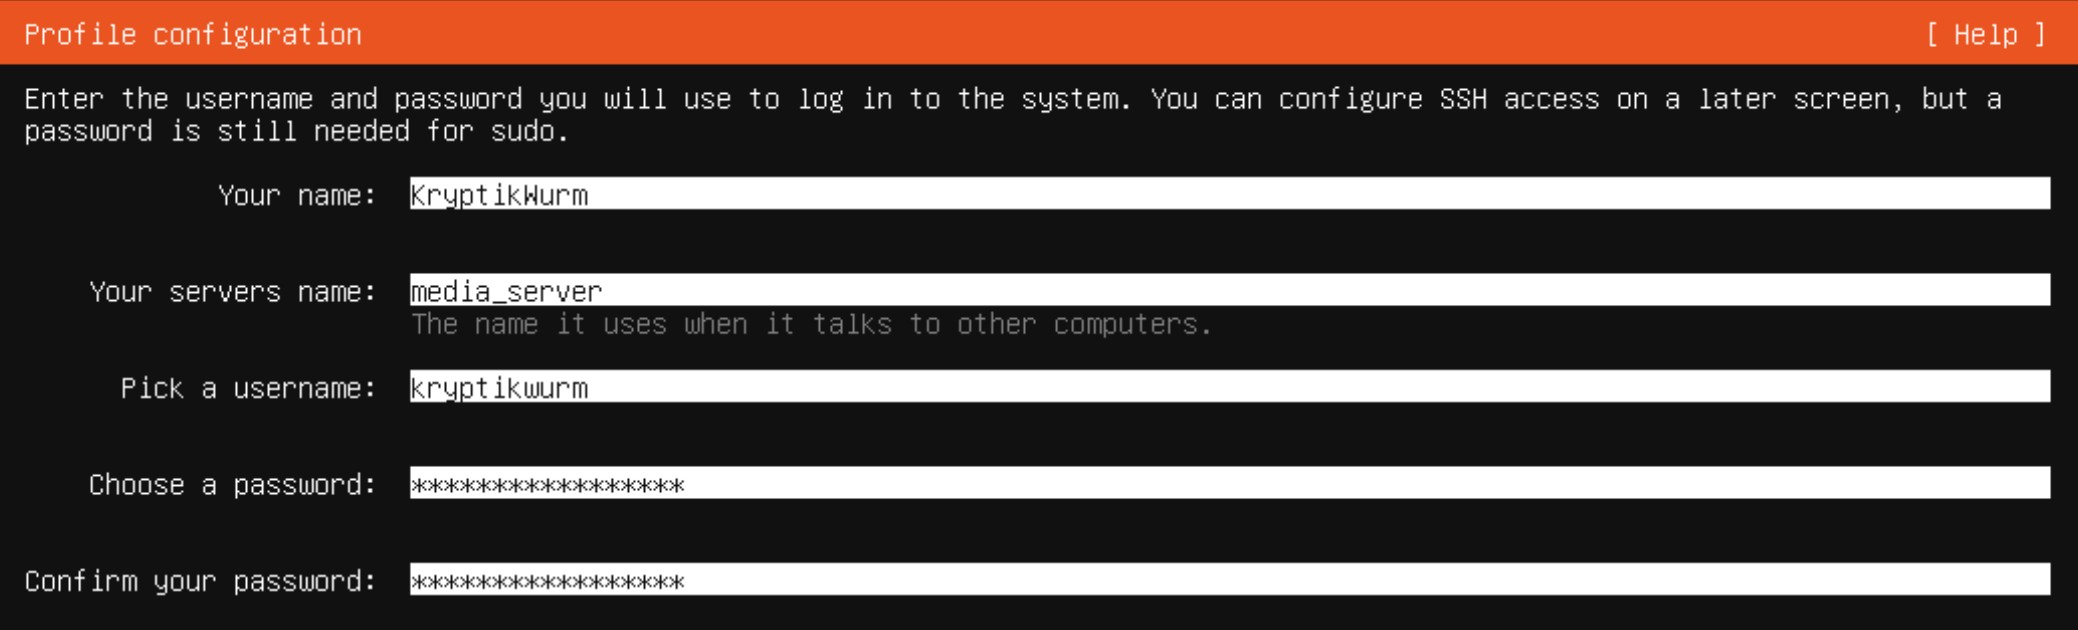
Profile Configuration
-
Your name - This is not the username. I tend to make my username and name field match.
-
Your server name - What do you want to call your server?
-
Pick a username - I use what is in the Your name block.
-
Password - Please make this a strong password.
-
-
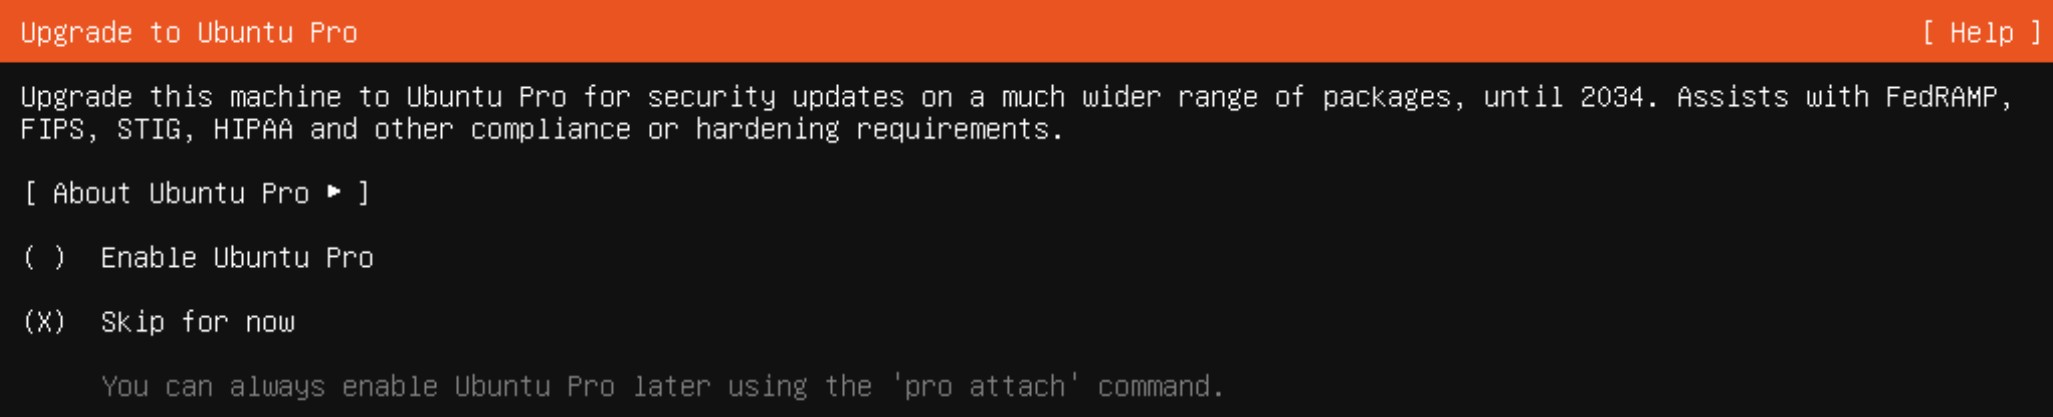
Upgrade to Ubuntu Pro - Skip for now
-
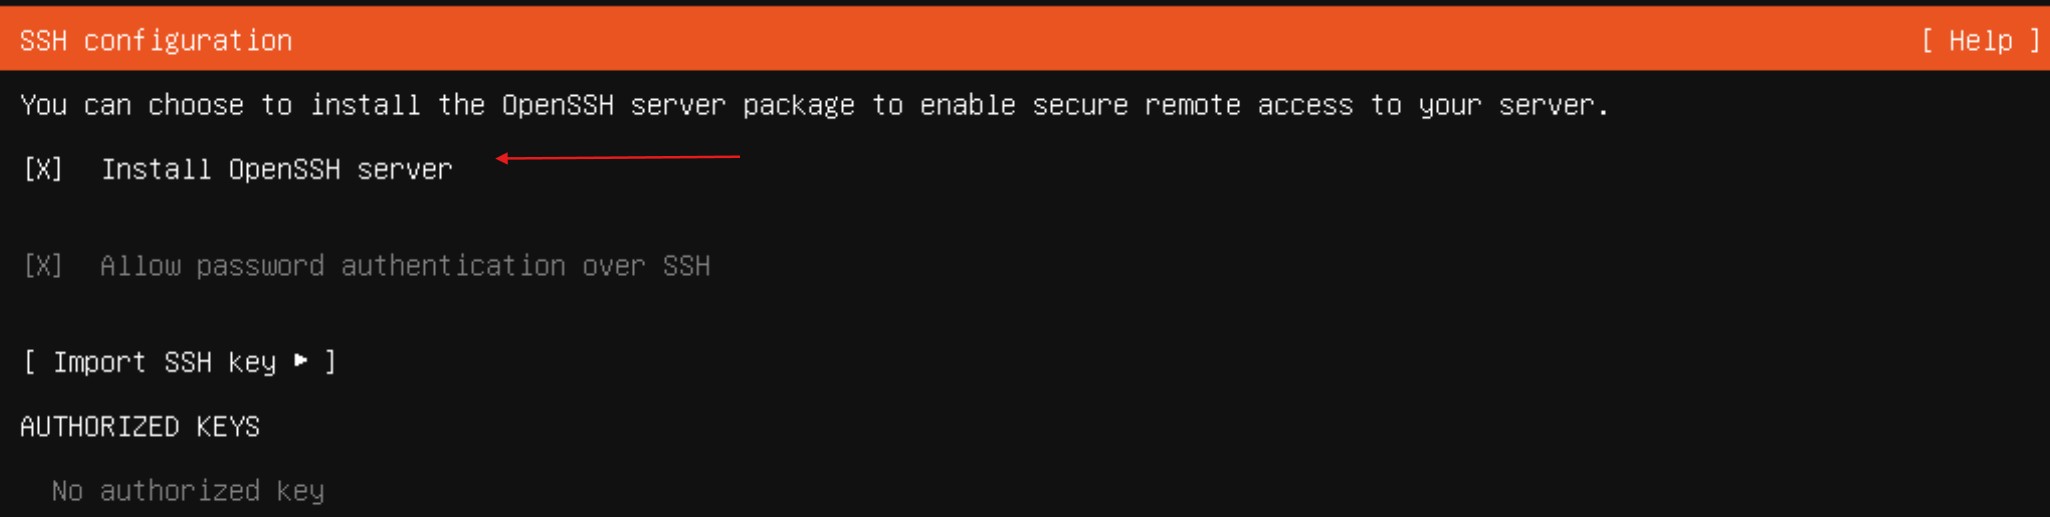
SSH Config - Make sure to select Install OpenSSH server
-
Third-party drivers - If you have any to install you can do so from here.

-
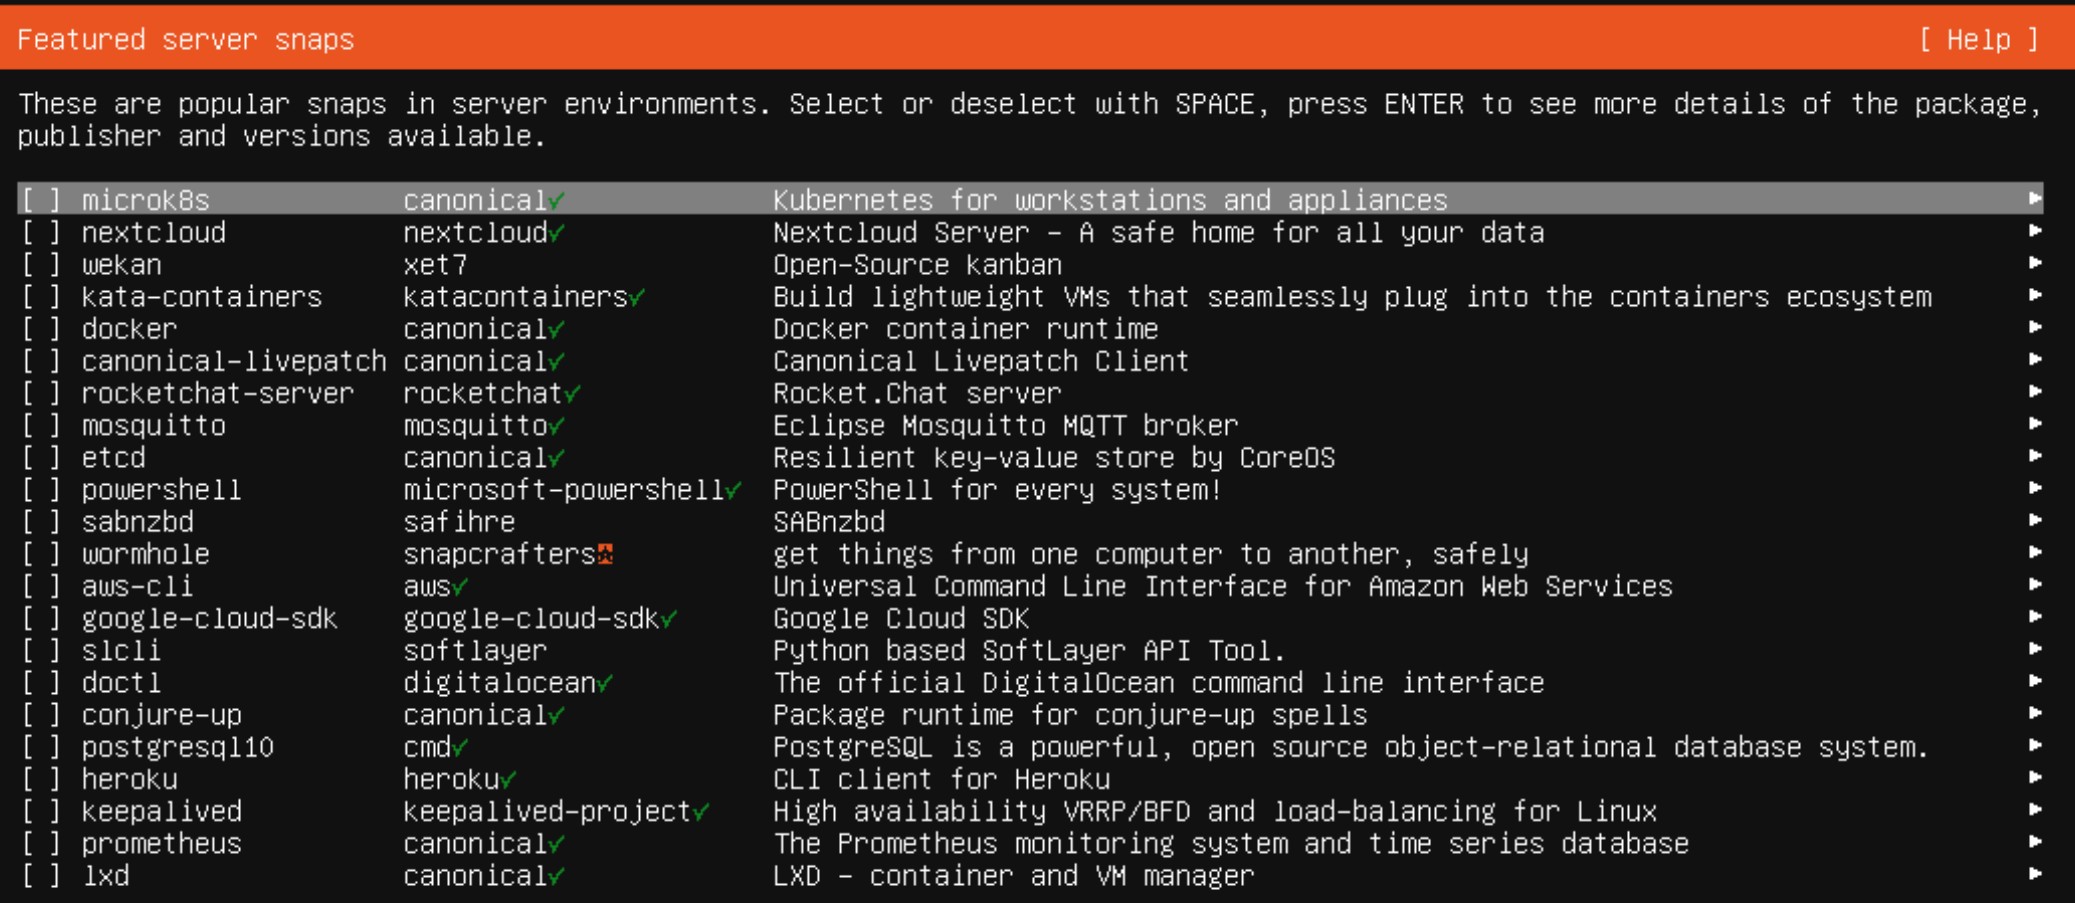
Featured Server Snaps - Leave all of these blank
-
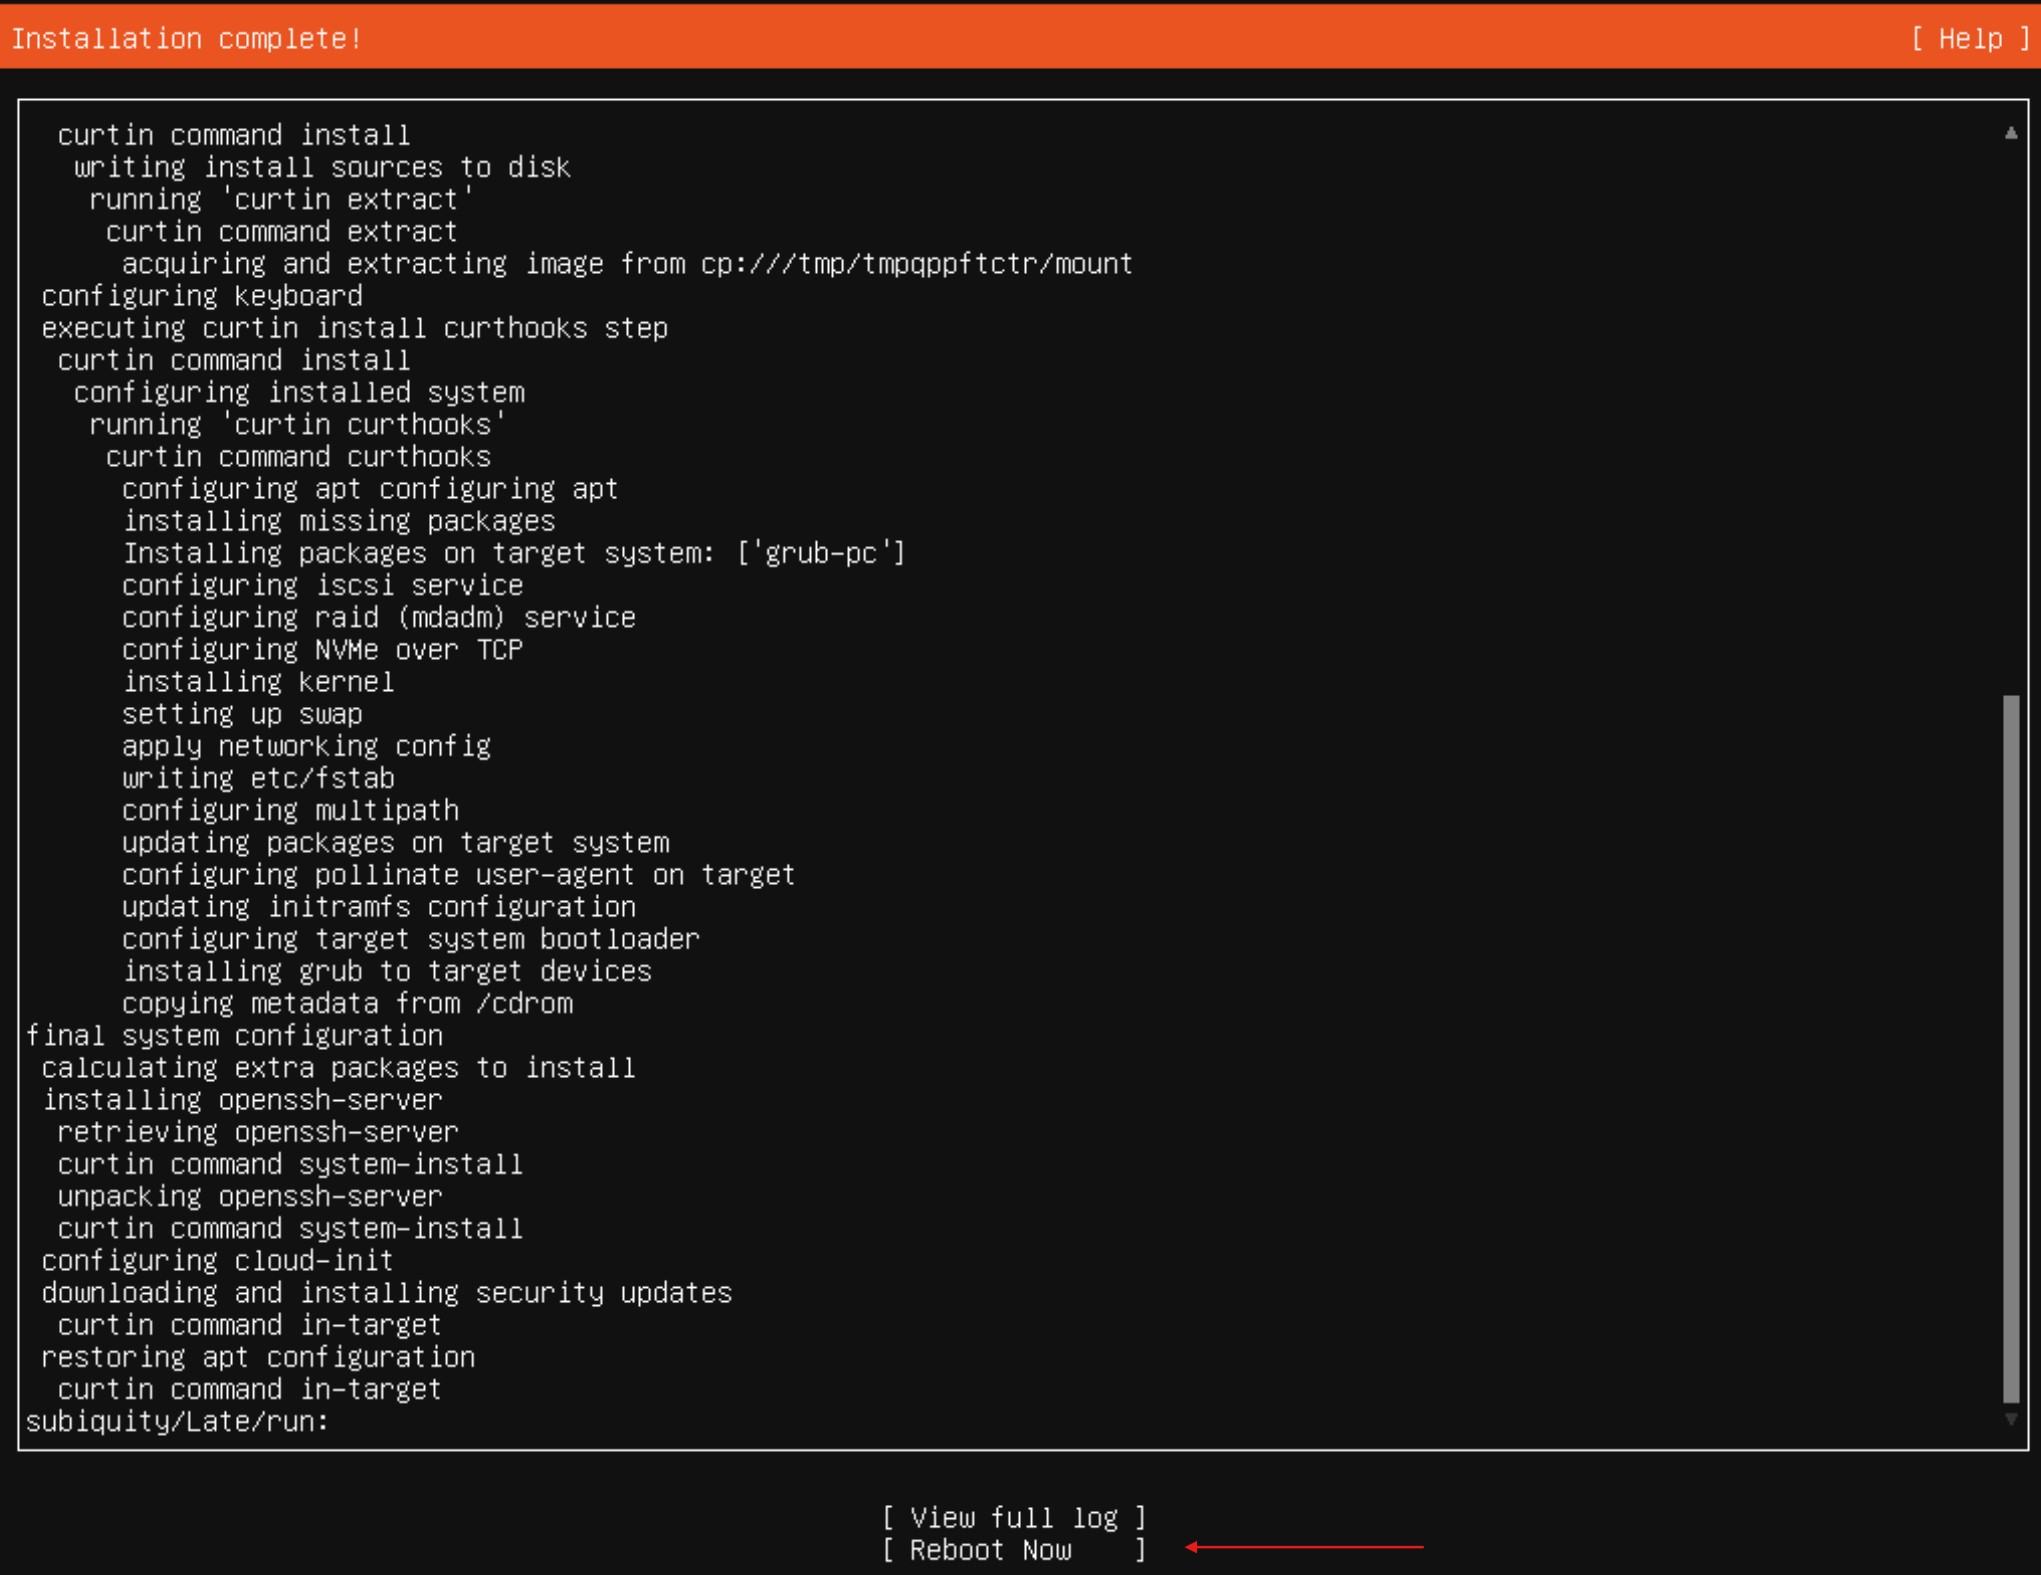
The installation will only take a few minutes. Once completed, remove the USB stick and reboot the system.
-
Login - Verify you can log in with the username and password you set during installation.
-
Update the server - Use this command to install any updates. I recommend doing this about once a week to make sure your server stays up to date on any security patches.
sudo apt update && sudo apt upgrade -y
- Reboot - From the command line
Reboot
Some of you may have a keen eye and can see that I’m installing this on a VM and not my i5-2500k. This was so I could capture the screenshots above. I’ll install Ubuntu on my physical computer and use it going forward.
Congratulations you have set up an Ubuntu server.
Ready to bring your media server to life? Head to Part 2 to install Jellyfin and be one step closer to streaming your favorite content.