Everyone starts with the dream: one box to rule them all. Media apps, storage, downloads, and yes, even routing if you’re feeling extra ambitious.
Then reality hits. Reboot time becomes a nightmare. LXCs start before storage mounts. Apps can’t find their configs. Nothing works unless you babysit the boot order like it’s a toddler who just discovered scissors.
The fix?
Four boxes.
Clear roles.
Real uptime.
Ask me how I know.
Spoiler: It involves a VM NFS Server, Jellyfin LXC, and a very angry Sunday afternoon where I almost threw my server out the window.
Why I Ditched My VM NAS and Went Bare-Metal
Who This Guide Is For
You’re the right person for this if:
- You’re running everything on a single machine, and it’s becoming a headache
- You’ve experienced the “nothing works after a reboot” phenomenon
- You’re ready to invest $900-$4,200 and a few weekends for a reliable setup
- You want to learn Proxmox, networking, and proper homelab architecture
- You’re tired of your family asking why the streaming server is down again
You might want something else if:
- You just want to watch a few movies and don’t care about uptime (get a Synology and call it done)
- You have zero interest in learning Linux or networking basics
- Your budget is under $900 total (stick with a single good machine for now)
- You need this working by next weekend (this is a learning journey, not a race)
Skills you’ll need (or learn along the way):
- Basic Linux command line comfort (you can navigate directories and edit files)
- Willingness to read documentation when things break (and they will)
- Basic networking concepts (what’s an IP address, what’s a subnet)
- Patience for the learning curve (expect some frustration, especially around Proxmox LXCs)
Don’t worry if you’re not an expert. I wasn’t either. You’ll learn by doing, and I’ll point you to resources when you need them.
The Real ROI: What This Actually Costs You
Let’s talk money. Because yes, you’re about to spend $900-$4,200 on hardware. That sounds like a lot until you do the math on what you’re already spending.
The Streaming Service Tax
Here’s what you’re probably paying right now:
| Service | Monthly Cost |
|---|---|
| Netflix (Standard) | $17.99 |
| Disney+ & Hulu | $19.99 |
| Max (HBO) | $18.49 |
| Prime Video | $8.99 |
| Apple TV+ | $12.99 |
| Peacock | $10.99 |
| Paramount+ | $13.99 |
| Starz | $4.99 |
| Crunchyroll | $7.99 |
| TOTAL | $116.41/month |
That’s $1,396.92 per year. Every year. For-ev-er.
And it’s getting worse. Remember when Netflix was $7.99? Yeah, so do I.
Don’t have streaming services? Cable on average is about $100.00/month too.
Have streaming services and cable? Wow.. This guide can help you the most.
The Break-Even Math
Budget build ($900):
You break even in 8 months. After that, you’re saving over $1,400/year.
Mid-range build ($1,900):
Break even in 16 months. Then it’s pure savings.
Dream build ($4,200):
Break even in 36 months, but you’ve built something that’ll last 5-9 years.
But Wait, There’s More
The math above assumes you cancel everything. But realistically, you’ll probably keep 1-2 services (I keep Prime Video because I like to have something available if in the rare event my Jellyfin server goes down).
Even if you only cancel 6 out of 9 services, you’re saving $80+/month. That’s $960/year.
Plus you get:
- Content you actually want to watch (not algorithmic slop)
- No more “sorry, that’s leaving the platform in 3 days”
- No more “this show is on Peacock now, not Netflix”
- No more paying for multiple services just to watch one show
- Complete control over quality (no streaming compression)
- Offline access (because internet outages happen)
The Hidden Costs They Don’t Tell You
Streaming services love to fragment. That show you’re watching? Season 1-3 are on Netflix. Season 4 moved to Paramount+. The spinoff is Max-exclusive. The movie that inspired it all is on Disney+.
You end up subscribing to four services just to watch one franchise. Or you play subscription roulette, canceling and re-subscribing monthly (and praying you remember to cancel before they charge you again).
With your own server? You watch what you want, when you want, without playing platform musical chairs.
The Power Bill Reality Check
“But what about electricity?”
Fair. Let’s do that math too:
- Average 4-box stack: ~130W idle, ~220W under load
- Running 24/7 at $0.12/kWh: ~$12-16/month
- So your actual monthly cost: $12-16 in power
You’re still saving $80-90/month vs. streaming services. That’s $960-$1,080/year in your pocket.
What About Content Acquisition?
Look, I’m not going to tell you how to get your “Linux ISOs”. But let’s just say that if you’re already paying for content through other means (totally legal Blu-ray ripping, of course), you’re not adding costs. You’re just organizing what you already own.
And if you’ve got a library card? Many libraries offer free streaming through Hoopla, Kanopy, or similar services. Rip, organize, and keep forever. All legal, all free.
I have several guides on all of this here are a few:
The Intangible Benefits
This isn’t just about money. It’s about:
- Not having shows you’re watching get canceled mid-season
- Not dealing with ads (even on “ad-free” tiers that still show promos)
- Not having your smart TV spy on your viewing habits
- Not being at the mercy of licensing deals and regional restrictions
- Actually owning your media instead of renting it monthly
The bottom line: Even the dream build pays for itself in 3 years. After that, you’re saving $1,400/year while having a better experience, more control, and media that’s actually yours.
That’s not a cost. That’s an investment that keeps paying dividends.
SECTION 1: Why One Box Isn’t Enough
Let’s start with the classic mistake: cramming everything (Jellyfin, Sonarr, Radarr, qBittorrent, SABnzbd, storage, Docker, and maybe even OPNsense if you’re really ambitious) onto that old desktop collecting dust in your closet.
It works.
Until it doesn’t.
Here’s what goes wrong:
One reboot = full outage.
Your apps don’t just go offline. They could come back in the wrong order. Jellyfin can’t see your media because NFS hasn’t mounted yet. Sonarr can’t write downloads because the share isn’t ready. That boot-time race between your LXC containers and your storage mounts? Nobody wins. Especially not you.
Performance becomes a bottleneck.
You’re trying to transcode a 4K stream while ZFS is scrubbing, torrents/nzbs are verifying, and your CPU is melting down. Everything competes for the same I/O, RAM, and CPU cores. There’s no isolation. Just a noisy soup of services fighting for resources.
Security is non-existent.
Mixing your media stack with your router or storage means one compromised container could break your entire network or corrupt your storage. Ever had Jellyfin accidentally nuke a mounted drive path? I have.
Troubleshooting becomes impossible.
Is it Jellyfin’s fault? A bad NFS mount? A network issue? You don’t know, because everything’s tangled together. Diagnosing one problem means taking down everything else to test it.
You can’t upgrade or experiment safely.
Want to try that new transcoding setup? Too bad. You’re scared to touch anything because a mistake means your entire network goes down. You’re paralyzed, stuck with a setup you hate because changing it is too risky.
My Breaking Point
I ran everything on one computer for years. It worked. Mostly. Until the power supply died.
The server went silent. And because I ran OPNsense, Jellyfin, and my NAS all on the same computer I had no internet and no access to my media.
While my partner asked increasingly pointed questions about when the internet will be back up.
Four hours and a trip to BestBuy later, I got it back up and running.
That’s when I have learned: building a modular homelab media server isn’t just for fun. It’s the only way to achieve real uptime, better performance, and the ability to fix one thing without breaking everything else.
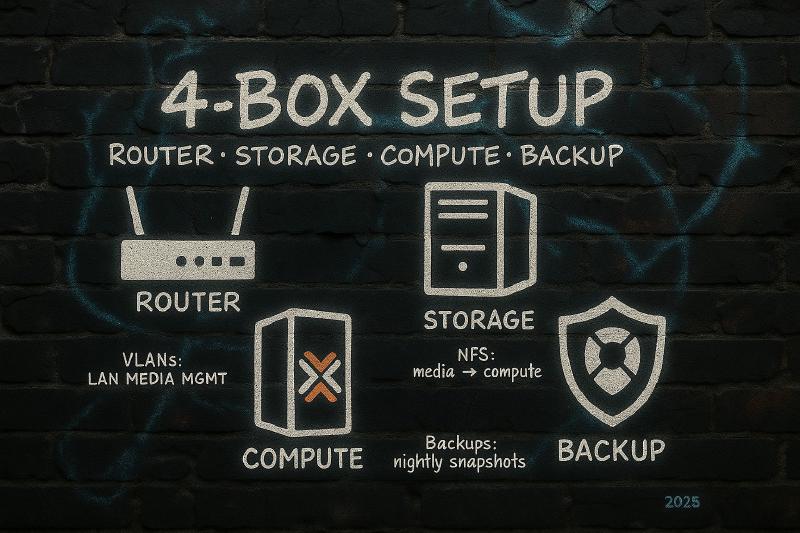
SECTION 2: The Four-Box Philosophy
Here’s the core idea: separate traffic, storage, compute, and backup into four dedicated machines.
Each machine does one job. Does it well. Stays stable. And doesn’t bring down the others when it needs maintenance.
The Stack:
Box 1: Router ($150-$500)
Controls all traffic, handles DNS, manages VLANs, runs your firewall. This is the gatekeeper.
Box 2: Storage ($400-$1900)
Holds all your media, provides redundancy, serves files to everything else. This is your vault.
Box 3: Compute ($200-$1400)
Runs all your apps: Jellyfin, Sonarr, Radarr, and any new software you want to try. This is the chaos layer where Virtual Machines and containers change, break, and get rebuilt.
Box 4: Backup ($150-$400)
Backup your compute node’s LXCs and VMs. Something breaks after a change just roll-back to the last working backup. This is your insurance policy.
Why This Works:
Modularity = Sanity.
Reboot compute without touching storage. Upgrade your NAS without breaking Jellyfin. Swap routers without tearing down your entire stack. When one piece fails, the others keep running.
Clear Failure Domains.
Something breaks? You know exactly where to look. Service down? Check compute. Files missing? Check storage. Network problems? Check the router. No more digging through monolithic logs trying to find which piece is the problem.
Easy Scaling.
Need more storage? Add drives to the NAS. Need more CPU power? Upgrade the compute box. Want faster networking? Upgrade the router. You’re not locked into some Frankenstein all-in-one that requires replacing everything to improve one thing.
Safe Experimentation.
Want to try Tdarr? Spin up an LXC. Want to test a new Jellyfin build? Clone your container. Breaking something on the compute box doesn’t take down your network or risk your data.
SECTION 3: Box 1 – The Router (Your Gatekeeper)
Your router is the traffic cop of your entire media stack. If it sucks, everything downstream suffers.
And yes, your ISP’s all-in-one Wi-Fi “router” absolutely sucks.
Why a Dedicated Router Matters:
You need control, not guesswork.
- Static IPs for all your services so they don’t randomly change
- VLANs to isolate your download clients from the rest of your network
- Firewall rules to keep risky devices in their own sandbox
- DNS that resolves
jellyfin.homeinstead of forcing you to remember IPs
You might get some of that from a consumer “gaming” router with racing stripes. You will get it all from a real box running OPNsense or pfSense.
Security starts here.
A proper firewall lets you isolate containers, restrict traffic by IP, and run reverse proxies safely. You can actually see what’s happening through logs and alerts. You’re not flying blind hoping nothing bad gets through.
Your media traffic stays fast.
4K Jellyfin streams shouldn’t fight with torrent downloads and game updates for bandwidth. Smart routing and QoS means your streams stay smooth even when everything else is maxed out.
Network isolation becomes possible.
Keep your kids’ devices off the same subnet as your torrent client. Put Home Assistant on a separate VLAN with no access to your NAS. Isolate your IoT lightbulbs from anything that matters. This is how you build defense in depth.
What You’ll Actually Do With It:
- Set up static DHCP reservations for every device in your stack
- Create VLANs for different trust levels (trusted, media, IoT, guest)
- Configure firewall rules to control what can talk to what
- Set up a reverse proxy (Nginx Proxy Manager or Traefik) for clean URLs
- Monitor traffic to see what’s hogging bandwidth
A proper router for your home server setup isn’t just about speed. It’s about control. And it’s the first box that makes the rest of your stack possible.
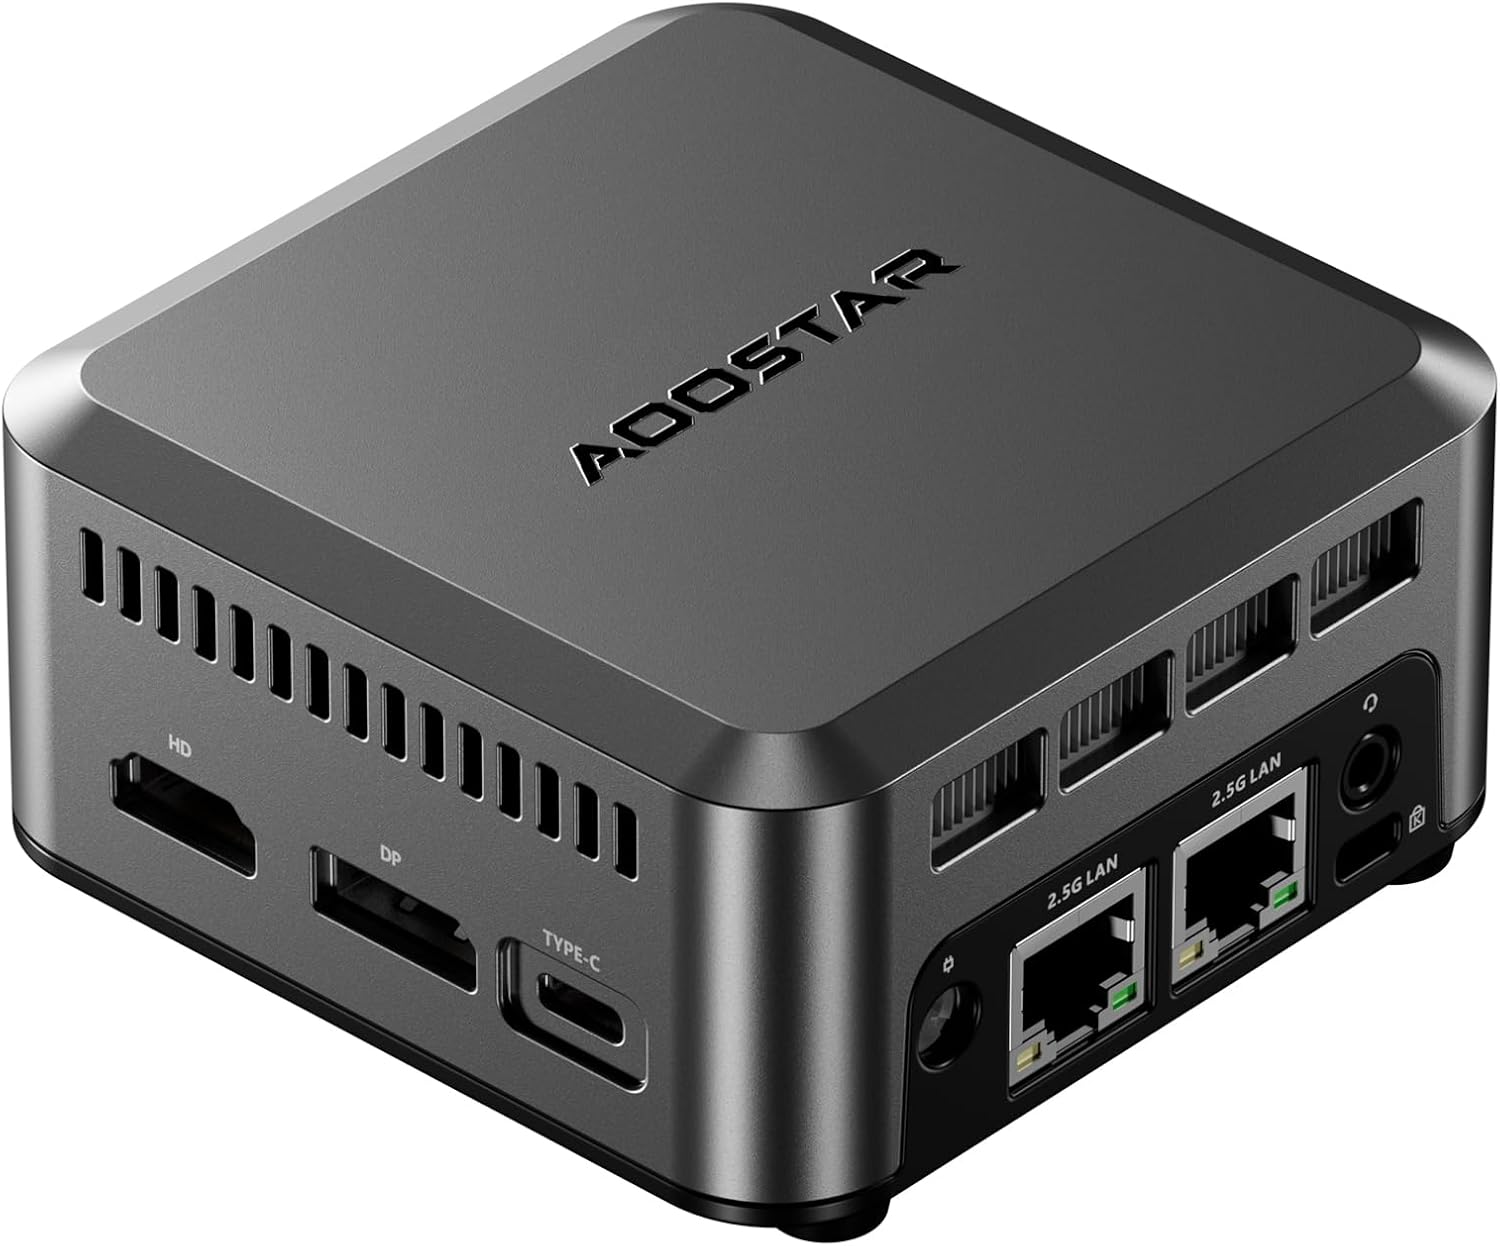
Coming in Part 2: I’ll show you exactly which routers to buy, from the $150 AOOSTAR N1 PRO that punches above its weight to the $500+ “final boss” build that handles 10Gbps like it’s nothing.
This affordable, energy-efficient single-board computer is perfect as a low budget router with its dual 2.5Gb network ports and enough processing power to support an IDS.
SECTION 4: Box 2 – Storage (Your Vault)
Your media has to live somewhere. And no, your download’s folder on a single SSD isn’t going to cut it when you’re storing terabytes of movies and TV shows.
This is where the NAS comes in. It holds everything, keeps it safe, and makes sure it’s still there tomorrow when you wake up.
Why Storage Deserves Its Own Box:
You need redundancy.
Hard drives fail. It’s not if, it’s when. (Ask me about my dead 14TB drive that took 9TB of unwatched shows with it.) A proper NAS setup whether its ZFS, SnapRAID, Unraid, or mirrored drives, gives you fault tolerance. You lose a drive without losing your media. Your compute server shouldn’t be the one keeping data alive. That’s not its job.
You need speed and consistency.
Streaming 4K, transcoding, downloading, and seeding all at once? You need fast sequential reads and smart caching. A NAS optimized for this workload handles it better than random drives thrown into your compute box.
Everything needs to find files reliably.
When storage is its own box, it boots first, mounts clean, and stays available. Your LXCs don’t wonder if /mnt/media is ready. They just connect via NFS or SMB and work. No more boot-order mysteries or race conditions.
You need upgrade flexibility.
Rebuilding your Jellyfin container? The NAS doesn’t care. Upgrading your compute box? Your media stays untouched. Separating storage from compute means you can break, upgrade, or rebuild services without risking your files.
What You’ll Actually Do With It:
- Set up RAID or ZFS pools for redundancy
- Configure NFS or SMB shares for your media libraries
- Set up automated scrubs to catch bit rot early
- Monitor drive health with SMART data
- Plan your backup strategy (yes, RAID is not a backup)
The Boot Order Secret:
Here’s the key: Router boots first. Storage boots second. Compute boots third.
This order matters. When storage is ready before compute starts, your LXCs never race against mount points. Everything just works. This alone eliminates 90% of the “why isn’t Jellyfin seeing my files” problems.
A dedicated NAS for your media server turns chaos into reliability. It’s not just extra drives—it’s peace of mind that your data will be there tomorrow.
Coming in Part 3: The actual NAS builds, from budget SnapRAID setups using old hardware to dream ZFS rigs that’ll make you feel like you work at a data center.

Seagate’s IronWolf HDDs are perfect for a NAS. They are engineered to run 24/7 for years. They also include a 5-year warranty.
SECTION 5: Box 3 – Compute (Your Workhorse)
This is the fun box. The one that runs everything: Jellyfin, Sonarr, Radarr, Tdarr, Bazarr, Lidarr, and whatever new -arr appears next week.
It’s where things happen. But it only works because the other boxes are doing their jobs.
Why Compute Needs Its Own Home:
It’s where the mess lives.
App updates. LXC templates. Docker networks. Transcoding jobs. This is the chaotic, ever-changing layer of your stack. You want it isolated so you can blow things up, reboot, or rebuild without touching storage or breaking your network.
You get proper service isolation.
Run Jellyfin in one LXC and qBittorrent in another. Experiment with Bazarr or Prowlarr without wrecking your stable setup. Proxmox makes this easy whether you’re using full VMs or lean LXCs.
You have actual resource control.
Assign specific RAM, CPU cores, and disk I/O to each container. Want Tdarr to use every core you’ve got overnight but stay quiet during the day? Done. Want to make sure qBittorrent can’t steal resources from Jellyfin during movie night? Easy. Good luck getting that kind of control on a janky all-in-one setup.
It’s built to change.
Want GPU passthrough for transcoding? Add it. Need more RAM? Upgrade just this box. This is the only part of your stack that should change regularly, so build it to take hits and keep going.
Pets vs Cattle: Why This Changes Everything
Here’s a concept from DevOps that’ll change how you think about your services:
Pets are servers you name, nurture, and baby. When they get sick, you stay up all night nursing them back to health. You’re terrified to reboot them because something might not come back right. You’ve spent hours configuring them just so, and the thought of rebuilding makes you break out in a cold sweat.
Cattle are servers you number, not name. If one gets sick, you cull it and spin up a replacement. They’re built from templates, configured automatically, and completely disposable. Lose one? Who cares. You’ve got backups and can rebuild it in minutes.
Your all-in-one box? That’s a pet. You’re scared to touch it. Every update is a gamble. You’ve probably got configs and tweaks you can’t even remember making. If it dies, you’re spending days rebuilding from memory and hoping you didn’t forget anything critical.
This four-box setup? It lets you treat services as cattle.
Here’s how:
Storage is separate = data is safe.
Your media, configs, and databases live on the NAS. When you rebuild a container, all your important data is still there. You’re not risking your files every time you experiment.
Proxmox makes containers disposable.
Spin up an LXC in 2 minutes. Test something. Hate it? Delete it. No drama. Want to try a different Jellyfin version? Clone your container, test it, keep what works.
Backups make everything replaceable.
With Proxmox Backup Server (coming in Part 5), you can restore any container to any point in time with one click. Accidentally nuke your Sonarr config? Restore yesterday’s backup. Takes 3 minutes.
Real-world example from my stack:
I wanted to test Jellyfin 10.11.0 (Major changes in this update), but I was running 10.10.7 in production. Old me (one-box setup) would’ve been too scared to upgrade. What if it breaks? What if I can’t roll back?
New me (three-box setup):
- Snapshot my Jellyfin LXC (30 seconds)
- Clone it to a test container (2 minutes)
- Upgrade the test version, break things, learn stuff
- Decide the new version wasn’t ready for Ubuntu yet
- Delete the test container, keep running production
- Total risk to my family’s movie night: zero
This is the mentality shift that makes homelabbing fun instead of terrifying. You stop being afraid to experiment because nothing you do can truly break things. Your data is safe on the NAS. Your configs are backed up. Your containers are cattle.
When your Nginx Proxy Manager container gets weird? Nuke it. Restore from last night’s backup. Six minutes later you’re back online, and you didn’t even break a sweat.
That’s the power of separation. Your compute box becomes a playground instead of a house of cards.
What You’ll Actually Do With It:
- Install Proxmox VE as your hypervisor
- Create LXC containers for each service (Jellyfin, AudioBookshelf, PiHole, etc.)
- Create VMs for specific Docker stacks (Arr Suite, Immich, etc.)
- Mount your NFS shares from the storage box
- Set up GPU passthrough for hardware transcoding
- Configure automated container backups
- Learn to love (and occasionally hate) Proxmox’s web interface
The Learning Curve:
Proxmox has a reputation. It’s powerful but not exactly hand-holdy. You will:
- Screw up your first few LXCs (everyone does)
- Accidentally delete something important (keep backups)
- Spend an hour Googling why NFS mounts aren’t working (permissions, always permissions)
- Eventually figure it out and feel like a genius
This is normal. This is the path. Embrace it.
A proper Proxmox media server isn’t just powerful. It’s resilient. And with the right storage and network behind it, you can finally stop fixing things and start watching stuff.
Coming in Part 4: The actual Proxmox builds, from repurposed office PCs to custom rigs, plus the LXC templates and configurations that actually work.
SECTION 6: How They All Work Together
This isn’t just three random boxes sitting on a shelf. It’s a system where each component has a clear job and makes the others better.
The Flow:
Router boots first.
It brings up the network, handles DHCP, starts DNS. Everything else depends on this foundation. It’s the traffic cop and bouncer rolled into one.
Storage boots second.
With the network ready, your NAS comes online, mounts its drives, starts serving files via NFS/SMB. Now the vault is open and ready.
Compute boots third.
With networking and storage available, Proxmox fires up, LXCs start in order, apps connect to their storage mounts, and everything just works. No race conditions. No mysteries. Just reliable boots.
When Something Breaks:
Router problem? Network is down, but storage and compute are fine. Swap in a backup router (or fix the issue), restore config, back online.
Storage problem? Media streaming stops, but your network still works. You can troubleshoot, check drives, restore from backup. Apps keep running (even if they can’t access files).
Compute problem? Services go down, but your network and data are safe. Reboot it. Restore a container from backup. Rebuild from scratch if needed. Your files and network never blinked.
This is the magic of separation. Problems stay contained. Fixes don’t cascade. You’re not gambling with your entire setup every time something hiccups.
SECTION 7: The Fourth Box - Backups
You’ve got your router. Your storage. Your compute. Feels solid, right?
Until something breaks. Then it’s panic mode, unless you have Box 4: Backup Server.
Proxmox Backup Server – The Box That Saves You
If you’re running VMs or LXCs, you need backups that actually work. Not rsync scripts you never test. Not drive clones you made once in 2023. Real, restorable, tested backups.
What PBS does:
- Automated daily backups of all your containers and VMs
- Deduplication so you can keep weeks of snapshots without filling drives
- Versioned backups you can browse by date
- One-click restores directly from Proxmox’s interface
- Verification to make sure backups actually work
Real-world save:
I once destroyed the wrong LXC in Proxmox (RIP Nginx Proxy Manager). PBS had me back online in 7 minutes. Without it? I’d have spent hours rebuilding configs from memory and old screenshots.
Is This Required?
Technically? No. You can run without it.
Practically? If your Jellyfin container died tomorrow, could you restore it in under 10 minutes? If not, you need this.
The Budget Reality:
You can run PBS on:
- A $150 used mini PC with a 2TB drive
- Your NAS if it has extra resources (though I prefer separation)
- Even a Raspberry Pi for smaller setups
This is cheap insurance. Way cheaper than rebuilding your entire stack from scratch at 2AM on a work night.
Coming in Part 5: Setting up Proxmox Backup Server, automating backups, and actually testing your restores, so you’re not learning how backups work during a crisis.

Common Questions
➤ Can I start with just 2 boxes?
➤ What if I already have a Synology?
➤ Do I really need to learn Proxmox?
➤ What about power consumption?
➤ Can I use old hardware for this?
What About the Easy Button?
“Can’t I just buy a Synology and run everything there?”
You can. And for some people, that’s the right answer. If you:
- Don’t want to learn Linux or networking
- Just want it to work out of the box
- Don’t mind being locked into Synology’s ecosystem
- Are okay with limited customization
Then yes, get a Synology DS925+ or similar, install Jellyfin/Plex, and call it done.
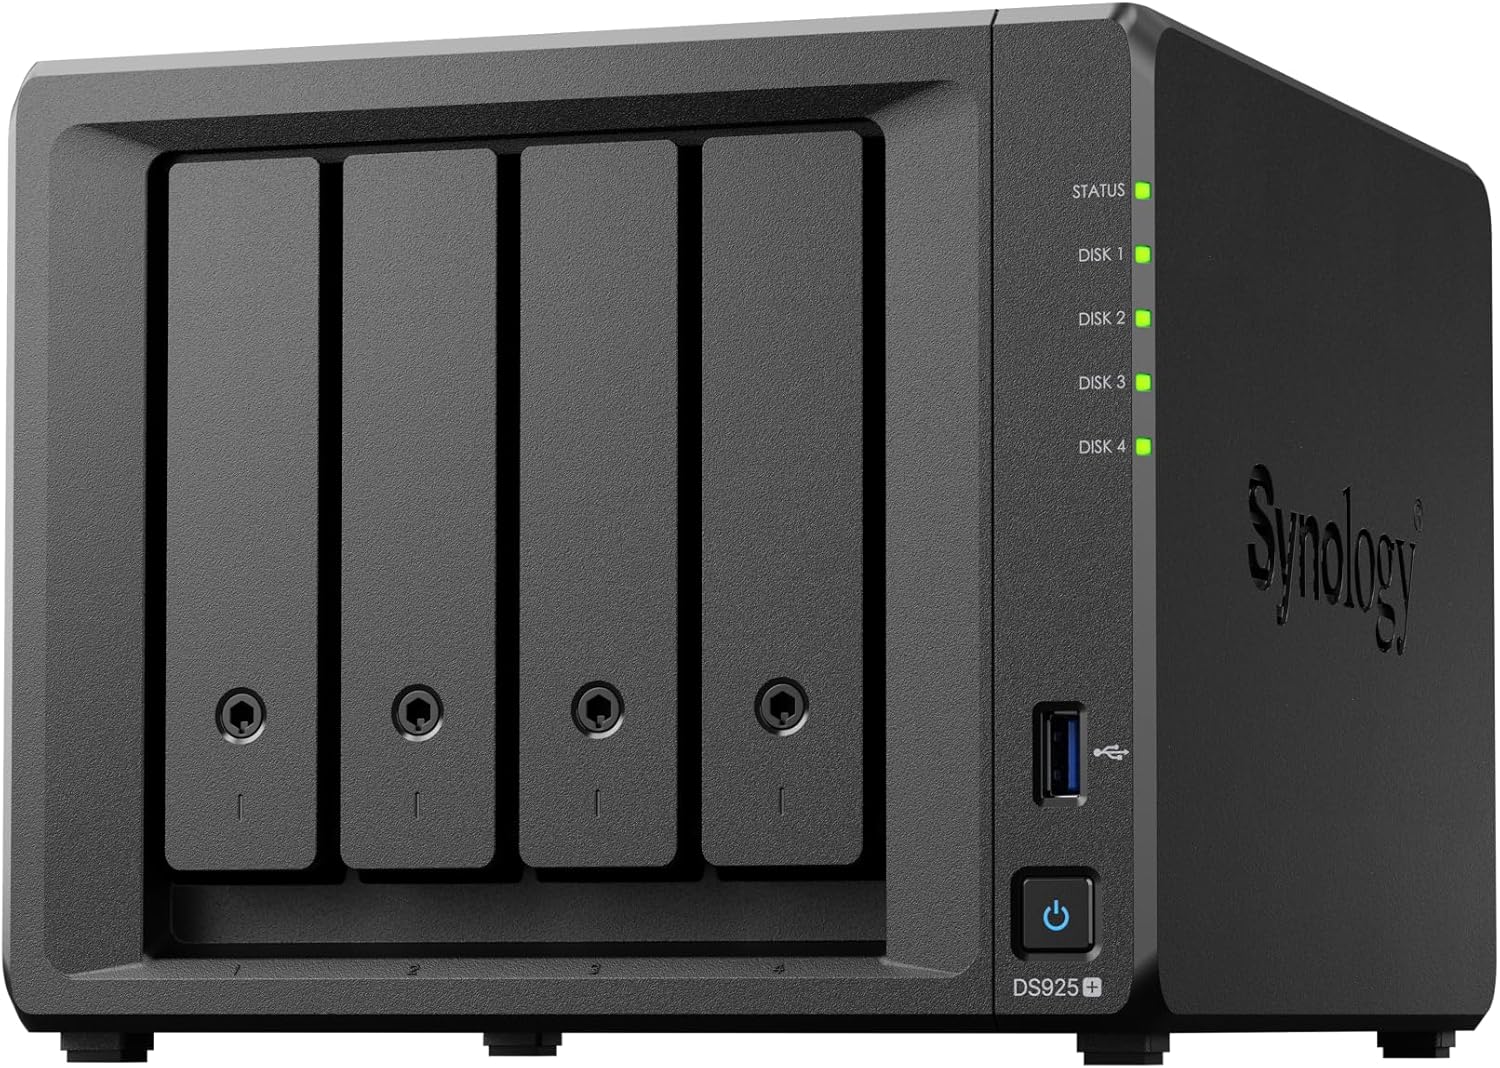
Want an easy button? Here you go. The Synology DS925+ can be an OK all in one box. It has enough storage and processing power to run your media services. It will however lack the power to go beyond basic needs.
But you lose flexibility.
- You can’t easily run multiple isolated services.
- You can’t experiment without risk.
- You can’t scale components independently.
- And when it breaks, you’re at Synology’s mercy for support.
This guide is for people who want more control, are willing to learn, and understand that power comes with responsibility (and occasional Googling at 11PM).
Your Growth Path
Phase 1: Get it working
- Build all three boxes
- Get basic services running (Jellyfin, Sonarr, Radarr)
- Verify everything boots reliably
Phase 2: Stabilize and monitor
- Add Proxmox Backup Server
- Set up proper monitoring (Uptime Kuma, Grafana)
- Document your setup (seriously, do this)
Phase 3: Optimize and expand
- Add GPU for hardware transcoding
- Upgrade to 10GbE networking between boxes
- Add more storage as your library grows
- Experiment with new services in isolated LXCs
Phase 4: Advanced features
- VPN for remote access
- Automated media management (Recyclarr, Tdarr)
- Advanced monitoring and alerting
- Offsite backup replication
You don’t need to do all of this at once. Build the foundation, then grow into it.
The next four posts break down each box in detail: what to buy, what to avoid, and budget vs. dream builds.
| Role | Purpose | 💰 Budget Range |
|---|---|---|
| Router | Traffic control, DNS, VLANs, firewall | $150-$500 |
| Storage | Reliable media storage with redundancy | $400-$1900 |
| Compute | Runs all your apps and services | $200-$1400 |
| Backup | Saves you from disaster | $150-$400 |
Each box has different needs, different trade-offs, and yes, different price tags. But here’s the thing: you don’t need the dream build to get started. A $900 budget stack works. A $4,200 dream stack works better. Both work way better than cramming everything onto one box and hoping for the best.
Part 2 drops next week: The Router. I’ll show you exactly which hardware to buy, from the $150 AOOSTAR N1 PRO that punches above its weight to the $500+ “final boss” build that handles 10Gbps like it’s nothing. Plus: OPNsense installation, VLAN setup, and the firewall rules that actually matter.
Want to be ready? Start thinking about:
- Your budget for each component
- What old hardware you might already have
- Whether you want to buy used or new
- How much redundancy you actually need
And most importantly: what you want to stop babysitting, so you can finally just watch your media in peace.