Recap: Your Journey So Far
In the previous posts, we breathed new life into your old, dusty PC by turning it into a powerful server running Ubuntu Server 24.04 LTS. Along the way, we:
-
Explored why starting with an old PC is a smart choice, it’s budget-friendly, eco-conscious, and perfect for beginners.
-
Reviewed the minimum hardware requirements for running Jellyfin, showing that you don’t need cutting-edge technology to build a media server.
-
Provided step-by-step instructions for installing Ubuntu Server, from creating a bootable USB drive to completing the installation process.
-
Added and configured storage for your media, including partitioning and formatting new drives for optimal use.
-
Set up a Samba share, which makes it easy to transfer files to your server from other devices on your network.
With your server prepped and ready, it’s time to bring it to life by installing Jellyfin. In this next phase, we’ll guide you through setting up Jellyfin and its dependencies so you can begin building your very own media library. Let’s get started!
What Is Jellyfin?
Jellyfin is a free, open-source media server that lets you organize, manage, and stream your media collection to any device, anywhere. Think of it as your personal Netflix, but completely under your control. Whether it’s movies, TV shows, music, or photos, Jellyfin allows you to build a centralized media hub that you can access from your phone, smart TV, computer, or even a web browser.
This post will guide you step-by-step through:
-
Preparing Your Ubuntu Server:
-
Ensuring your server is fully updated for stability and security.
-
Installing essential tools like
curlfor downloading and configuring software.
-
-
Adding the Jellyfin Repository:
-
Adding the official Jellyfin repository to your server so you can download the latest stable version.
-
Explaining why repositories are important and how they keep your server software up to date.
-
-
Installing Jellyfin:
-
Using Ubuntu’s package manager (
apt) to install Jellyfin easily. -
Starting and enabling the Jellyfin service so it runs automatically whenever your server starts.
-
-
Accessing Jellyfin for the First Time:
-
Verifying that Jellyfin is installed and running correctly.
-
How to find your server’s IP address and access Jellyfin’s web interface via a browser.
-
Section 1: Preparing Your Server for Jellyfin
SSH Into Your New Server
Not sure how to use SSH? Refer to this post: Master the Basics - How to SSH Into a Linux Server
Steps to Connect Using SSH
- Open PowerShell on Windows:
The command for SSH:
ssh <username>@<server-ip>
Example From Part 1:
ssh kryptikwurm@172.27.0.200
- Authenticate:
Enter your server password when prompted. (Don’t worry if you don’t see any characters while typing—that’s normal for security reasons.)
Once logged in, you’ll have full access to your server remotely, ready to start installing Jellyfin!
Install System Updates and Curl
Update the system:
System updates are crucial because they ensure your server has the latest security patches, protecting it from vulnerabilities that could expose your data or compromise your setup. Additionally, updates improve system stability and performance, reducing the likelihood of crashes or compatibility issues with new software like Jellyfin.
Commands to update the server:
sudo apt update && sudo apt upgrade -y
Install essential tools:
Curl is a command-line tool to transfer data from or to a server, making it a popular choice for downloading files or interacting with APIs directly from the terminal. It’s lightweight, versatile, and supports many protocols like HTTP, HTTPS, and FTP, making it essential for tasks like adding repositories or fetching configuration files on Linux systems.
Install Curl (Might already be installed, verify anyway):
sudo apt install curl -y
Section 2: Adding the Jellyfin Repository
Adding the Jellyfin repository to your server ensures you can download the latest stable version of Jellyfin directly from its official source. This not only guarantees you up-to-date features and security fixes but also makes it easier to manage updates through Ubuntu’s package manager (apt).
Command to add the repository (copy and paste each into the command prompt):
The following command securely fetches and stores the GPG key needed to verify Jellyfin packages during installation or updates.
curl -fsSL https://repo.jellyfin.org/ubuntu/jellyfin_team.gpg.key | sudo gpg --dearmor -o /usr/share/keyrings/jellyfin.gpg
The following command creates a file in /etc/apt/sources.list.d/ to register the Jellyfin repository with Ubuntu, ensuring your system can download Jellyfin and future updates from the correct source.
echo "deb [signed-by=/usr/share/keyrings/jellyfin.gpg] https://repo.jellyfin.org/ubuntu noble main" | sudo tee /etc/apt/sources.list.d/jellyfin.list
sudo apt update doesn’t install or upgrade any software—it simply updates your system’s knowledge of available packages, ensuring you can install the latest versions. It’s a necessary step before running commands like sudo apt install or sudo apt upgrade.
sudo apt update
If it was successful your should see this line:
https://repo.jellyfin.org/ubuntu noble InRelease
Section 3: Installing Jellyfin
- Use the
aptpackage manager to install Jellyfin:
sudo apt install jellyfin -y
- Enable the Jellyfin service so it starts at boot:
sudo systemctl enable jellyfin
- Start the Jellyfin service without rebooting:
sudo systemctl start jellyfin
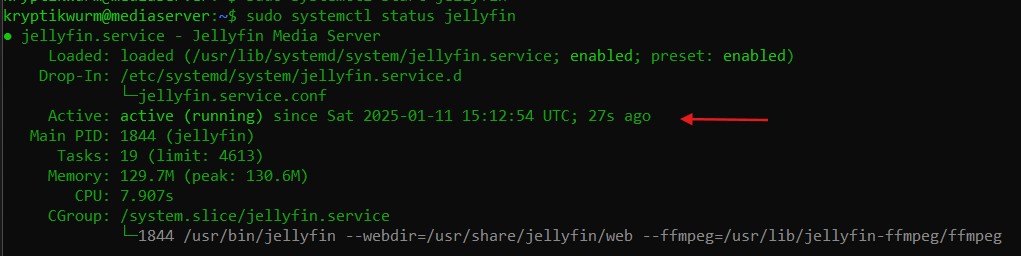
- Verify it is running:
sudo systemctl status jellyfin
- You should see output indicating the service is active and running. Look for a line like this:
Active: active (running) since <date and time>
Section 4: Creating Groups and Permissions
To allow Jellyfin to access your /mnt/media/ folder, we need to create a dedicated group, add the jellyfin user to it, and include your default user as well for convenience.
To create the group:
sudo groupadd media
Add users to the group:
sudo usermod -aG media jellyfin
sudo usermod -aG media $(whoami)
Change the group owner of the media folders:
sudo chown -R :media /mnt/media
Section 5: Accessing Jellyfin for the First Time
With your server running and the IP address in hand, you can now access Jellyfin from a web browser:
-
Open a Web Browser:
On your main computer, phone, or tablet connected to the same network as the server, open any modern browser like Chrome, Firefox, or Edge.
-
Enter the Address:
In the address bar, type the following, replacing
<server-ip>with your server’s IP address:
http://<server-ip>:8096
Example:
http://172.27.0.200:8096
-
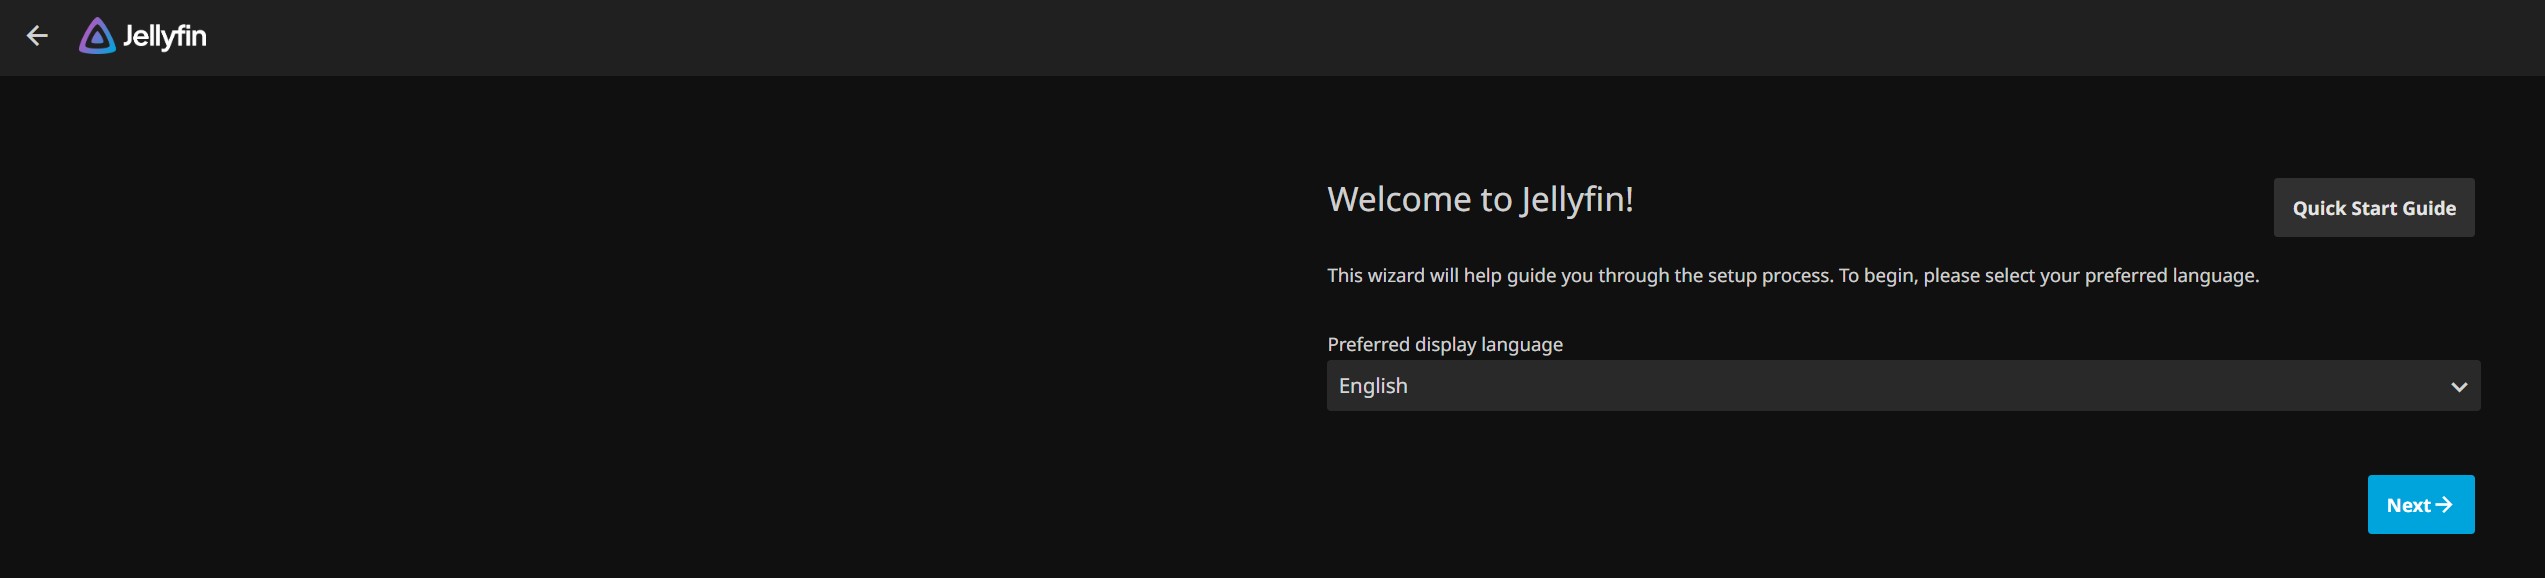
Verify the Jellyfin Interface Loads:
You should see the Jellyfin setup wizard screen, confirming the server is running and accessible.
What’s Next?
Once you’ve verified that Jellyfin is running and accessible, you’re ready to configure it! In the next post, we’ll walk through setting up Jellyfin, adding your media libraries, and customizing it for the best streaming experience.
Ready to configure Jellyfin and start streaming? Head to Part 4 of this series to complete your setup!