You finally got your homelab dialed in. Jellyfin streams flawlessly. Your dashboards are organized. Maybe you’re even self-hosting Gitea, Nextcloud, or a personal blog.
Then comes the big question: how do you safely share those services with the outside world?
If your answer is port forwarding on your router, you’re not alone. I did the same thing. I slapped a reverse proxy and Cloudflare in front and called it a day. It worked. It felt secure. It was not as secure as I thought.
When I moved to a Virtual Private Server (VPS) running a second reverse proxy with a WireGuard tunnel back to my homelab, everything changed. My home IP disappeared from the public internet. My router stopped getting hammered. I stopped lying awake wondering what was poking at my network.
If you’re serious about running public-facing services from home, a VPS in front of your homelab is the smarter move. Not because port forwarding is automatically a problem, but because a VPS shrinks your attack surface and limits the blast radius when something goes wrong. And something always goes wrong eventually.
Direct port forwarding exposes your home IP to constant scanning and increases your attack surface. A VPS acting as a reverse proxy with a WireGuard tunnel hides your home network, reduces blast radius, and gives you more control than relying only on Cloudflare or other zero trust tunnel solutions.
The Real Problem With Port Forwarding at Home
Your Attack Surface Is Bigger Than You Think
When you forward ports on your router, you’re publishing your home IP address to the world. That’s not automatically a death sentence. ISPs rotate IPs, CGNAT exists, and plenty of people run services this way for years without incident. But every open port is another door you’re daring the internet to try.
That means:
- Bots can scan and fingerprint your services
- DDoS attempts can target your home connection directly
- Persistent probing never stops, even on non-standard ports
- A single misconfigured service becomes a direct entry point to your home network
Automated scanners are relentless. Within minutes of opening ports 80 or 443, you’ll see probes in your logs. Open 8096 for Jellyfin. Same story. The entire public IPv4 space gets scanned constantly, and your little corner of it is not special enough to be ignored.
Here’s why that matters more for homelabs than enterprise. You likely don’t have:
- An IDS/IPS appliance doing deep packet inspection
- Upstream DDoS mitigation from your ISP
- A SOC team monitoring logs at 3 AM
- Redundant uplinks or failover
Your home internet connection is a single point of failure. If someone floods it, your family loses internet too. That’s not a hypothetical. That’s a Tuesday for anyone running public services on a residential line.
The Myth of “Safe Port Forwarding”
Some argue that best practices, diligent patching, and network isolation make you 99% safe. In theory, maybe.
In practice:
- Zero-days happen
- Misconfigurations happen
- Humans make mistakes
- Bots don’t sleep
The issue isn’t only application security. It’s about reducing how much of your lab is reachable from the internet and limiting the damage when something inevitably slips through. Defense in depth isn’t paranoia. It’s plumbing.
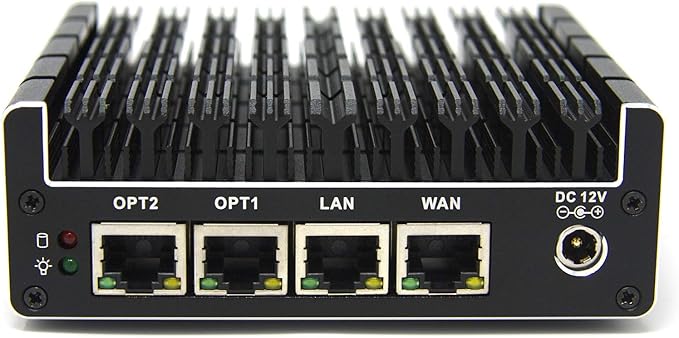
A fanless, six-port Intel-based firewall appliance built for pfSense/OPNsense, with Intel NICs and hardware AES-NI for fast, secure routing. Silent and compact yet expandable (RAM and SSD), it’s a favorite for gigabit-plus WANs, VLAN-heavy homelabs, and always-on IDS/IPS.
What a VPS Changes for Your Homelab
A VPS Becomes Your Public Edge
A Virtual Private Server acts as your public-facing gateway. Instead of traffic going straight to your house, it hits the VPS first.
Instead of:
Internet → Your Home Router → Homelab
You get:
Internet → VPS → WireGuard Tunnel → Homelab
The world only sees the VPS IP address. Your home IP is never published. That one change shifts your entire risk profile.
Your Home IP Stays Private
All traffic terminates at the VPS first. The VPS forwards it over an encrypted WireGuard tunnel to your homelab.
From the outside:
- DNS resolves to the VPS IP
- Nmap scans hit the VPS
- Attack traffic hits the VPS
If someone decides to DDoS your public endpoint, they’re punching the VPS, not your home router. Your family’s Netflix and your kid’s Minecraft session keep working.
No More Port Forwarding at Home
With the VPS plus WireGuard model, your home router stays locked down:
- No forwarding ports 80 or 443
- No exposing random service ports
- No inbound NAT rules on your residential gateway
Only the VPS exposes ports publicly. On the home side, the WireGuard tunnel is outbound-initiated. Your homelab reaches out to the VPS, not the other way around. No inbound firewall rules needed on your router. That alone is a massive reduction in exposure.
Why Cloudflare Alternatives Matter
I used Cloudflare. Many homelabbers do.
Cloudflare Tunnel and Zero Trust solutions avoid open ports at home. That’s a real improvement over raw port forwarding. But there are trade-offs worth understanding before you go all-in.
Pros
- No ports open at home
- Easy setup
- Automatic HTTPS
- Built-in DDoS mitigation
TLS Termination and Trust
Cloudflare terminates TLS. That means Cloudflare decrypts your traffic and re-encrypts it to your origin. For hobby projects, that’s usually fine.
But here’s the trade-off: any reverse proxy you don’t control can see your decrypted traffic. That includes Cloudflare. It also includes a VPS provider if they wanted to snapshot RAM on the host, though that’s a different threat model. Both approaches involve trusting a third-party infrastructure provider. With a VPS you control, you at least decide where TLS terminates and you manage the certificates yourself.
You own the edge.
Vendor Lock-In
Cloudflare is excellent. It’s still a vendor. If you hit bandwidth limits, violate ToS unintentionally, need advanced routing, or want to proxy non-HTTP services, you can run into walls fast.
High-bandwidth media streaming is especially risky. Depending on your plan and usage, Cloudflare may throttle or flag you. Streaming terabytes of Jellyfin through their free tier is not what they had in mind.
With a VPS, you’re not tied to one company’s proxy layer. You can move providers without redesigning your entire network.
Non-HTTP Services
Cloudflare excels at HTTP and HTTPS. It is not built for everything else.
What about custom TCP services, game servers, experimental protocols, or self-hosted APIs over raw TCP? A VPS gives you full Layer 4 and Layer 7 control. You can proxy HTTP, HTTPS, TCP, UDP, and anything else WireGuard can tunnel.
That flexibility matters the moment you move beyond basic web apps.
The VPS + WireGuard Architecture Overview
No install steps here (the next post covers that). This is just the lay of the land.
The Components
-
VPS in the cloud
- Static public IP
- Reverse proxy such as Caddy or Nginx
- Strict firewall rules (only ports 80, 443, and your WireGuard UDP port)
- WireGuard server
-
Homelab server
- WireGuard client (initiates the tunnel outbound)
- Services bound to private interfaces only
-
Secure tunnel
- Encrypted point-to-point VPN between VPS and homelab
- VPS routes inbound requests over the tunnel to your services
How Traffic Flows
- User visits
app.yourdomain.com - DNS points to the VPS public IP
- VPS reverse proxy receives the request
- VPS forwards the request over WireGuard to the homelab
- Homelab responds through the tunnel
- VPS returns the response to the user
At no point is your home IP exposed publicly.
If someone runs:
nmap yourdomain.com
They only see:
- VPS ports
- VPS fingerprint
- VPS OS signature
Not your home network. Not your ISP. Nothing useful.
Security Layers You Gain
On the VPS you can stack additional defenses:
- Rate limiting (via Caddy’s
rate_limitdirective or Nginx’slimit_req) - Fail2ban watching your proxy logs
- Basic WAF rules
- Geo-blocking at the firewall level
- Strict
ufwornftablesrules allowing only ports 80, 443, and your WireGuard UDP port
In most cases, you only need ports 80 and 443 open publicly. Restrict WireGuard’s UDP port to known peer IPs where possible with something like ufw allow from <home-ip> to any port 51820.
Your homelab becomes private infrastructure behind a single hardened edge node.
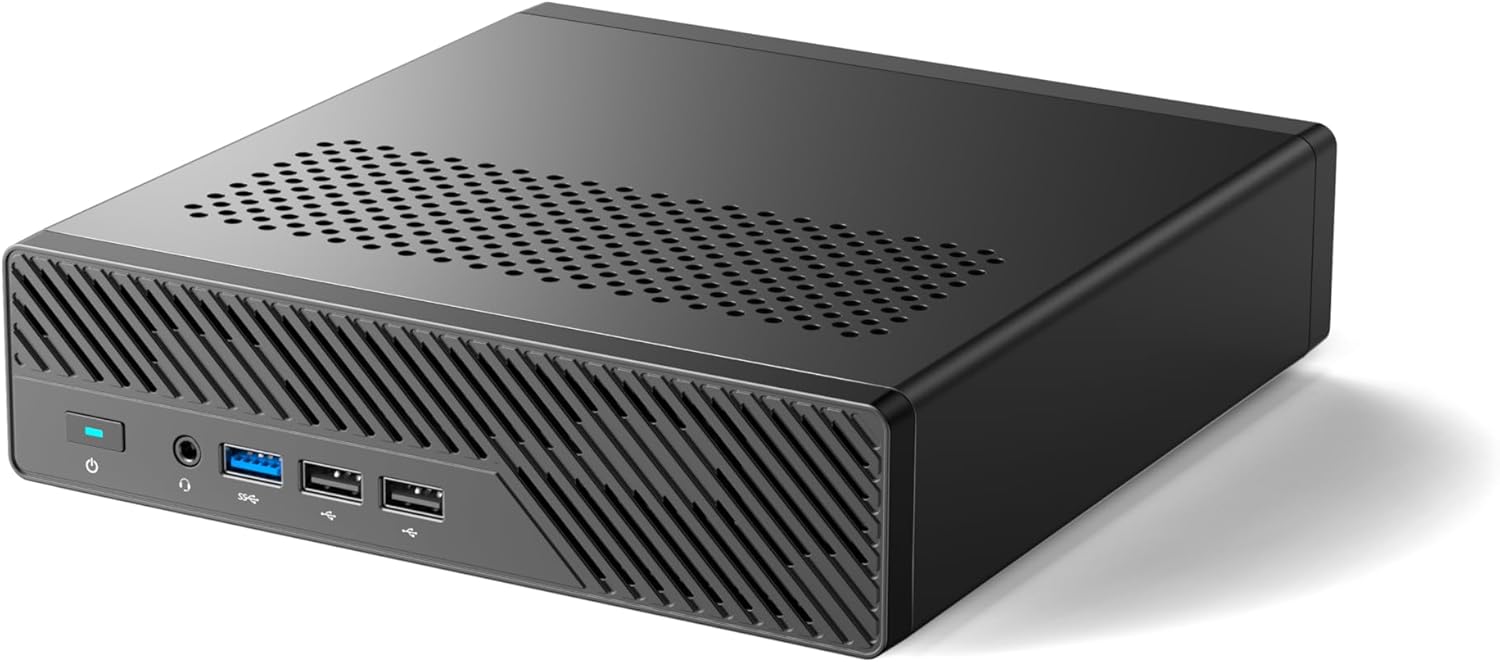
The MS-01 i5 is a tiny mini PC with plenty of cores, multiple NVMe slots, and real homelab networking (dual 10G SFP+ plus 2.5 GbE), which makes it perfect for a Proxmox compute node. It has more than enough power for Jellyfin, the *arr stack, downloads, and a few VMs or LXCs, without turning your closet into a jet engine or space heater.
Trade-Offs You Should Understand
A VPS is not magic. It adds responsibility. Go in with your eyes open.
Cost
Expect around $5 per month at minimum for a basic VPS with reasonable bandwidth.
You need:
- Enough bandwidth for your traffic (1-2 TB/month covers most homelabs)
- Stable networking
- Latency to your home under 100 ms if possible
For most homelabs, this is the cost of a fancy coffee once a month.
Added Latency
Traffic now takes a detour:
User → VPS → Home → VPS → User
That adds latency. How much depends on the distance between you and your VPS.
For dashboards, usually negligible. For media streaming, typically acceptable because buffering absorbs the delay. For real-time gaming, possibly noticeable. If latency climbs above 200 ms, choose a VPS region closer to you. You can also tune WireGuard MTU (try 1280) if you suspect packet fragmentation is making things worse.
You Must Secure the VPS
The VPS becomes your edge. Treat it like one. If you leave it misconfigured, you’ve just moved the problem from your house to a server you’re also responsible for.
You should:
- Use SSH keys only (disable password auth in
/etc/ssh/sshd_config) - Configure a host firewall (
ufwornftables) - Keep the system updated (
unattended-upgradeson Debian/Ubuntu is your friend) - Monitor logs (even a simple
logwatchcron job beats nothing) - Run nothing else on this box if you can help it
A VPS introduces its own management and patching burden. But it’s far easier to defend a minimal single-purpose VPS than an entire lab network with dozens of services hanging off your residential IP.
Realistic DDoS Expectations
A $5 VPS is not a bulletproof DDoS shield. Budget providers may null-route your IP if you attract significant attack traffic. That means your services go offline until the attack subsides.
But here’s why it’s still better than direct exposure: the attack hits the VPS, not your home. Your family’s internet keeps working. You redeploy the VPS with a new IP, update DNS, and move on. Compare that to someone DDoSing your home connection directly, where your only option is to call your ISP and wait on hold.
The VPS shifts where the attack lands. It doesn’t eliminate DDoS risk entirely. Don’t kid yourself on that.
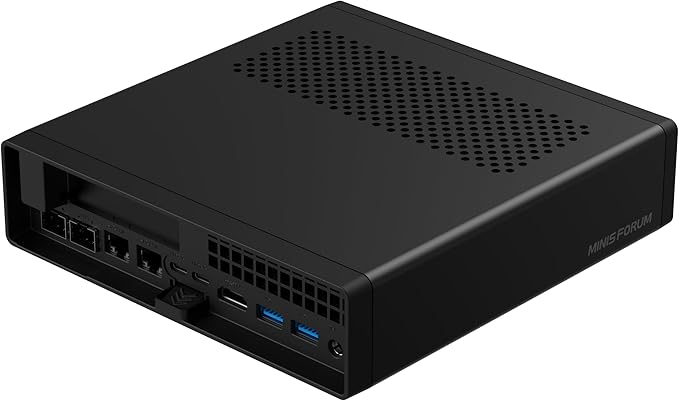
A compact mini-workstation built around up to a 16-core Ryzen 9 9955HX, with dual 10GbE SFP+ plus dual 2.5GbE, flexible storage (U.2 + M.2 including 22110), and triple 8K display outputs. Great as a homelab node or small server with serious I/O.
Alternatives Compared
| Approach | Home IP Hidden | Protocol Support | Management | Cost | Best For |
|---|---|---|---|---|---|
| Direct Port Forwarding | No | All | Low | Free | Temporary testing only |
| Cloudflare Tunnel / Zero Trust | Yes | HTTP/HTTPS mainly | Low | Free tier available | Low-traffic web apps |
| Tailscale / WireGuard Only | No (if publishing) | All | Low | Free tier available | Private remote access |
| VPS + WireGuard | Yes | All | Medium | ~$5/month | Public-facing homelab services |
| Full Cloud Migration | Yes | All | High | $$$ | Business-critical workloads |
Direct Port Forwarding
Pros: Free, simple.
Cons: Exposes home IP, constant scanning, no DDoS buffer, high risk if misconfigured.
Best for: Temporary testing only. If you’re still using this in production, you’re living on borrowed time.
Cloudflare Tunnel / Homelab Warp or Zero Trust
Pros: No open ports, easy setup, DDoS mitigation, good for web apps.
Cons: TLS termination by a third party, vendor lock-in, bandwidth constraints for streaming, limited protocol flexibility.
Best for: Low-traffic HTTP apps, quick deployments.
Tailscale or Direct WireGuard Only
Using WireGuard or Tailscale without a VPS works well for internal access. It’s great for reaching your lab from your phone or laptop on the road.
Pros: Secure, no public exposure, excellent for private access.
Cons: Not designed for anonymous public users. If you publish services directly, your home IP is still exposed.
Best for: Personal remote access, admin connections.
VPS Reverse Proxy + WireGuard
Pros: Hides home IP, full control over TLS, works for HTTP and non-HTTP, flexible routing, reduced residential exposure.
Cons: Monthly cost, added latency, extra management layer.
Best for: Serious homelabbers running public-facing services, media servers, or custom apps.
Full Cloud Migration
Pros: Enterprise-grade infrastructure, no home exposure.
Cons: Higher recurring costs, less homelab control, less fun.
Best for: Business-critical services, high-risk workloads, or when compliance requirements enter the picture.
Troubleshooting and Operational Realities
Even good solutions need maintenance. Here’s where things actually break.
WireGuard Tunnel Drops
Symptoms:
- Services intermittently unavailable
- Reverse proxy returns 502
wg showshows no recent handshake (or a handshake timestamp from hours ago)
Common causes:
- Home IP changed (dynamic IP from your ISP)
- NAT timeout on your home router killed the session
- MTU mismatch causing packet fragmentation
Mitigations:
- Set
PersistentKeepalive = 25on the home peer’s WireGuard config. This sends a keepalive packet every 25 seconds, preventing NAT tables from expiring your session. - Lower MTU to 1280 in your WireGuard interface config if fragmentation is suspected
- Monitor handshake timestamps with a cron job. Something like
wg show wg0 latest-handshakespiped into a simple alerting script works. - Use a dynamic DNS updater (
ddclientor a provider’s API script) if your home IP changes frequently
Reverse Proxy Errors
If the VPS returns 502 or 504:
- Confirm the homelab service is actually running (
systemctl status <service>) - Verify routing over the tunnel subnet (can the VPS
pingyour homelab’s WireGuard IP?) - Check SNI and TLS configuration in your reverse proxy
- Ensure firewall rules on both ends allow tunnel traffic
Unexpected Public Exposure
Run:
nmap yourdomain.com
You should only see the VPS ports.
If you see your ISP IP in DNS records, HTTP headers, or service responses, investigate immediately. Check for DNS leaks (stale A records pointing home), misconfigured X-Forwarded-For headers, or services that embed your local IP in responses (some apps are chatty about this in their default configs).

A palm-sized single-board computer with a quad-core ARM CPU and 4GB RAM that runs full Linux, with Gigabit Ethernet, dual-band Wi-Fi, USB 3.0, and dual micro-HDMI. Ideal for lightweight homelab duties or for running a WireGuard endpoint while sipping a few watts.
Frequently Asked Questions
➤ How does a VPS hide my homelab IP from attacks?
➤ What happens if my VPS provider null-routes me during an attack?
➤ Can I use WireGuard port forwarding without a VPS for public services?
➤ What about CGNAT? Does that change the equation?
➤ How do I handle a dynamic home IP with this setup?
ddclient or your DNS provider’s update API) on your homelab that updates a hostname whenever your IP changes. Configure the WireGuard peer on the VPS side to use that hostname instead of a hardcoded IP. Combined with PersistentKeepalive, the tunnel re-establishes automatically after an IP change.➤ What's the cheapest VPS that works for homelab proxying?
Look for:
- Around $5 per month
- 1 GB RAM
- 1 vCPU
- Generous bandwidth (1-2 TB minimum)
- Static IPv4
- KVM virtualization (avoid OpenVZ for WireGuard kernel module support)
Latency to your home should ideally be under 100 ms.
➤ When should I stop self-hosting and move to the cloud?
If you:
- Handle sensitive client data
- Require guaranteed uptime with SLAs
- Face compliance requirements (HIPAA, SOC 2, etc.)
- Attract sustained, large-scale attack traffic
It may be time to move critical services fully to the cloud. A VPS plus homelab combo works great for personal projects and media, but it’s not a substitute for managed infrastructure when the stakes are high.
Lessons Learned From Doing It Wrong First
I ran my homelab with a reverse proxy at home, Cloudflare in front, and strong passwords. I figured that was enough.
It wasn’t.
My IP was still exposed in certain scenarios. My logs showed constant probing. I was handing TLS termination to a third party without fully considering what that meant. And my home network was still in the blast radius if anything went sideways.
After moving to a VPS running Caddy as a reverse proxy with a WireGuard tunnel back home, I got IP privacy, cleaner architecture, zero exposed ports on my router, and a lot more confidence that a bad day on the internet wouldn’t become a bad day for my household.
The setup isn’t complicated. It just requires you to accept that “good enough” wasn’t actually good enough.
The Right Architecture for Serious Homelabs
If you’re casually experimenting, port forwarding might feel fine for now. Just know what you’re accepting.
If you’re serious about running public-facing services, a VPS in front is the better way to keep your home network out of the blast radius. It hides your home IP, eliminates router port forwarding, gives you full TLS control, works beyond HTTP, and scales with you.
Cloudflare and zero trust tools are useful. Tailscale is fantastic for private access. But if you want full control, privacy, and protocol flexibility, the VPS plus WireGuard model is the sweet spot for anyone looking to self-host their own edge.
Your homelab should be a playground, not a liability. If you’re going to open it to the internet, do it the right way.
This is Part 1 of a 3-part series on building a VPS-fronted homelab.
- Part 1: Why Your Homelab Needs a VPS to Share Services Publicly (this post)
- Part 2: How to Install WireGuard on a VPS and Connect It to Your Homelab (Not published yet)
- Part 3: WireGuard Client on OPNsense and pfSense: LAN Routing for Your VPS Tunnel (Not published yet)